Is it terribly American of me to feel like I could eat pizza at least once a week, if not more often? I'm not talking about frozen or delivery pizza mind you, but pizzas of my own concoction, made usually with leftovers on all accounts. For the past month, I dove more in depth into sourdough pizza dough, playing on variations of Peter Reinhart's non-sourdough version in Crust and Crumb.
early June (sourdough) pizza, baked in oven.
grilled pizza.
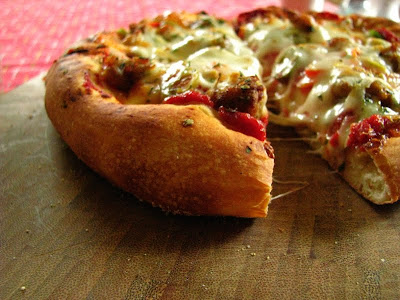
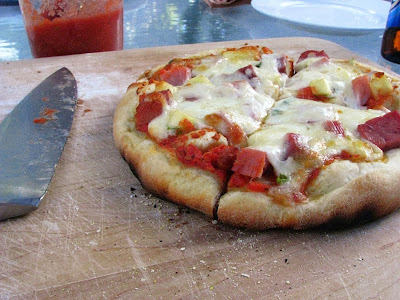
oven pizza. so far, I'd say the oven version is better - but I'll still try grilling one again.

early June (sourdough) pizza, baked in oven.
You'd think that Peter had asked me personally to run P.R. for that cookbook, but I can not help how excited I get when ratios seem to be perfect no matter what you do to vary them. So far, each loaf I've tried has been stellar: my results only failing when my patience for the rising wanes or when I suspect my starter isn't vigorous enough. Not once, however, has a loaf emerged that was inedible... and the same can be said of this pizza dough.
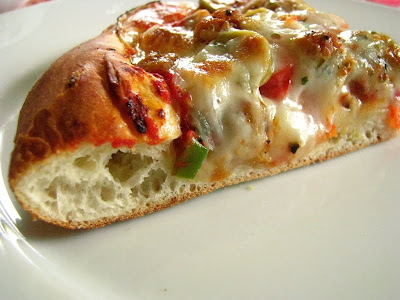
I have had a few hard and fast rules of pizza. I always bake at 500 or higher, and on a stone. I always topped with cheese after the pizza was mostly cooked. This endearing dough has me changing my once cemented pizza ideals. I've lowered my temps a bit to cater to it and pop the entire pizza into the oven with cheese and all. In exactly 10 minutes, I'm ready to eat pizza - and usually the dishes are done meanwhile. It's also a thicker crust, blistered outside with plenty of tunneling holes submerged within the outer crust. It's a pleasant escape from super thin (and nonetheless addicting) Lahey crust, and I love that it's fast, freezes well, and bakes directly from the fridge.

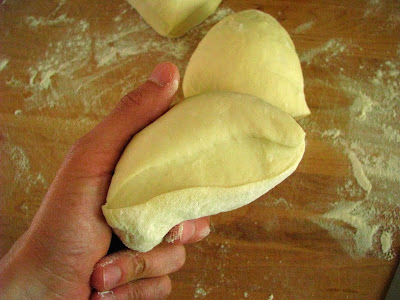
It's hard to get an idea of the weight of dough from a photograph. This dough is not at all dense, it's appearance is shocking to the actual weight of the dough - it feels airy, light. Because it contains both sourdough and active dry yeasts (what I affectionately call "hybrid dough"), it seems to have the best of both worlds when considering flavor and time spent.
It does it's second rise in the dark, cold privacy of the refrigerator and finally the time comes to bake: reaching in for a pleasantly plump, well risen orb is always a surprise - the dough is resilient, not prone to deflation without some coercion. It's the dough dreams are made of, and since I'm so addicted to Reinhart's bread that requests me to have a firm starter (rather than the 100% hydration that sits on the counter) going most of the time in the fridge, if I even have an inkling that I want pizza for supper it can be done in fairly short order.


Reinhart's dough uses a poolish, a pre-ferment starter made the day before from instant yeast. Instead, I use firm starter (also the base of the Reinhart Pain Au Levain that I love so well). With a little feel for the dough, you can probably use any type of starter if you also alter slightly the amount of liquid in the recipe.
Reinhart's recipe also calls for buttermilk. I make a viili style yogurt which is much more runny than commercial yogurt and substitute it often. I've also used whey, or whey mixed with some strained (Greek-style) yogurt. The dough should feel "soft, stretchy, and tacky, somewhat like baguette dough", but poolish starter is likely a bit higher in hydration. This dough is not so sticky, but more satiny, like the feel of an under-inflated balloon. A bit of practice will guide you to the correct feel, so long as you don't stray too far from the ratio.
(To make firm starter enough for this recipe: combine 1 c. 100% hydration sourdough starter with 1 c. bread flour and about 2 T. water, just enough to form the dough into a ball. Knead it lightly for a minute, and let it ferment at room temperature for 4 hours. Transfer to the refrigerator for at least 8 hours and up to 3 days. This starter is very sticky, using wet fingers will help. Let the firm starter sit at room temperature for an hour before using if you can, although I have used it right from the fridge in a pinch. The rising time for the pizza dough may be slightly longer if you do that.)
(To make firm starter enough for this recipe: combine 1 c. 100% hydration sourdough starter with 1 c. bread flour and about 2 T. water, just enough to form the dough into a ball. Knead it lightly for a minute, and let it ferment at room temperature for 4 hours. Transfer to the refrigerator for at least 8 hours and up to 3 days. This starter is very sticky, using wet fingers will help. Let the firm starter sit at room temperature for an hour before using if you can, although I have used it right from the fridge in a pinch. The rising time for the pizza dough may be slightly longer if you do that.)
Sourdough Hybrid Pizza Dough (adapted from Peter Reinhart)
Place in a clean bowl, cover, and let rise until it "swells noticeably", about an hour.
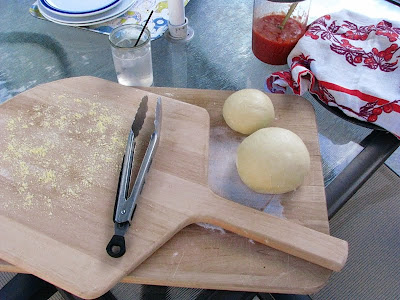
On a floured surface, divide dough. (You can make anywhere from 3-6 pizzas, I usually make 4.) Roll the pieces into balls (This is a good video to see how to form the balls: Peter Reinhart visits a LaBrea bakery which is using huge portions and is somewhat mechanized, but you can see how the dough is shaped by hand. This is how I "rolled" dough when I worked at a bakery.)
Place shaped balls on a lightly floured baking sheet that has first been lined with a silpat or parchment paper. Enclose the whole pan inside a plastic bag, and transfer to the fridge. Let it rise at least one hour, and up to 48 hours. You can also freeze the dough after this second rise, it will retain it's lift for up to 3 weeks. (I freeze the balls on the baking sheet until hard, then transfer to a zip top plastic bag with a date on it.)
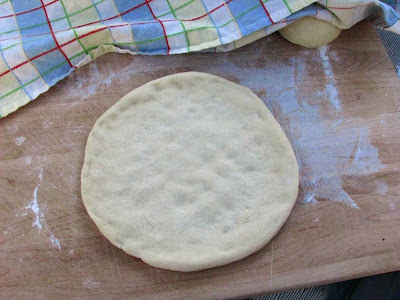
To bake in oven, heat to 475 (Reinhart says 550, I've done 500 - depends on my mood) with a baking stone in the lower third of the oven. Press dough to deflate, and stretch using hands, knuckles, rolling pin if you like, to desired thickness. Leave a thicker amount of dough around the outside edge. Transfer dough to a peel that has been sprinkled well with cornmeal, top and bake until the top is golden.
- 1 lb. (3 1/2 c.) bread flour
- 1 1/2 t. salt
- 1 T. instant yeast
- 1 T. honey or sugar
- 2 T. olive oil
- 3/4 c. buttermilk (Reinhart says to use it at room temp, but I never remember to take it out and cold seems to be fine, first rise time may increase a tad...)
- 8 oz. firm starter
- (additional room temperature water - as needed, about 1/4 c.)
Place in a clean bowl, cover, and let rise until it "swells noticeably", about an hour.
On a floured surface, divide dough. (You can make anywhere from 3-6 pizzas, I usually make 4.) Roll the pieces into balls (This is a good video to see how to form the balls: Peter Reinhart visits a LaBrea bakery which is using huge portions and is somewhat mechanized, but you can see how the dough is shaped by hand. This is how I "rolled" dough when I worked at a bakery.)
Place shaped balls on a lightly floured baking sheet that has first been lined with a silpat or parchment paper. Enclose the whole pan inside a plastic bag, and transfer to the fridge. Let it rise at least one hour, and up to 48 hours. You can also freeze the dough after this second rise, it will retain it's lift for up to 3 weeks. (I freeze the balls on the baking sheet until hard, then transfer to a zip top plastic bag with a date on it.)
To bake in oven, heat to 475 (Reinhart says 550, I've done 500 - depends on my mood) with a baking stone in the lower third of the oven. Press dough to deflate, and stretch using hands, knuckles, rolling pin if you like, to desired thickness. Leave a thicker amount of dough around the outside edge. Transfer dough to a peel that has been sprinkled well with cornmeal, top and bake until the top is golden.

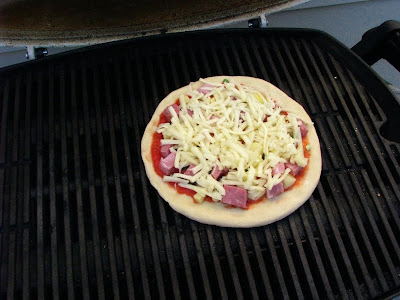
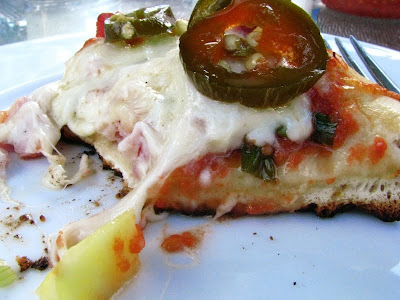
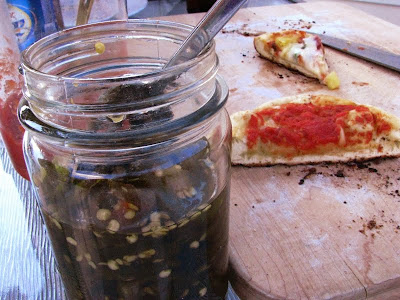
I decided, since I'm newly addicted to baking on my grill, to grill pizza tonight. Having never done it before, I'd say I have some learning to do. I had the heat pretty high, and the bottom was "nicely caramelized" (a.k.a. kinda burnt). It didn't stop us from eating the whole thing, but next time, I have to remember to throw some unglazed quarry tiles down to temper the heat. The top didn't brown, but everything was cooked through, and even though the bottom was a bit blackened and extra crisp, it wasn't really unpleasant. There was still a good amount of chew to the outside edge, and I have to put yet another mention out there for the candied jalapeno, which is the crown jewel of my homemade pantry. Every bite tastes better with a candied pepper.


grilled pizza.

oven pizza. so far, I'd say the oven version is better - but I'll still try grilling one again.
I think I need something hot on every pizza I've ever eaten because of my Mom. As long as I can remember she eats pizza with peppers alongside, either her own pickled jalapenos in oil and vinegar, or as a last resort purchased pepperoncinis. She orders them on the side if we happen to eat pizza out, but also like my Mom, we tend to make our pizzas at home rather than do that. We may not have the ovens of the professionals, but we do our best - and this crust makes me feel one little step closer to the unattainable Perfection of Pizza.

This post has been Yeastspotted.