Showing posts with label sourdough. Show all posts

Friday, February 6, 2015

Decades, Sprouted Wheat.

In two weeks, I'll have been married for a decade.  A decade.  That frame of time seems both long and short as I look back over it.  Time in general has started to feel completely relative in nature: in perpetual fast forward as I look at my boys growing bodies day by day, in slow motion as I watch things in the kitchen sprout and grow, in stubborn reverse as I look back over the things that might have been or could have been if events hadn't played out the way they did.  

A decade, almost all of it full of slow food and homemaking as a profession.  I don't know many who do their taxes and put "homemaker" down in the box - every year I think of that.  The term, also in print on my boys' birth certificates, seems antiquated and humbling and yet it is the thing I am most proud of.  I never dreamed I'd even have children let alone have the autonomy to watch them closely every day, hold onto the minutes, the hours, the years and try (at times) to remember to not wish them away.  I never knew how happy tending a home full time would make me, and I worry that if I ever had to be doing something else full time it would kill me.  I watch over my home, the center of which is (of course) this kitchen, and there is nothing else I'd rather be doing.

Another relationship began 5 years ago, the one involving wild yeast.  That relationship parallels the ones with my husband and children in perplexingly similar ways.  Living, breathing, growing, changing, I can't neglect it and I can't ever predict it.  Just when I think things are going horribly, out pops a tremendous and amazing reminder that slow and steady wins the race.  That glorious things can come from strange circumstance.
sprouted wheat, Ball jar.

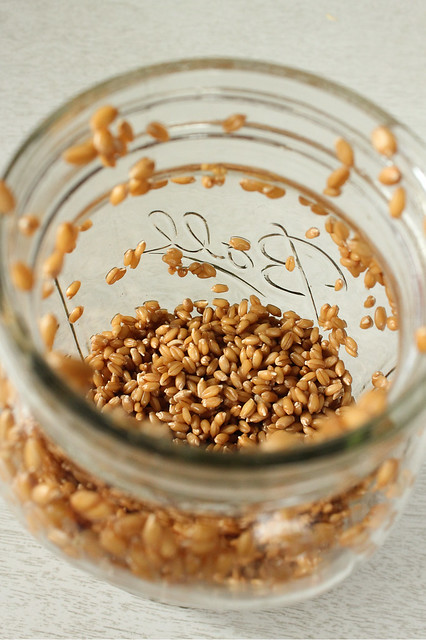
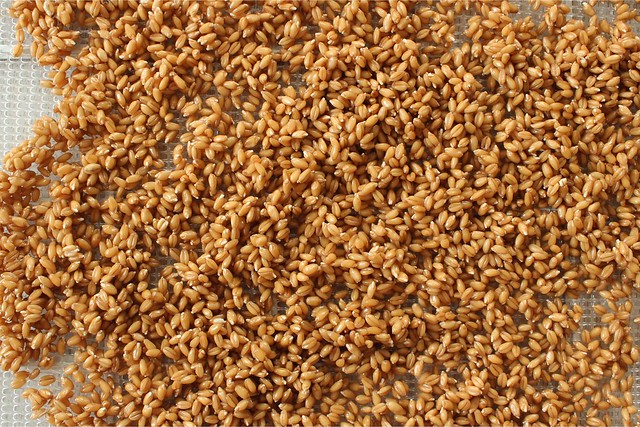
In the new batch of cookbooks rented, I've been enjoying Peter Reinhart's Bread Revolution.  It focuses on sprouted wheat breads both with conventional yeast and wild yeast and also a host of quick bread and baked good recipes using sprouted grain flours.  When I had first sprouted my own wheat a few years back, I couldn't get over the flavor of it - but I did notice the difference in how it baked.  Reinhart of course is able to explain this better than I ever could, and leave it to him to come up with a whole book full of recipes highlighting how to use it in the very best way.

Sprouted sourdough almost seems redundant.  After all the process of culturing regular flour with the wild yeast innoculant renders the whole loaf already easier to digest, a true whole and fermented food.  Before reading about it, I never thought the result would be that much better but boy was I wrong!  The flavor is incredible; it's wheaty, earthy, and almost sweet.  It makes the best toast I've ever eaten.
sprouted wheat berries
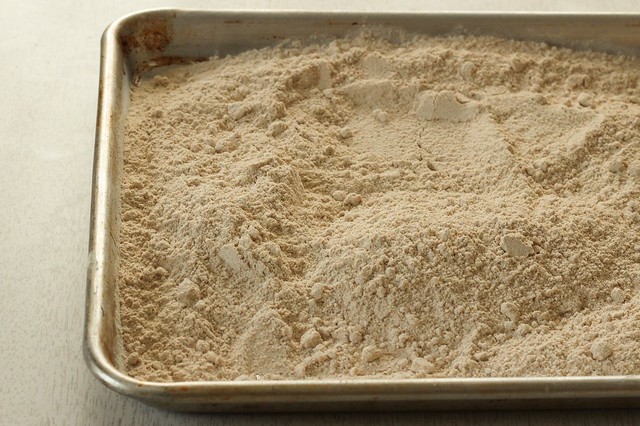
sprouted wheat flour

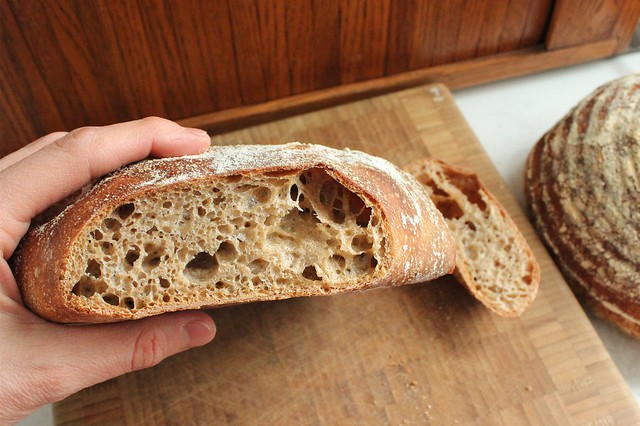
The dough seems harder to work with, it's stickier (Reinhart advises oiling your hands, but I just used water and folded the dough in the bowl I mixed in rather than putting it on the counter each time) and more "relaxed" in feel than dough made with regular flour.  I didn't pay good attention to the time when I began and had to get up in the night to form my dough into a loaf - and then rather than set more nighttime alarms, I decided to cold proof it in the fridge until morning.  All of my variables and I was sure the bread wouldn't be anything to speak of, but like sourdough always does it surprised me with it's wonderfulness.
009 :: 02.04.15
Click the photo to read the baking notes.

Isn't that always the way?  The bread always changes the rules just when you think you know it all.  And there is always, always something more to learn.  I made this loaf alongside a whiter one, plain sourdough as I'm used to making.  The boys all wanted this one before the other and it really was that unique.  When toasted, it became brittle and almost graham like.  There is just the heel left, and I'm saving it for breakfast tomorrow with more marmalade.  I will eat it slowly and plot my next sprouted baking experience.
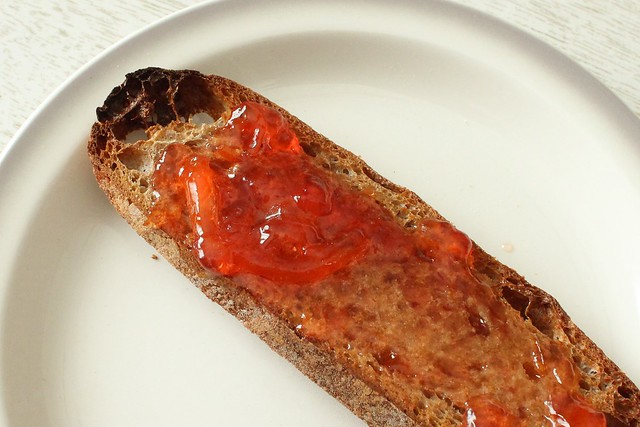
sprouted toast.
I still can't decide if I should make another batch of the kumquat & blood orange marmalade...

I seem to save the heels of bread to toast and eat myself, like I save up all the small moments in my day to day family life that one day I'll likely use to comfort and warm myself.  In another decade, my oldest boy will likely be out of the house and the growing baby boy will be almost a teenager.  I will be greyer and telling more tales of bread, hopefully still learning more and more about it. 

Tuesday, May 20, 2014

Sourdough Surprises May 2014: Sandwich "Buns".

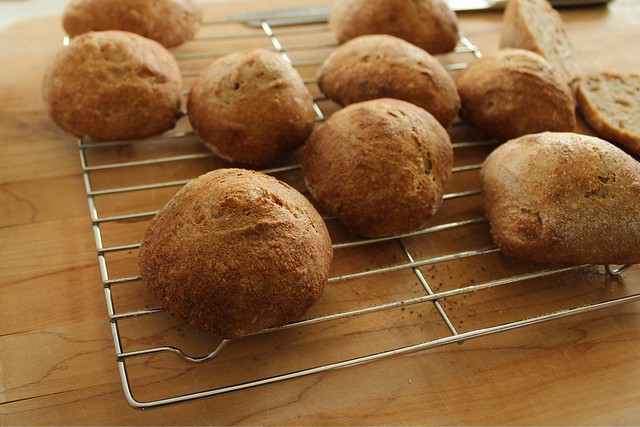
So it's been a few months since I made time for the Sourdough Surprises baking group but it's not because I didn't want to do it.  Time seems to be going even faster now that the weather has turned for the warmer, and just yesterday I realized that it was close to the 20th and that I had just happened to bake my rolls in the morning.  Technically the challenge was for a sandwich bun, and these are bun-shaped so I'm going with it. 

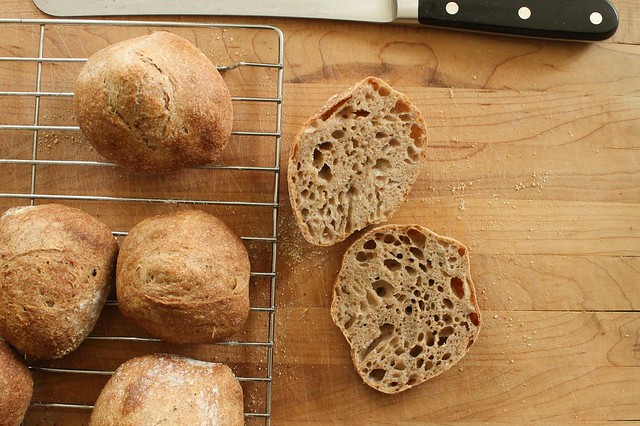
sourdough rolls

I don't usually mess with rolls.  I don't know why, maybe because bread lasts longer and stales slower?  Because it's less monkeying around?  I've been following a few bread boards on Pinterest, and when I saw these, I knew I had to make them.  Made of heftier grains and plenty of water, I suspected they would be a good sandwich roll, and I was right.  I made just a dozen and only one remains 24 hours later.

After baking, with just enough time for them to come to room temperature, they were actually nice and soft - despite me misting them with water to try and encourage a crustier crust.  I used Kosher salt instead of fine salt, and when eaten plain, I would have preferred them a touch saltier.  However, made into a sandwich with some type of salty cheese, they were perfect.

sourdough rolls
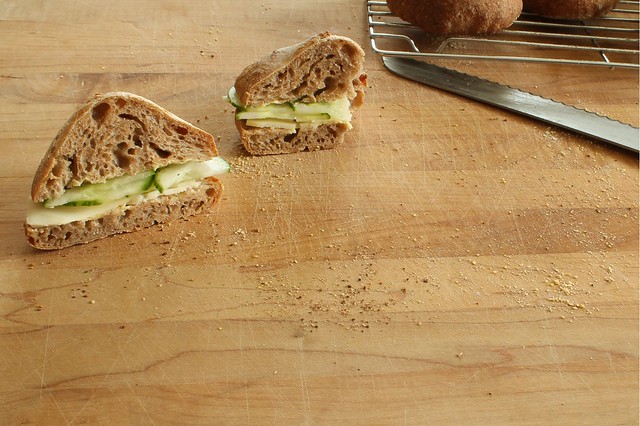
Not so creative, but delicious asiago cheese and cucumber sandwich.

They are heartier than most soft buns, but I think when using deeper tasting grains that is acceptable.  I'm still using the local Lonesome Stone Milling flours (except for the spelt, which I ground myself from co-op spelt berries), and the taste is so so good.  By today, they really had developed some great flavors.  In fact, I'm thinking of making them again for tomorrow.

The recipe is incredibly simple:  just mix up the dough and autolyse without the salt for 45-60 minutes, then add the salt and give it a few folds at 30 and 60 minutes.  Just wait until the next day, let it laze about on the counter for awhile and bake them.  I used a baking stone, and shoveled them in using a pizza peel dusted with cornmeal.  They are pretty sticky; use a bench scraper to help you cut them and gently form them into rough pieces.  The dough was so sticky I had trouble using a lame to slash - resulting in domed tops.  By the last pieces, I figured out to use a serrated knife - those rolls baked into a more appropriate shape.  Here is the recipe I used, I didn't alter it at all except to make a half batch.

sourdough rolls

I would like to experiment more with soft buns - and I'm sure the baking group will have lots of inspiration, have a look below!  I hope to be more on track for the summer months with Sourdough Surprises participation!


Sunday, March 9, 2014

Sourdough without a recipe.

The sourdough has become so much a part of my life that now it's hard to remember a time without it.  But if I do think back, I remember the sinking feeling that I would never master it, that I would continually have too much waste (or rather discard), and never really have something that I would be proud to share.  Working with things continually is the best education, and my daily walk with sourdough has taught me so many things.  Deep things like patience, scientific things like the power of leaven, and superficial things like the cosmetics of slashing.  There are probably one hundred other things - it's been a very well-rounded education to be sure.

Just when I think that I should delve into new technique or hydration, branch out into other grains or even tackle something gluten-free just for the sake of learning, sourdough has other more basic things to teach me.  My confidence in my own intuition is sometimes lacking, and these past few weeks that leaven has showed me that I know more than I think I do.  It has given me baking confidence.

sourdough cracker

In efforts to entice my husband to healthier snacking, I've taken to more scheduled cracker making.  I've made them pretty much the same way for a very long time, more or less using this recipe.  I don't know when I stopped looking at the actual recipe, and just starting winging it, casually spooning in room temperature coconut oil and usually forgetting the salt by accident, adding whatever flour is handy.

Sometime after my Tartine #3 book came, I oogled Chad's gorgeous windowpane-thin "crackerbreads", but wasn't so enthusiastic with the way his recipes were written.  And meanwhile, I had made crackers with the 80% hydration starter that I base my bread on.  It seems less water in the cracker dough to begin with helps in the rolling out, and I was finally able to run the dough through my pasta machine without wondering why I bothered with the big mess.

Just a couple of weeks ago, I stumbled onto my new preferred method, a foolproof way of easier crackers, without any waste or as much mess.  To whatever measure of 80% starter I have to use, I mix in a few spoonfuls of room temperature coconut oil and mash it with the back of a spoon as best I can.  Then, I mix in flour until a nice dough forms, and try to remember to put in a heavy pinch of salt too.  I knead this by hand on a bare countertop for several minutes, rolling the dough strongly with my palms to melt any little bits of coconut oil that is still solid.  I might notice it needs more flour, but I try not to add too much - figuring that like pasta and tortillas, a cracker is most tender and delicate with less flour instead of more.  Then I let it rest for 8-24 hours before running through the pasta machine.

Instead of cutting the crackers into little diamonds, I started baking them in whole sheets and instead of brushing them with olive oil and sprinkling with salt, I sprinkle them first with (kosher) salt and then spritz them water to help the salt to stick.  I bake them at 350 until golden or dark golden brown depending on what other things are going on around me.  After cooling thoroughly, I break them into rough shards and store them in glass jars.

(To make my 80% hydration starter, I follow Ken Forkish's ratio in Flour Water Salt Yeast.  For 2 loaves of bread I've scaled it down to this:  50 g. 100% starter, 50 g. whole wheat flour, 200 g. ap flour, and 200 g. 95 degree water.  I mix it about 6-8 hours before building bread or cracker dough.)

sourdough "cracker"
They bake into brittle thin sheets, and depending on how long I've let the dough rest they can have a nice sour tang to them.

Yesterday, I mixed up enough 80% starter for 3 loaves although I was only going to make two.  When I set to working the bread, I also mixed up some cracker dough.  By this morning, the dough had risen out of the container signaling both the well-fed nature of the culture and the how-can-it-finally-be-spring feeling of warmer outdoor temperatures.  I knocked it down a couple of times, and it kept growing back - and then I had the idea of making it into flatbreads for lunchtime.

I mixed up some mid-eastern inspired spice mix based on the msemmen from Artisan Bread in 5 Minutes a Day, and pinched off a few ping pong ball sized pieces of cracker dough.  I rolled them the same way I did the msemmen, and baked them several minutes per side in a cast iron skillet.

sourdough flatbread

They were crunchy in some places and soft in others and perfectly spicy.  I realized that I'd forgotten the salt in the cracker dough, so I sprinkled more on top and pressed it in.  I don't know why it's so hard for me to remember that lately; I have stopped the practice of nibbling a small bit of raw dough, and I think I need to take that back up.

I'm not sure how well these would keep - but given how simple they are to make on demand you wouldn't have to worry about that I suppose.  Instead of letting the dough rise at room temperature after mixing it, it might be a good idea to refrigerate it right away.  I'm assuming that instant flatbreads could be yours for the next 48 hours before the yeast tires.  If you were to bake the breads more thoroughly, say on a pizza stone, and let them crisp up fully, their keeping power would increase.  But I say make and eat liberally on demand.  There aren't nearly enough breads eaten directly from pans, moments after baking transforms the raw dough...


sourdough flatbread
Perfect eaten with feta, chile olives, and some delicious homemade yogurt my friend Mary gave me: I added a little of the msemmen spice mixture to it.

The sourdough is a teacher, always providing me lessons in life and good eating.  When I work with it, I often think back to a conversation more than 20 years old that I can't quite remember.  My Gram was the first to tell me about capturing wild yeasts, though I'm not sure she ever used it to bake wild yeast bread.  That day she told me about trying to find a favorable culture by leaving a piece of bread out in the woods is like a dream at this point, I remember where I was in her house when she told me, and I remember conjuring exactly where in the woods she was placing that slice of bread, just past the edges of her sprawling garden.  Like a dream, I can't quite put a finger on any more detail than that and I wonder about it all the time.  Is it in my blood to be so curious about natural cultures?  Did the wild yeast also have lessons for my Gram long before I ever would have suspected it had lessons for me?  Either way, it has turned from a unknowing teacher to a carefully chosen mentor, one I respect deeply, and one I hope to continue learning from for the rest of my life.

Thursday, February 20, 2014

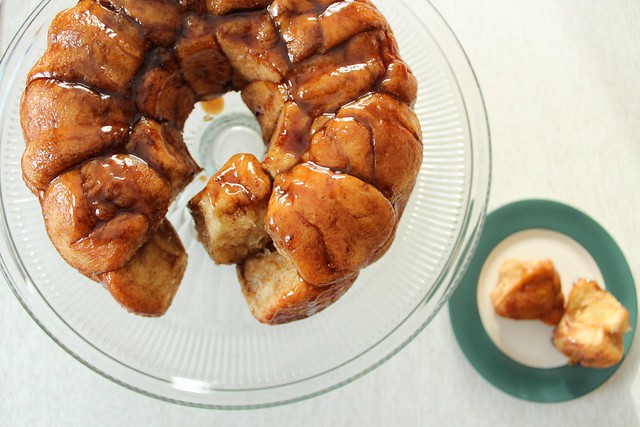
Sourdough Surprises: Monkey Bread

Monkey bread.  A pretty straightforward breakfast sweet, whose charm lies in the communal, pull-apart nature of the finished loaf.  I've never made monkey bread, but I have made many pans of cinnamon rolls, and thanks to Sourdough Surprises I had also made babka.  I married the two for this challenge, basing the monkey bread on Nancy Silverton's brioche recipe and hastily mixing up some sugared cinnamon to roll the portions in before letting them rise in a bundt pan.

sourdough monkey bread

I forgot how much I loved Silverton's brioche recipe.  I halved the recipe and ended up with about 2 lbs. of dough, suspiciously perfect for one 12-cup bundt pan.  I planned it out 3 days before Valentine's day, so I could bake it for a somewhat special morning.  This bread is not unlike a soufflĂ© in that it tastes best moments after leaving the comfort of the oven.  When pulled apart barely cooled, the little puffs of dough taste feather light, a quality that leaves soon after the heat is gone.  I wouldn't say it's any less delicious when cooled, just different.  But that said, I'd probably recommend planning ahead to appropriately devote the morning to enjoying it.

sourdough monkey bread
monkey bread

Since I recounted the recipe for brioche on the babka post, I'll not post it here.  I used half measurements, by conventional weight, and my yield on the dough was almost an even 2 lbs.  I portioned the dough into 1 oz. bits, then rolled each into a taut ball.  Meanwhile, I had melted about 4 tablespoons of unsalted butter in a pot on the stove.  I also had mixed a dish of approximately 1/2 c. brown sugar, 1/4 c. granulated sugar, a few generous shakes of the cinnamon jar, a pinch of cloves and a pinch of salt.  When all the balls were ready, I rolled them first in butter and then in the cinnamon sugar and then positioned them concentrically in a well buttered 12-cup bundt pan working from the center out.  I sprinkled any leftover sugar mixture evenly over the top, taking care to let some fall down into the crevices. When the dough appeared about half risen, I preheated the oven to 350.

unbaked monkey bread
monkey bread

I baked the bread for about 35 minutes if I remember correctly.  I checked the internal temperature when the top looked nicely browned, and it was around 200 degrees, so I figured (correctly) that it was done.  I let the bread cool in the pan for 5 minutes before inverting it onto a plate - during which time I could see the bread settle down into the pan and shrink back a little bit.  After inversion I was surprised at how beautifully glossy the top became; this was short lived, since I didn't go overboard with the sugar and it absorbed into the tops of the puffs as they cooled more completely.

I was also surprised how much the dough rose. I know I shouldn't have been, but I guess 3 days of preparation and waiting, and then the beating the little portions into submission... I thought I had worked all the life from the bread.  Sourdough continually surprises, it has a deep life that is hard to beat back.

This bread is really not all that sweet.  I mean, it is sweet, but it's not tooth-achingly sweet.  It's a polite sweet that tricks you into eating far too much.  I had 32 light little puffs of portioned dough and they didn't last long...  I didn't eat them all myself if that's what you're thinking, but I certainly could have.

sourdough monkey bread

I'm excited to look around at the other ideas this month.  I know I could have taken monkey bread to a savory place, but I just couldn't bring myself to do it.  I'm curious how many were brave enough to tackle that!


Sunday, October 27, 2013

Fall is for bread baking.

I'm only speaking from a amateur perspective, but it does seem that all the best breads are baked in the fall.  In the past few years that I've been mothering the sourdough culture, autumnal air seems to be my most trusted ally in getting the most impressive results.  I like to think it has to do with less ambient moisture, and maybe a more seasonal reason for firing the oven (even though the heat of summer does nothing to stop me), but it's quite possible it's just luck.  Just in case, I had to detail the loaves that came from my kitchen last week, the ones still under the glass dome on my counter aging gracefully, the ones that still surprise me and make me feel like a bona fide baker.

72% hydration sourdough (2)

I lowered the water content intentionally and increased the whole wheat content in the Ken Forkish method bread I've most favored for about the past 6 months.  I got out my calculator, and figured it at 72% hydration.  An approximate amount since my bread begins with 100% hydration starter that is well fed and converted some 6 hours before into a near 80% hydration starter.  I'm not math savvy enough to figure the degrees of difference.  72% is close enough for me, and dense enough to stand up to some artful slashing, which was my hope.  This bread was pure perfection; I have to say, I was so proud.

The baking notes:

6-8 hours before mixing the dough, build the 80% levain:
  • 25 g. (100% hydration) starter
  • 25 g. whole wheat flour
  • 100 g. ap flour
  • 100 g. water at 90 degrees.  
Mix well, cover and and let ferment.
Then to build bulk dough:
  • 100 g. whole wheat flour
  • 300 g. ap flour
  • 280 g. water (90-95 degrees)
Autolyse for 30 minutes.  Then add:
  • 2 t. kosher salt
  • 1/4 t. instant yeast
  • 210 g. of the levain (almost all of the levain from above)
Bulk ferment time is 5 hours - with folds every 30 minutes for the first 2 hours (4 folds total).  Form loaf, retard in the fridge overnight, 8-12 hours.  Bake at 475 in preheated, covered cast iron dutch oven for 30 minutes, remove the lid, and bake until deep brown, another 10-15 minutes.

72% hydration sourdough

This success was early on last week, before my Mom visited.  I like to plan on baking just before she leaves so she can take a fresh loaf home with her.  I was slightly frazzled when it came time to do my mixing, and I had a complete accident that worked out unbelievably to my advantage.  I had pre-measured my flours before she arrived, thinking I'd save myself a few minutes when it came time to build the bread.  But... when I went to add my carefully measured amount, I mistakenly grabbed the container of whole wheat flour next to the measured flours, and emptied the whole of it into my mixing bowl.  As I mixed in the water it felt stiff and different, and it took me a few minutes to realize what I did.  My Mom thought I should just go ahead and try building with it since I'd be wasting ingredients anyway if I didn't try... and it turned out to be one of the best mistakes ever.  Two loaves of nearly 100% whole wheat sourdough that didn't feel leaden or too dense, just wonderfully wheaty tasting.

close to 100% whole wheat sourdough

I had already mixed up the 80% levain I mentioned above, and I added it to the autolysed dough of a mystery amount of whole wheat flour and base water amount of 280g.  I knew it would need more water, and added it by feel after the autolyse, working it by hand perhaps a bit more than with properly ratio-ed doughs.  I let it bulk rise for about 5 1/2 hours, folding every 30 minutes for the first 2 hours like I do with regular breads. I could tell it was rising, and held hope the whole while that I would be as lucky when the dough met the heat.

Whole wheat breads never spring back and have the loft of their whiter counterparts, but these rose nicely.  Whole wheat breads age better too in my opinion - their flavors develop and take on more nuance as the days grow on them, and I wish all the more I would have some idea how much flour was actually in the bin I dumped into the bowl to begin with.

close to 100 % whole wheat sourdough

This unintentional success reminds me of my breadmaking goals in the first place: to be able to readily adapt myself to environmental factors, and to somehow cultivate the intuition needed to make consistently good bread.  While it could be a one-off, it certainly gives me bakery confidence, the self-assurance I sometimes need as a home baker.  And just maybe, I've got more intuition that I think I do - unless the fall has something to do with it.

Friday, October 18, 2013

As if honey isn't good enough...

The other day, I fed up my sourdough starter so much that it expanded out of the glass container it was housed in and spilled down the sides and onto the counter.  For some reason, that generous morning surprise cued my need to make English muffins.  The recipe I most like for English muffins comes from Northwest Sourdough, and uses a whopping 453 g. of well fed starter.  I've made it a number of times, and it is reliably good.  What I haven't done before is form it into a loaf and bake it:

sourdough english muffin bread

I did that with the scraps after I cut a dozen traditional muffins, and it was a marvelously good idea.  I thought I might have added too much additional flour as I struggled to get it to form a round of dough that was dry enough to handle.  I didn't proof in the fridge, just let it stand for a few hours at room temperature until it seemed to pass the finger-dent test.  (The dough should slowly spring back and fill in, telling you that the yeast has slowed its action enough and is fully proofed.  If it springs back quickly, the yeast still has some work to do.)  Then, I took a chance on scoring it and baking it in a cast iron pot at 475 degrees.  It was done in a mere 25 minutes, about 18 with the lid on, the remainder with it removed.

The scraps of muffins are always a challenge to re-roll, so I was glad this worked as well as it did.  I froze most of the muffins, and went to town making the best toast ever: pleasantly sour and with perfect, even texture.

toast.

Then yesterday morning, I was talking with my friend E on the phone - which by the way seems like such a refreshing thing to do as most communication is done via text or email lately.  How nice to hear a phone ring and a "good morning" in true human tones!  Anyway, we were talking about quince, which I will be getting my hands on tomorrow.  She said she found some this year in a neighborhood tree, that they are delicious poached, and she ate them all that way pretty much.  Poached and with cream, because everything is better with cream.  I had to agree.  And the English muffin bread made me think of the cream I had to use up and this recipe for "ambrosia" I had seen a few weeks ago.

Now there are things that you avoid making because you know that they are dangerous. Things that don't stand a chance due to the deliciousness of their combined components.  That is what this recipe made me think of.  Originally, it called for an amount of sugar; but why add sugar to honey?  Honey is honey and worthy of no adornment.  But if you are going to adorn it, why not with butter and cream?  Everything is better with cream.

honey butter cream

Honey Butter Cream (adapted from One Good Thing)
  • 1 c. honey
  • 1/2 c. heavy cream
  • 6 oz. room temperature, unsalted butter
  • pinch of kosher salt
  • 1 t. vanilla
Place the butter in a large bowl and have an electric mixer ready.  Bring the honey and heavy cream to a boil in a heavy saucepan (make sure it is large enough to account for some boiling expansion), and boil for 1 minute.   Remove it from the heat and let it stand for a minute, then pour it over the butter.  Mix until all the butter is melted.  Add salt to taste and the vanilla and beat for another minute.  Decant into glass jars and transfer to the fridge while trying to be patient enough for it to cool.  This recipe would be easily doubled, but do that at your own dietary discretion.

honey butter cream

When tasting a spoonful of honey and butter and cream, your mind races to find suitable accommodations for it.  Granted, you could eat the whole jar(s) by the spoonful and no one would judge.  But putting it on ice cream or plain yogurt, spooning it into the black coffee I generally don't mess with (remember the buttered coffee trend?  This one-ups that for sure.), or topping a perfectly ripe pear or apple slice is so much better.  It's a good thing too, since I think the heavy cream gives this a shelf life of about a week - a week that won't be a problem with so many sweet options...

honey butter cream

Tuesday, August 20, 2013

Sourdough Surprises August 2013: Crackers

I was kind of glad that the Sourdough Surprises item-of-the-month was crackers.  I think I've consistently made sourdough crackers ever since I started my sourdough starter, in September of 2010.  In those early days of sourdough experimentation, I was obsessed with finding ways to use up my discard starter - probably because I had so much of it in the beginning.  It took me some time to be more efficient with my feedings and management of my fledgling starter, and pancakes and crackers became a staple part of my kitchen life.

sourdough crackers.

The recipe I first found for sourdough crackers is still the one I use most frequently.  I've gotten so good at making them that I rarely even measure, I just mix them up according to feel - and they always turn out good.  I always let the dough rest for at least 7 hours (making them a fully cultured snack with reduced phytic acid in the grain), but usually it ends up being a whole 24 hours.  On occasion, I've let the dough sit in the fridge for a couple of days before getting around to rolling them out, and that works too, though remember that you need to allow an hour or so for the dough to come back to room temperature before rolling it out.  The longer resting times make for crackers with a little more tang, but that is fine with me.

sourdough crackers.

My best advice making these is to invest in a silicone baking mat.  I found mine for a well-spent $11 at a restaurant supply store, and I can roll the dough out directly on it without bothering with wrinkling parchment.  I use this pastry roller, which was another rummaged gift of that bread genius, ex-boyfriend's mother.  She really was an inspiration to me in the baking department, and I like having little remembrances of her in this tool I use so often.

I've made these crackers with all sorts of flours, but prefer them best with plain old whole wheat.  I've also made them with both butter and coconut oil (and olive oil too, if memory serves), but I like coconut oil the best.  When I have quite a lot of discard starter I'll make a double batch; I've found that for a single batch I can fit exactly half of the dough on the silicone baking mat, so double batches take me much longer to bake.  I really need to invest in another baking mat to bake more efficiently.  Meanwhile, I try to schedule my cracker baking when I have something else to go into the oven as well.

sourdough crackers.

  • 1 c. discard sourdough starter (any hydration seems to work fine)
  • 1/4 c. melted coconut oil (or butter, olive oil) (if the coconut oil is spreadable consistency, I sometimes don't even melt it)
  • 1/2 t. kosher salt, plus more for top
  • 1/2 - 1 c. whole wheat flour
  • olive oil for brushing the tops
Combine starter with coconut oil and salt and stir well to combine.  Begin to add whole wheat flour, starting with 1/2 c., and stir or use your hands to start kneading it in.  Continue adding enough flour to create a sturdy dough that is smooth and not sticky, but don't add so much as to make it dry.  Form the dough into a ball, place in a clean bowl, and cover well with cling wrap.  Let stand at room temperature for at least 7 hours before rolling out into crackers, or storing in the fridge for up to 2 days.

Preheat oven to 350.   Divide the dough in 2 pieces.  Working with the first piece, roll the dough as thin as you like, I like to make the amount of dough fit the entire sheet pan - which makes them very thin (1/16").  I like to roll on a silicone baking mat as I described above, but you can roll between two sheets of parchment paper.  Use a pizza cutter to slice the crackers into squares or rectangles, and transfer the sheet to a baking pan.  Using a pastry brush, brush the top of the cut crackers with olive oil and sprinkle with additional kosher salt.  Bake for 20-30 minutes depending on the thickness of your crackers.

sourdough crackers.

 I have also tried adding a few spices to this dough, or just to the tops prior to baking... but really none of those experiments stand out.  I just like these as plain crackers, to munch on their own or with thin slices of cheese.  They also keep an amazingly long time - if they don't disappear first.  I store them tightly sealed in quart size canning jars.

round sourdough crackers
 I have cut fancy shapes from them, but it takes a bit longer than just cutting squares or rectangles...

sourdough cracker ends
...but then I just baked the ends right next to the rounds so I didn't waste any dough (and didn't take too long transferring them to another pan to bake).

I'm really looking forward to seeing what other group bakers used for recipes!  While I do truly love this recipe, I could stand to break out of my mold.  But if I could ever recommend a single quick and reliable recipe to use up a cup of starter (and that is fully cultured to boot) this is definitely the one.

Saturday, April 20, 2013

Sourdough Surprises April 2013: Sourdough Pasta.

The Sourdough Surprises challenge this month was pasta.  I have to confess that while I have tried a whole lot of sourdough things, I have never considered adding starter to pasta before this challenge.  Sourdough starter really makes good pasta.

sourdough pasta

Since I am still obsessed with the Ken Forkish bread-making ratios, I often have extra 80% hydration starter to use up.  The day I mixed up this pasta, that is exactly what I used.  The recipe that The Gingered Whisk suggested worked well with my starter, I just added flour to feel (about a cup if I remember right) and kneaded by hand for several minutes until the dough felt most like the many traditional pasta doughs I've made in the past.  I also used a whole egg and 2 egg yolks, because I had a couple of extra yolks to use up.  Then I sealed it up in a glass bowl and just tried to be patient.  I actually had to punch it down a couple of times, as the starter was active enough that it was raising the dough...

I let my pasta ferment at room temperature for a full 7 or 8 hours, ensuring it was a truly fermented food.  By the end of that time frame however, it was late afternoon when I started rolling it through my Pasta Queen; I hadn't planned a meal around fresh noodles.  I rolled them to the level 6 (of 7 levels) thickness, then tossed them in plenty of flour, as my Mom does when cutting rustic soup noodles... then I decided to dehydrate them for using another day.

sourdough pasta

I only recently discovered drying out pasta in the dehydrator, and it really works well.  My only problem is that I need to keep my dehydrator in the basement for space reasons, and in addition to sometimes several trips up and down the stairs with loaded screens, sometimes I forget that I've left something in there for days after the drying has finished.  Not so much a problem I guess, but this pasta I forgot about for about a week before the Sourdough Surprises Facebook page posted a challenge reminder!  Then, I carefully brought my screens up and packed the fully dried noodles into jars.  They were more fragile than traditional noodles I've made, but when I boiled some quickly (as in fully cooked in three minutes) they were delicious and tender.  Maybe tender to the point of nearly falling apart... but that could have something to do with the dehydration.  Next time, I'll mix up pasta early in the morning and cook it fresh for comparison.

sourdough pasta

My boys devoured my sourdough noodles, which I only buttered and salt-and-peppered.  It was the fastest meal ever, since I pulled some frozen beef stew from the freezer and pan fried some finally here spring asparagus.  It really had a marvelous texture, despite being robbed of some looks.

I was very happy to be challenged to make pasta this month - and I can't wait to see some of the pastas that others have made.  I certainly want to try some stuffed pastas when I remember to allow more time, and I know this isn't the end of my sourdough pasta-making!


Wednesday, March 20, 2013

Sourdough Surprises March 2013: Cake!

It was funny that cake was the sourdough theme of the month for the Sourdough Surprises baking group.  Just before the announcement,  my Facebook friend (and all-around good, real food maven) Holly was talking about some amazing changes she made to a chocolate sourdough cake.  It took me a few days to realize that the reason her cake looked so good and so familiar was because I had already made it - and changed it with similar results!  I've said it before but it's true that it is a good thing that I have this space to write things down or I'd never remember half of what I've made.

sourdough chocolate cake

The sourdough cake that we both loved was this one from King Arthur Flour.  I had played around with it quite a bit (apparently, that was a year ago already), and then in my quest for not eating as much dessert, I let it go for too long a time.  As Holly did, I had cut the sugar in half, but in my experiments this month, I used a different hydration sourdough starter - and both coconut and olive oils for the fat.  The result was a moister version of that butter cake I made a year ago, and one that was not really high in sugar.  Not counting the frosting, and allowing for 9 large slices in a 8x8 glass pan, I figure it around a tablespoon per serving.

I've been in full swing with Ken Forkish's breads - all of them turning out stellar, and I may be hooked on the 80% hydration starter that he calls for.  I'm still figuring out the best feeding schedule for both my baking and waste reduction, but meanwhile, I'm turning 80% starter into all of my old favorites:  crackers, cake and pancakes all turning out better than with my 100% liquid levain.  The only thing I forgot about making this cake is that it takes some serious arm power (and lack of concern for gluten toughening) to incorporate the starter into a homogenized looking batter.  

Don't be afraid to beat this cake until you are certain you have overbeaaten it, otherwise you may have traces of white sourdough bits in your chocolate cake, which you can't really taste, but they aren't as pretty.  And a stand mixer might work, but avoid using a hand mixer... I learned the hard way that the batter tends to climb up the beaters and generally make a huge mess of things.

Chocolate Sourdough Cake (adapted from King Arthur Flour, with regard to Holly Langenburg, and my previous chocolate sourdough cake post)

makes one 8x8 inch cake
  • 1/2 c. well-fed 80% sourdough starter (about 150 g.)
  • 1/2 c. milk
  • 1 c. AP flour
  • 1/4 c. melted coconut oil
  • 1/4 c. olive oil
  • scant 1/2 c. sugar
  • 1/2 t. salt
  • 1 t. vanilla
  • 6 heaping T. cocoa powder (natural process)
  • 3/4 t. baking soda
  • 1 egg
Combine starter, milk and flour in a mixing bowl and let ferment. (KAF says at least 3 hours, I ferment at least 8, and this particular cake fermented for 16.  It's okay to leave it at room temperature during this fermentation time.) After ferment time, proceed:

Preheat oven to 350 degrees.

In a good sized bowl, mix the oils, sugar, and salt together well.  Add the vanilla, cocoa powder, baking soda, and egg, and mix thoroughly.

Add the sourdough/milk/flour ferment to the chocolate-butter mixture. I found it easiest to use a sturdy spatula to mix the two - be firm but not vigorous and also be patient. Stir to combine until very few streaks of sourdough remain, and the batter looks like batter. It's sticky stuff!

Pour into a greased 8x8 glass baking dish, and use a metal knife or spatula dipped in water to spread batter evenly in the pan. The cake does "dome" a little, so you can try to push a bit more batter into the corners than into the center if this matters to you. Bake for 30-35 minutes until a tester in the center comes out clean.

You can use whatever frosting you like to top it after it cools completely - I just went with a simple American-style buttercream in a thin layer..
lithuanian coffee cake.
Sourdough Lithuanian Coffee Cake.

I have made a number of cakes with sourdough starter - and also talked about them before.  Most recently, I was excited about this Lithuanian Coffee Cake.

I also truly love this fully fermented Applesauce Cake, which uses a whole pint of home-canned applesauce and is based on a Spanish Bar Cake recipe my Gram used to make.

I'm fairly certain that sourdough cakes are not something I'm done experimenting with - and I'm sure I'll find plenty of links this month to convince me to consume a bit more sugar!  Take a look below to check some of them out!

Monday, March 4, 2013

Bread in Every Meal.

You would think I'm not eating much, what with the infrequency of my writing life lately.  I can assure you that is not the case.  In fact, I've come to blissful (re)discovery that indeed almost every meal can be improved with bread.  Relatedly, I'm increasingly grateful that my old bread appetites are fully back and ever since that brief, pregnancy induced repulsion, I have renewed appreciation for the staff of life.

sourdoughs.
(Little Goat Bread's apple and pistachio loaf on the left, my Forkish-style sourdough on the right.)

It may have actually started a few weeks back when Deena and I were chatting online and she mentioned that her Basque country friends revere bread so much that they incorporate it into nearly every eating experience.  Intrigued, for days I imagined my stale bread crumbled into some strong coffee laced with milk as she described...  I didn't go so far (yet) as to actually drinking my bread, but increasingly I have been using every last crumb of my loaves.

Not that I ever wasted old bread.  I usually dried the last several slices and ground them up into breadcrumbs, which somehow always seem to come in handy.  But more recently, I make my eating schedule up around these gorgeous loaves that seem to have graced me with their abundant presence.  Like I am not any sort of real baker, like they arrive mysteriously overnight and fill my little kitchen with shear wealth of kitchen alchemy, they are too good to have come from my hands:  reminders that good bread is as much a product of the elements as intuitive know-how.

sourdoughs, cubed.

I'm also reminded of the electronic age in which I live.  I hate it.  But then, with so much food inspiration running into me on a daily basis, it's hard to deny myself the pleasures of the Internet.  This morning, Autumn Makes and Does posted about a Kale Panzanella she made, and just after clearing the breakfast dishes, I was toasting up the last of the old bread in really (really) good olive oil to start my lunch.  Cooking lunch for myself is such a pleasure, I need almost to be coaxed not to eat at home.  Of course, when lunchtime came around, I was more than pleased with my altered version of her recipe:  garlicky, massaged raw kale, tossed with those Outpost chile olives that I am obsessed with for years, a handful of raisins, more olive oil, lemon juice, and some of the chile olive brine for good measure.  It was so good, I'm looking forward to having the same thing for lunch tomorrow.

kale sourdough panzanella

Since I'm a pregnant lady, I added a poached egg and some avocado.  I need the protein, and I wanted to try out the Serious Eats method of egg poaching that David Leibovitz posted on Facebook last week...  I learned that the strainer method does make for a pretty perfect looking poached egg, but also that my superfresh farm eggs have virtually no runny white to fall through the strainer - so if I'm not too picky about the pursuit of perfection, I can skip that part.

kale sourdough panzanella
"Autumn" inspired lunch

As for the Ken Forkish bread that I am still thrilled with:  click on the photo below for my baker notes.  I love that this bread proofs entirely in the fridge with hardly a second thought from me.  I'm patiently rereading the formulas, and am convinced that I have to try some of his other loaves - if only this first one I tried wasn't already so perfect.  4 weeks in now, and I've yet to produce a faulty loaf.

Forkish!

So other inspirational lunches from breads lately?  A savory feta and spinach bread "pudding" that was based on Heidi Swanson's Food and Wine post.

savory bread pudding

A stellar homemade hummus (courtesy of Alton Brown) that employed effortlessly creamy garbanzos cooked in a slow cooker (with more of those Outpost chile olives).

"Forkish" tartine

There were probably more instances, definitely there were.  But saving you from a post of 30 photos taken on an iPhone and the manic ravings of a bread obsessed supergeek shows my genuine concern for keeping up my small readership.  Today anyway, I am the Queen of Restraint.

Perhaps I'll close with a thought from Ken Forkish (in his book, Flour Water Salt Yeast) that I can't seem to get out of my mind.  Giant loaves of bread were baked in Europe years ago because families didn't have access to home ovens.  The community oven was fired once or twice a week and bakers would bring their risen loaves to bake.  The bread had to last until the next time an oven was fired - rationed appropriately and the weekly meal planning surrounded it.  Of the 3-kilo (6+ pounds) loaves his bakery produces, he feels those giants taste best around the 3-day mark, having a sufficient time to age and accustom to their environment.

He also goes on to say that his patrons don't eat that much bread, so they need to sell those monster breads in half or quarter loaves.  How sad, I've been thinking for the past week, that we have become so afraid of the carbohydrate (even though properly prepared sourdough breads pose none of the threats of common supermarket loaves, "wholegrain" or not) that this old-country tradition of bread with every meal is all but erased from our collective knowledge.

My bread isn't 6 pounds, but it is around 2 pounds, and I can get by baking just one a week being creative to use every morsel of it to the best of my ability.  This translates to strings of beautiful lunches, sometimes baking day breakfasts of week old French toast which we devour with true appreciation.  Never yet have I had a loaf of my bread mold.  This is the stuff that sustains, the realness of life and the centerpiece of my kitchen.  This is the staff that I can make into every meal.

Wednesday, February 20, 2013

Sourdough Surprises: Flatbreads (Sourdough Pita)

Flatbreads were the item of the month for the Sourdough Surprises bake along... and I couldn't have been happier since I've been meaning to convert one of my favorite pita bread recipes into a true sourdough version for quite a while.

sourdough pita

Long before I ever baked a loaf of bread, I had started playing with flatbreads.  Something about them is much less intimidating than traditional loaf baking; they are smaller things that don't require as much time or effort, and usually they can be baked in mere minutes.  Part of this infatuation with pita in particular likely came from the bread-genius Mom of one of my friends.  I clearly remember standing in her kitchen as she rolled out small discs about the size of your palm, telling me that "you want the dough to be the same thickness as your earlobe, that's how you can be sure they'll puff in the oven."  Her oven was perpetually lined with blackened quarry tile (or maybe it was brick), and she'd deftly slap the pitas on there and we'd peer through the oven door as they rose.  I did the same thing with these, my growing belly all of a sudden requiring me to grab a step stool to sit on instead of crouching or sitting on the floor for the several minutes of baking time.

I think this could also be the first sourdough recipe that I've made up entirely myself, basing the proportions loosely on a fast, favorite food processor version of pita that Cook's Illustrated published more than a decade ago.  I used some pointers on Sourdough Home on how to go about converting, but instead of letting the dough ferment at room temperature, I let mine linger in the fridge until I was ready for it.  My result was a sturdy pocket bread with a good, not-too-sour sourdough flavor.  It's a keeper of a recipe for those times when sandwiches packed in bread need to travel well.

sourdough pita ('batter')

Part of the reason my bread was a bit more stable was that I recently read about pita on a Food52 post.  The baker suggested rolling out the dough and letting it sit for a while until puffy, resulting in a pocket that was more uniform on both sides.  Prior to this revelation, my pita was always thinner on one side, leading to leakage when the bread was stuffed.  Let them hang out only the length of time it takes the oven to heat, and you'll be surprised at how "professional" your breads turn out!

sourdough pita

sourdough pita

I divide this dough into 8 pieces, making pita that is pretty substantial in size - about 7-8 inces across.  Of course you can divide them into smaller portions to make more petite breads - just follow the rule of the earlobe thickness.  It really works!  Ordinarily I scale all ingredients for breads, but this one is casual enough (and you kind of know how soft and pliable a pita dough should be, right?) that I used conventional, non-weight measurements.  Be sure to start the bread 12-18 hours before you want to bake the pitas.

Sourdough Pita Bread
yields 8 breads

For the sourdough "poolish":
  • 1 c. 100% hydration starter, well fed
  • 2 c. bread flour
  • 1/2 c. whole wheat flour
  • 1 c. water
To finish the pitas: 
  •  1 T. olive oil
  • 2 t. granulated sugar
  • 1/4 c. plain yogurt
  • 1 1/2 t. kosher salt
  • 1/2 c. bread flour (plus 1/2 cup additional, likely)
Start the poolish at least 12 hours before baking.  Mix all ingredients together well.  The dough will be more like a batter than a stiff dough.  Cover tightly, and put into the refrigerator to rest.

When ready to continue (12-18 hours later), take the sourdough poolish out of the fridge and add it to the bowl of a stand mixer.  Add the olive oil, sugar, yogurt, salt and 1/2 cup of flour and mix well.  (You can do this by hand if you like, but it's easier in a stand mixer.)  The dough will be quite sticky, and will likely need another 1/2 cup of flour as it is being kneaded.  Knead for about 5-7 minutes until you can feel the dough turn soft and pliable. Turn the dough out onto a lightly floured surface and knead for a minute or two adding just enough flour to bring together a soft dough.  The dough may still be a little tacky, and this is ok.  (Try not to add too much flour so the dough feels soft rather than tight and dry.)  Put into a clean container (I didn't bother to grease it), cover well with cling film, and let it rise at room temperature until doubled in size, about 3 hours depending on room temperature.

Turn dough out onto a lightly floured surface, and divide into 8 equal portions.  Roll each portion into a ball, trying not to add too much additional flour.  One at a time, use a rolling pin to roll each ball into a disc about 6-7 inches across.  Aim for even thickness across the disc, that is about the same thickness as your earlobe.  Let the discs rest on a lightly floured surface, covered by a clean, lint free cloth.  Preheat the oven to 500 degrees with a pizza stone or unglazed tiles (a plain sheet pan in a pinch) in the center of the oven.

After the stone has fully heated, about 30 minutes, take a disc of pita and gently stretch it out slightly as it probably sprang back a little bit.  The discs might feel a little tacky again as they rested, and that's ok; it's easier to take the side that feels driest and make that the bottom of the bread.  You can bake as many pitas at once as your stone will allow - 3 or 4 for me - but I recommend baking one first to observe about how long it will take.  It should be fully puffed and lightly browned within 5-6 minutes.  After baking, transfer to a stack of towels.  You may have to help the steam come back out of the middles - just let them rest for a few minutes, then gently and carefully (to avoid burning yourself) press down on them  to flatten.

sourdough pita

These breads are not quite as tender as the non-sourdough version, but I really enjoyed them.  In fact, I had too much bread going around here this past week, and plan on turning the last few into pita chips today - which I figure will be a very good use for aged and sturdy pita breads.

Be sure to check out sourdough flatbreads from the many other Sourdough Surprises participants.  There's sure to be plenty of inspiration!