Showing posts with label cake. Show all posts

Wednesday, March 18, 2015

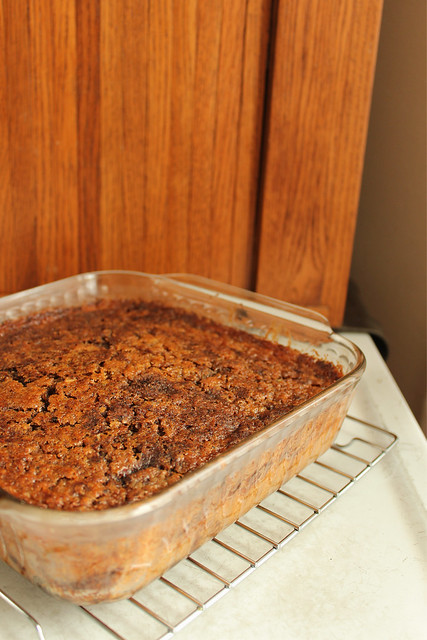
Old is new again: Chocolate Olive Oil Bundt Cake.

I don't spend so much time around adults.  Because of this, I find that I carry on whole conversations with myself in my head.  As I'm washing the dishes I think about recipes, where things originate and who changed them to accommodate what was in hand.  I'll waiver my opinion if necessity was the mother of invention, or if times changed and so did palates.  I'll wonder just how many times the same chocolate cake was recycled and made new.  And then I'll revisit my stacks of old timey recipes and see what I would do differently or if I would even bother making half of them anymore.

I don't make nearly as much dessert as I used to (although it would seem that is usually what I end of writing about), and when I do feel the need to make something I slash the sugar mercilessly.  I almost make a point to see how much I can cut before a boy will notice, and to my endless amazement it never happens.  They see chocolate.  They eat.  Maybe that is just the way our brains work.  (That also works with adding vegetables into chocolate covered things: zucchini, squashes, carrots, and beets have all been eaten this way too, none the wiser.)

I might not have a knack for a lot of things, but I have the uncanny ability to remember desserts that were eaten and enjoyed and who ate them and enjoyed them.  My special skill allows me to recall then that the last time I made this recipe, a faded photocopy of a Hershey's chocolate bundt cake that my mom wrote upon in her perfect penmanship her mark of highest approval "very good!", was in 2011 when we had a houseful of my husband's friends over to watch the Pacquaio/Marquez fight.  For that occasion I didn't cut the sugar or use olive oil, I made it pretty much as directed and frosted it with melted chocolate chips.  And it was eaten completely.  But my tastes have changed since 2011, and one thing that I find myself loving even more than less sugar is olive oil and chocolate together.  
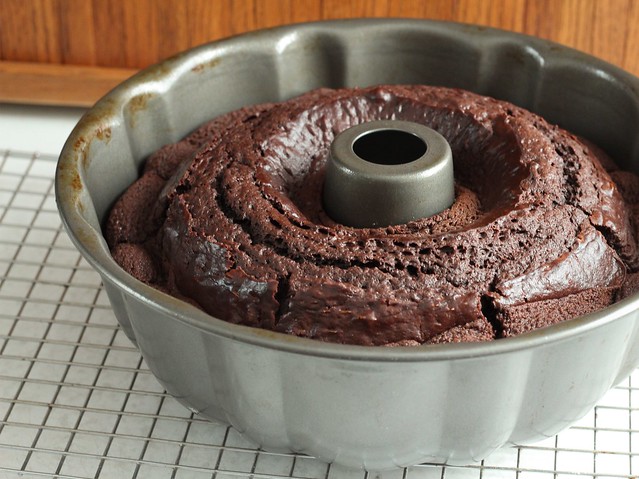
olive oil chocolate bundt.

For at least the last year, pretty much every time I see a baked good call for canola or sunflower oil - any "flavorless" oil really -I use olive oil instead.  I never worry about the density or richness of olive oil overpowering things... and maybe because I love the flavor of good olive oil so much it never does.  I am able to find the once elusive California Olive Ranch oil easily now, and it is my baking staple.

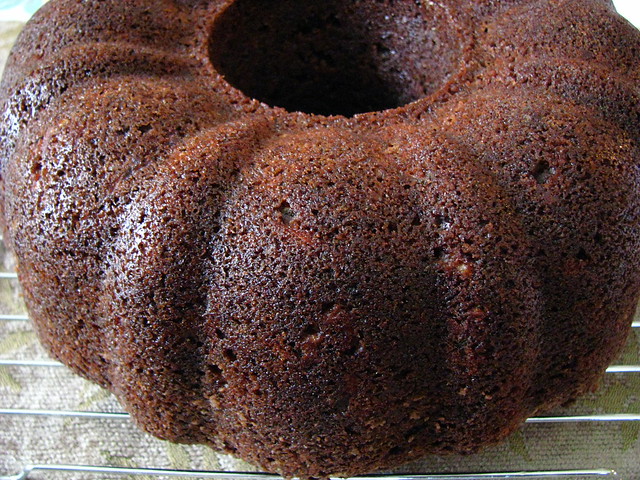
This cake lasts well for about 4 days if covered well.  I generally store cake at room temperature, and this one develops better flavor on the second day - although the texture is really very nice the day it is baked.  You would do well to serve this sans frosting and with a scoop of vanilla ice cream, or just dusted with powdered sugar.  I made half of the recommended amount of frosting "glaze", which is glossy when first topped and then dries matte. Beating the batter well causes the cake to dome up (as seen in the picture above), but when inverted it isn't noticeable. 

Chocolate Olive Oil Bundt Cake (adapted from Hershey's)
serves 8-12
  • 1 2/3 c. ap flour
  • scant 1 c. sugar
  • 1/2 c. cocoa powder (I use a blend of natural and dutch cocoa)
  • 1-2 t. espresso powder, optional
  • 1 1/2 t. baking soda
  • 1/2 t. baking powder
  • 1 t. kosher salt
  • 1/2 c. olive oil 
  • 1 1/2 c. buttermilk
  • 1 t. vanilla
 Heat oven to 350 degrees and butter and flour a 12 cup bundt pan and set aside.

Combine flour, sugar, cocoa powder, espresso powder (if using), baking soda, baking powder and salt in a large mixing bowl.  Measure olive oil, buttermilk, and vanilla into a smaller bowl, and add all at once to the dry ingredients.  Beat on medium-high speed with a hand mixer (or by hand if you like) for a full 3 minutes, making sure the sides are scraped well into the batter.

Pour into prepared pan, and bake in the center of the oven for 50-60 minutes or until a tester comes out clean.  Cool in the pan on a wire rack for 10 minutes before inverting and allowing to cool completely before frosting.

Chocolate Glaze
(double this amount for a thicker topping)
  • 2 T. sugar
  • 2 T. water
  • 1/2 c. bittersweet chocolate chips
Bring the sugar and water to a just boil in a small saucepan, stirring to be sure the sugar is dissolved completely.  Remove from the heat and stir in chocolate chips, stirring well with a spatula to melt them evenly.  Immediately spoon (or spatula) the thick glaze onto fully cooled cake.

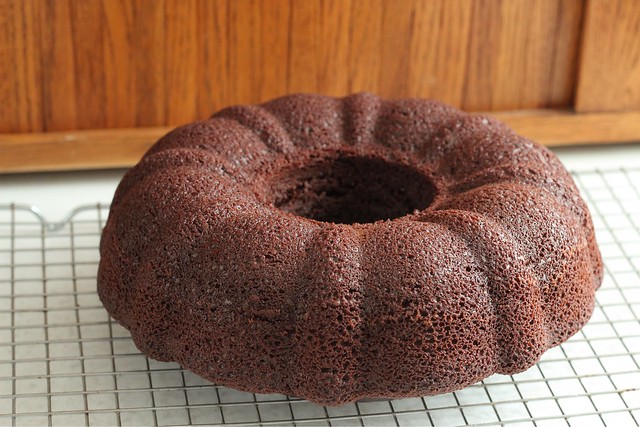
olive oil chocolate bundt.

I have no completed cake picture.  In part because I didn't feel like setting up a tripod in the fading light just before the daylight savings time change... but also in part because I feel the increasing need to only photograph things when I feel like it.  Another thing I think about when washing dishes is if there are any food bloggers that can tell stories without the aid of photography?  While the two go hand in hand, sometimes it's more important to just eat the end results and be satisfied with the enjoyment of cake.  Especially when they have been few and far between.

Sunday, June 29, 2014

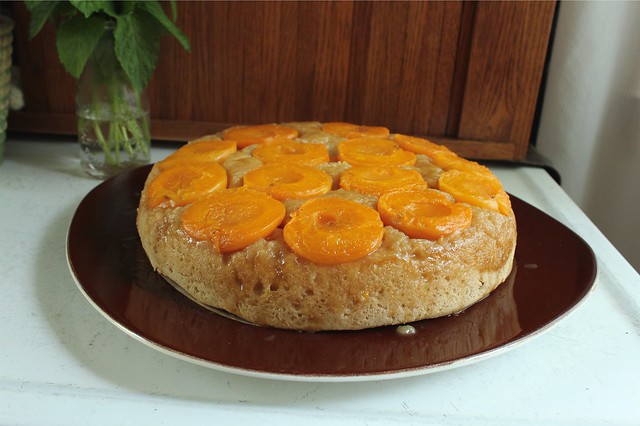
Yeasted Apricot Upside Down Cake

Before I start, maybe I should say that this isn't the most amazing cake I've ever eaten.  True, I did  love it for the sum of its parts, for the deliberate act of assembling its components, for its subtle mix of simple flavors.  But I think it's possible to love a cake purely for the process of making a cake.  That is how I love this cake.  I love this cake with all of my old soul.
yeasted apricot cake.

Last year I found a copy of Debora Madison's Seasonal Fruit Desserts at the library.  It may no longer be in print, but I loved it so much I found a used copy online, and I'm so glad I did.  It's become a manual I consult whenever I have extra fruit on hand, and it's consistent in the new inspiration and techniques it teaches me.  

Ripe apricots in hand, I began my search online for what to make with them when I remembered she had a recipe for a yeasted pear cake, baked in a cast iron skillet upside down style.  Obsessed as I've been with mint lately, I was really looking for a way to combine some perfectly ripe apricots with fresh mint... and preferably in some type of cake since it has been awhile since I've made a cake.  Fortunately, I decided on this old-fashioned skillet cake.  I was happy for a few occasions to share it, since it is a good sized cake and not really a "good keeper", although I have been appreciating it gracefully staling cold from the fridge and with a scoop of vanilla ice cream.  I can't complain.
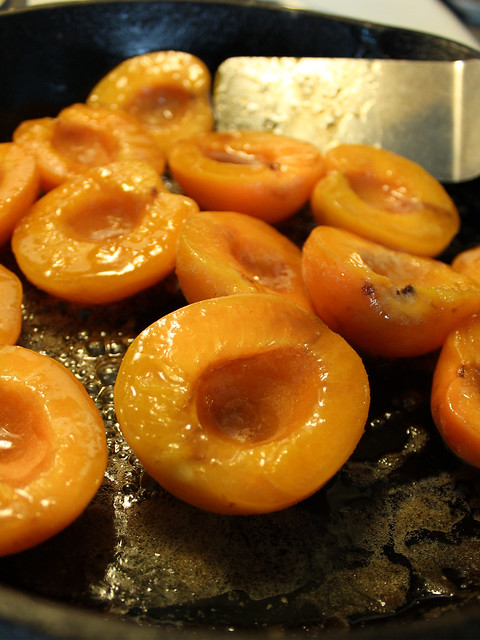
browning apricots.
With only 6 tablespoons of sugar, this is a decidedly unsweet confection.  The apricots turn soft and jamlike and make this the perfect thing to have with coffee or tea (or with the aforementioned ice cream, the ice cream adds a little extra sweetness and helps the dry crumb go down a little easier).  I played around with the spices a little and think I could have maybe been a little more aggressive, but in a way it works because the apricots are the stars of the show.

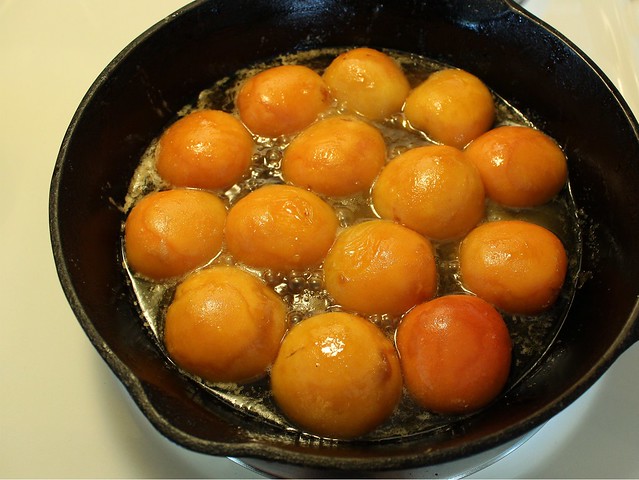
browned apricots

Make sure you take note of each part of the process, enjoying the steps as you go.  It's not a one-bowl cake; it requires some finesse, especially when working with a soft and somewhat sticky dough.  The texture of the cake is akin to a biscuit, and as Madison says, it is best warm.  I would store any leftovers in the refrigerator and try to eat them within a few days.  The texture changes, but it's still good.

I used Lonesome Stone Milling's organic all purpose flour which is wheatier than most, more like a "white wheat" available in the regular grocery.  The recipe is written for a 10 inch cast iron skillet (oddly enough, that's my number 8 skillet), you could use a well buttered 10 inch springform or cake pan and brown the fruit with the butter in a skillet first if you don't have cast iron that size.

Yeasted Apricot Upside Down Cake (adapted from Deborah Madison)
makes 1 10 inch cake
  •  6-7 ripe apricots, washed (but not peeled) and halved
  • 2 T. dark brown sugar
  • 8 T. (1 stick or 4 oz.) soft butter, divided
  • 1/4 c. warm water (100 degrees)
  • 1/2 c. warm whole milk (100 degrees)
  • 1/4 c. granulated sugar
  • 2 1/4 t. active dry yeast
  • 2 1/2 c. ap flour, divided 
  • 1 t. cinnamon
  • 1 green cardamom pod, seeds removed and crushed
  • 1 egg plus 2 egg yolks, at room temperature
  • 1/2 t. almond extract
  • 1/2 t. kosher salt
Melt 3 T. of the butter in the cast iron skillet over medium-high heat.  After it melts, brush it well up the sides of the pan and add the dark brown sugar and the apricot halves.  Toss the apricots in the bubbling mixture to coat, and then let them brown slightly on both sides, about 4 minutes total.  Turn them all cut side down and arrange them as you like and remove the skillet from the heat.

Put the warm water and milk in a small measuring cup and add the yeast and 1 t. of the sugar from the measured 1/4 c. of granulated sugar.  Set aside to proof, and meanwhile whisk together 2 c. of the ap flour with the cinnamon and cardamom.

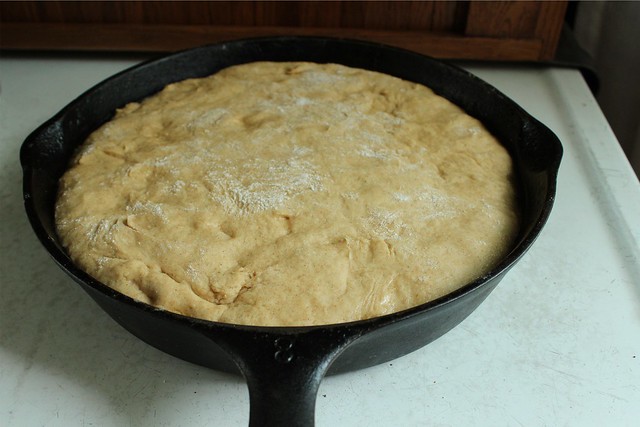
In a bowl of a stand mixer (or in a large bowl if working with a hand mixer), add the egg and egg yolks, almond extract, remaining sugar, and salt.  Working with the paddle attachment, beat in the yeast mixture on low speed, then add the flour/spice mixture (also at low speed) 1/2 c. at a time until it is all incorporated.  Increase the speed to medium-high, and add the soft butter.  Beat for 2-3 minutes until the batter is smooth and glossy.  By hand, stir in the remaining 1/2 c. flour, and turn it out onto a lightly floured counter.  (It will still be sticky, use a bench scraper to help you maneuver it.)  Knead it gently a few times, then pat into circle the same size as the skillet holding the apricots.  Lay the disc over the fruit, and slide the whole pan into a plastic bag to rise for 30-40 minutes.

Preheat the oven to 350.  Once the oven is hot and the cake is noticeably risen, remove it from the plastic bag and bake until golden brown and a tester comes out clean, about 30 minutes.

After removing from the oven, immediately invert by placing a cake plate over the pan and flipping it carefully.  As Madison recommends, serve it warm with whipped cream (she also recommends sabayon) - I say go for the vanilla ice cream.

yeasted apricot cake
Just prior to baking.

Of all the many cakes I've made over the years, not many yeasted cakes come to mind (a noteable exception is the panettone), and this one seems to be versatile enough that with mindful spicing, you could use just about any fruit that comes to mind.  I'd imagine using a whiter flour would result in a slightly less dense cake, but I like this old-timey texture and depression-era sweetness.  It's satisfying.

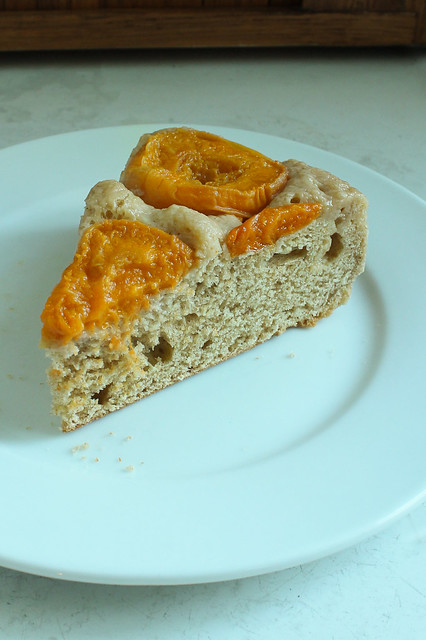
apricot cake slice

This slice is 3 days old, and I took the picture tonight just as the sun was about to fall behind the trees.  It's not photogenic really, but it shows the texture of the cold cake pretty well.  I always think there are two types of people (well, 3 really if you count "pie" people) those who refrigerate cakes and those who don't.  I am one who doesn't.  I don't like cold cake, I like cake about to fall apart under the weigh of my fork - or better, under the weight of thinking about my fork.  But this is a sturdy cake that I love and I hope you'll love it too.  If you happen to try it with other seasonal fruits, let me know will you?

(P.S. A couple weeks ago when I was just starting to see apricots pop up at my food co-op, I made this apricot jam... it's a winner.  I'm eating it nearly every day (it's particularly good in vinaigrette with really good olive oil and Bragg's cider vinegar) and I am still not tired of apricot!)


Monday, February 24, 2014

Salad Dressing Cake.

I guess it all started when I wanted a tuna sandwich for lunch one day last week.  I love tuna sandwiches, but I hate hate hate the conundrum of purchasing mayonnaise.  I like lacto-fermenting my own, but haven't done that so much since I made the commitment to higher quality olive oils.  I don't have any "neutral flavored oils" in my kitchen arsenal at all anymore; if it can't be made with butter, olive oil, coconut oil or bacon grease, I probably will opt out.  But that tuna sandwich was nagging me, and I recalled this recipe for super quick mayonnaise made with a whole egg and an immersion blender.  Armed with a new bottle of olive oil, I figured I'd give it a go.  I didn't have any purchased mayo on hand, so it was my only option if that tuna sandwich was going to become a reality for me...

salad dressing cake

To the basic mayo recipe, I added a spoonful of dijon mustard and extra lemon juice; the recipe did work (although the texture wasn't quite as lovely as the yolks-only, lovingly hand whisked versions).  My only complaint was that the quality extra virgin olive oil I used made the mayo seem a bit too rich and mineral-y.  It was edible, but I didn't want to go through the trouble of lacto-fermenting it, and I didn't have a good excuse to go all out on a mayo binge to use up the cup or so I had leftover.  I also didn't think I could pass it off on the rest of the family - I have one kid who can't even eat condiments yet, another who won't eat them out of choice, and finally a husband who is a harder sell than I am.

Fortunately I remembered about salad dressing cake.  Salad dressing cake could very well be the first cake I ever made myself, mixing the simple, pantry-staple ingredients with a whole cup of mayonnaise, Miracle Whip actually, which was what we called mayo at my house growing up.  It was proof that miracles do indeed exist.  How on earth could you make a chocolate cake with a cup of sickly sweet and thick Miracle Whip that left no trace on the tongue of mayo?  How could you make a cake that was so perfectly full of moisture, a good keeper at room temperature or in the fridge, and barely messed up the kitchen?  It's magic.  And I'm glad I remembered it now. 

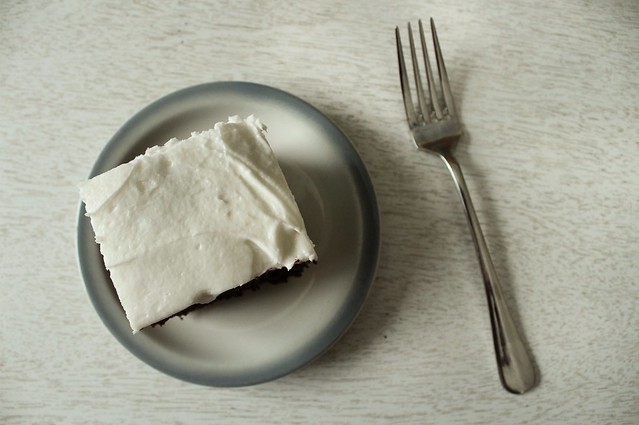
salad dressing cake

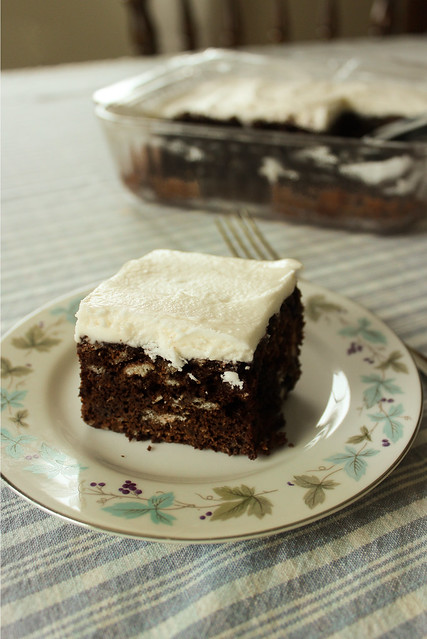
You can frost this cake however you see fit, but I can't properly enjoy an everyday chocolate cake at my house without a simple butter infused, powdered sugar based buttercream spiked with almond extract.  I don't ever measure, I just try not to make too much, and if I do, I store the leftover in a glass jar until I need to make another cake - which will then usually happen sooner than later because I have extra frosting.  It's a vicious cycle.

I also encourage you to make immersion blender mayo with 100% olive oil for this recipe.  You get a nuance of olive in the background for those that are interested in tasting it, yet it's subtle enough that the rest of your family won't go noticing it.  They'll just think you made the best chocolate cake ever.

Salad Dressing Cake
makes 1 8x8 inch cake
  • 2 c. ap flour
  • 1 c. granulated sugar
  • 1/2 c. cocoa powder
  • 1/4 t. kosher salt
  • 2 t. baking soda
Preheat the oven to 350 degrees.  Butter a glass 8x8 inch baking dish.

In a 4 cup measure (or medium sized bowl), combine the mayo, cold water, vanilla, and espresso powder if using and stir well to combine.  (I still had a dirty immersion blender from making the mayo, so I used it to blend the wet ingredients.)

In a large mixing bowl, sift or mix well the dry ingredients.  Pour the wet ingredients over the dry and stir until just mixed thoroughly and no dry spots remain.  Use a spatula to ease it into the prepared baking dish, and smooth the top out towards the corners to counteract some of the doming action in the center as the cake bakes.  Bake in the preheated oven for 35-45 minutes, until a tester comes out clean.  Cool completely before frosting.

salad dressing cake


Wednesday, August 7, 2013

Mulberries. Mulberry Cake.

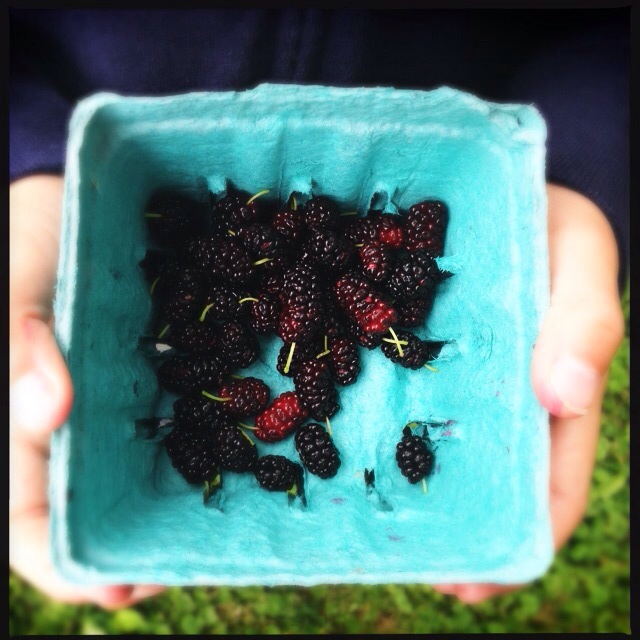
 mulberries.
the first of the mulberries.

I first ate a mulberry two summers ago after discovering what I thought to be a tree full of them growing in a public park.  Any prior knowledge I had of mulberries centered around the Dr. Seuss book And To Think That I Saw it on Mulberry Street, which in my mind was one of the earliest books I read myself.  I don't recall that book contained the eating or description of the mulberry, which is a less seedy, blackberryish berry that grows either on trees or bushes depending I assume on the maintenance of the plants and the locations they are found.   What I do know now is that a fat, thumb-sized, perfectly ripe mulberry has no comparison in the berry world.

The first taste of mulberry for me (after confirming with someone who knew what a mulberry was), wasn't really so sweet.  Mulberries must be falling-off-the-tree ripe, and deep black - at least the varieties that I've seen here should be deep black.  The reddish ones, or ones that need some coercion to detach from their tree, are sour or tart; they are seedy and not that pleasant.  Last year's severe drought is blamed for just about everything bad in the Wisconsin food world of 2012... and what few mulberries I saw were tiny and I suspect gobbled up by the birds.  But this year:  sweet success.   The clutch of public trees I had my sights on were prolific this year, still bearing as I check up on them every few days or so, ripening slowly as if to provide me desserts just as I need them.

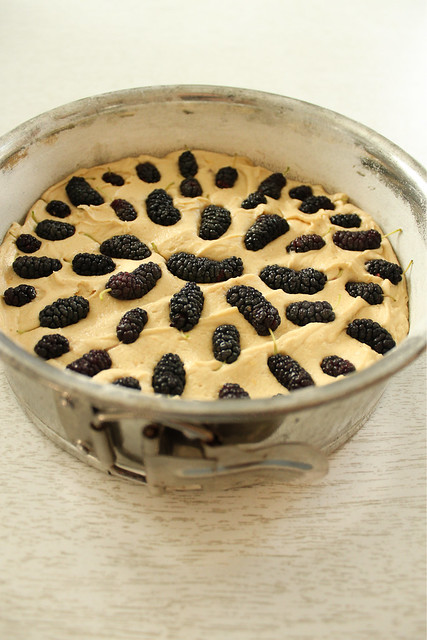
mulberry cake

I made the first full pint of berries we found into a tiny batch of jam, a single jar that I've been enjoying on toast about every other day.  But when we checked the tree Monday and many more berries had ripened, I thought I should really celebrate by making a cake.  I never need prompting to make a cake... but it helps that I had recently made one of my favorite summertime cakes ever - Dorie Greenspan's Dimply Plum Cake.  Except the two pieces I gave some visiting friends, I ate that whole cake myself, and then had to refrain from making another. 

I made only a few well suited changes to Dorie's impeccable original recipe, chiefly adding coconut oil instead of another type of vegetable oil.  Coconut oil and butter work together to provide an amazing texture, almost bordering on a softer version of shortbread.  Playing around with the spices is only half the fun too.  This cake is so endlessly adaptable, you could really do any kind of fruit, nut, or berry I would think. 

mulberry cake (batter)

nutmeg

If you are a raw batter taster, as I am, I would heartily encourage you to taste this batter.  It is billowy, silky, and downright indescribably delicious.  I tried to think of just one spice that could complement the flavor of mulberry, and settled in on nutmeg.  It could be that a nutmeg heavy cake I had made for a Daring Baker challenge was lingering in my mind, and I grated in a good amount of it due to the happy memory of enjoying it.  I'd see no reason why you couldn't fold the berries into the cake batter instead of arranging them on top, but I wanted to keep the spirit of Dorie's cake, and let the berries dimple the top.  The cake is best served with just a bit of barely sweet whipped cream, and additional mulberries.

Mulberry Cake (adapted from Dorie Greenspan)
  • 1 1/2 c. AP flour
  • 2 t. baking powder
  • 1/4 t. salt
  • about 1 t. freshly grated nutmeg
  • 5 T. (2 1/2 oz.) unsalted butter, at room temperature
  • 3/4 c. (packed) light brown sugar
  • 2 large eggs
  • 1/3 c. melted coconut oil
  • zest of 1 lemon
  • 1 t. pure vanilla extract
  • 1/2 c. ripe mulberries (you can snip off their stems if you like, but I went for rustic and left them attached...)
Preheat oven to 350.  Butter and flour an 8 inch round pan, I used a springform pan.

In a small bowl, combine flour, baking powder, salt, and nutmeg.  In a large bowl, beat the butter until light and fluffy, about 3 minutes.  Add the sugar, and beat another 3 minutes until fluffy.  Add the eggs one at a time, and beat a full minute after each addition.  With the mixer on medium speed, blend in the coconut oil, lemon zest, and vanilla.  Dorie says "the batter will look smooth and creamy, almost satiny", which is so apt I need to include her description.  Taste it.  It's wonderful.  Finally, add the dry ingredients, and mix until just combined.  Before transferring the batter to the baking pan, use a spatula to be sure you've incorporated any dry spots.

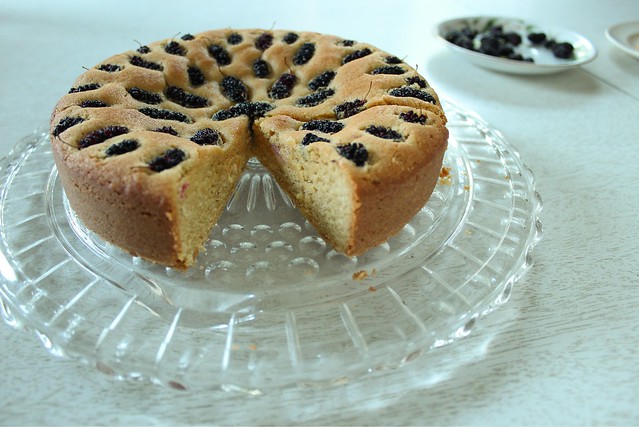
Smooth the batter into the prepared pan, and decorate the top with the mulberries.  Bake for about 40 minutes until the top is nicely browned and a tester comes out clean.  Cool in the pan for 10 minutes, then run a knife around the edge before unmolding it.  Cool it right side up.  Store the cake at room temperature for 2 days (it's moist, so will mold if you try to push it further), or coax another 2 days of longevity by storage in the fridge.  The texture changes under refrigeration, which isn't bad, but you may wish to allow your slices to come back to room temperature before eating them.

mulberry cake

After the discovery of what mulberries looked like, I identified trees in nearly every park we frequented.  Some trees are so big, I'd need a ladder and a friend to help glean.  But fortunately, the best glut of berries to be found is right in my own neighborhood, and is low enough to reach - even for my kiddo.  Just this week, we noticed another similarly sized tree hiding in plain sight, not far from the first... more than plenty for fresh eating and playing around with.  Not much makes me happier than seeing my picky eater stained purple from picking and eating berries and excited to look for more.  He even liked my cake, and now that he's finished off the last of the fresh mint ice cream (which is the best recipe ever, by the way), he may even help me to eat it.  If I'll share it, that is.

mulberry cake

Wednesday, March 27, 2013

Daring Baker's Challenge March 2013: Hidden Vegetables.

Ruth from Makey-Cakey was our March 2013 Daring Bakers’ challenge host. She encouraged us all to get experimental in the kitchen and sneak some hidden veggies into our baking, with surprising and delicious results!

I kind of opted out on the challenge this month - in part because I've done my fair share of hiding vegetables in baked goods.  Instead of making something new,  I have quite a few successful experiments that I'll list here for you.

For example:

Beet Cake.  This was de-gluten-free-ified  from one of my favorite local bakers, Annie Wegner-LeFort. It was also a hit with my son, who would never touch a beet if prepared traditionally.  Click the photo for the recipe (and a link to the original, gluten-free recipe) on flickr.


chocolate beet cake

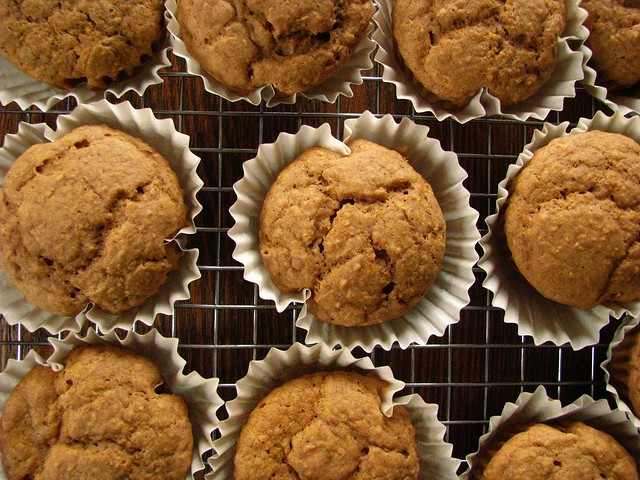
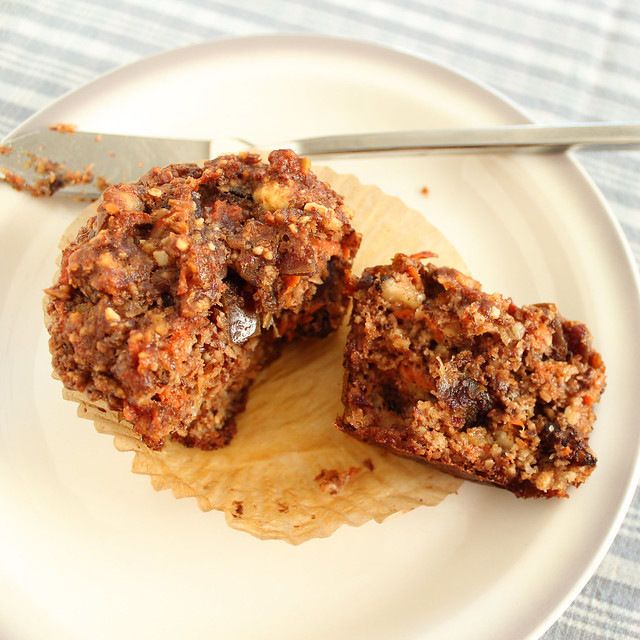
Hidden Veg Muffins.  There is pureed carrot in here, and some banana, making for a muffin with very little refined sugar.  For some reason, my kid will not eat carrots - but I try and sneak them in where I can, and this is one place where they went undetected.  Recipe is also linked to the photo on flickr.


hidden veg muffins.

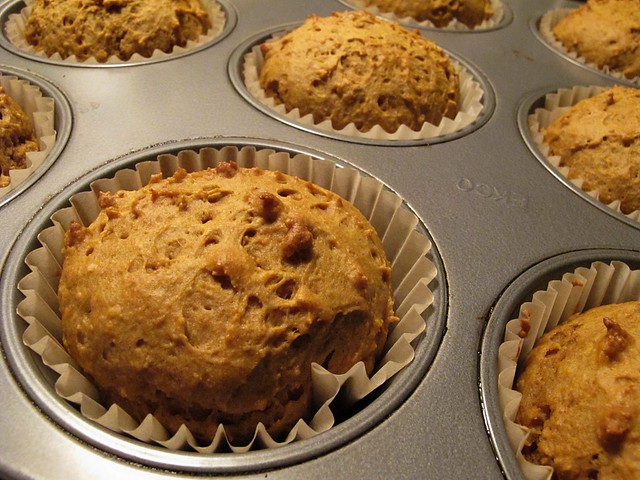
And speaking of muffins, these Sweet Potato Muffins went over well at my house as well.  A whole cup of sweet potato puree in these!


sweet potato muffins

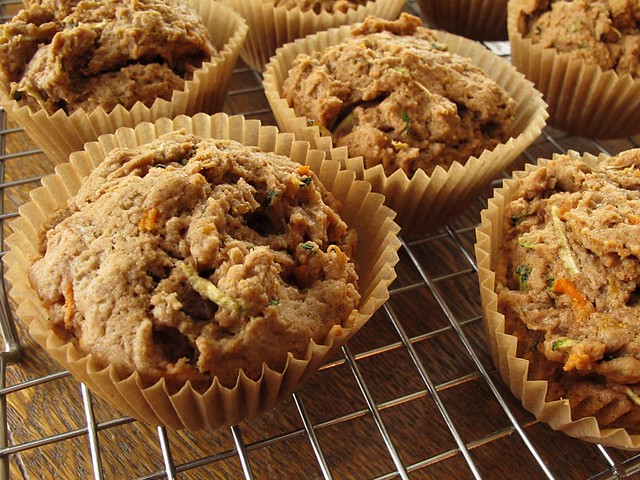
I mentioned in the notes for these Vegan Zucchini Carrot Muffins (also posted on flickr), that the world really doesn't need another muffin recipe - but that sometimes a good muffin recipe is hard to find.  I've made these several times - and they are deliciously able to hide about 2 cups of shredded vegetables and keep them hidden from suspecting children.


vegan zucchini carrot muffins

On a more desserty note, I had tinkered for some time with black bean brownies.  I probably haven't made them again in the 3 years since I wrote about them, but they were good, and vegan to boot.  I do highly recommend whipped cream with cayenne pepper though, which is what made these brownies not truly vegan.

Deena's Chocolate Zucchini Cake is probably one of my most favorite cakes ever - if you don't include her Honey Cake.  So much of what Deena writes sticks like glue in my  head.  The opening of her post on this worthy cake says: "My friend's husband once left her a note in the kitchen that read: Honey, we're out of bundt cake."  I always think of this when I want to make a bundt cake, because I grew up in a bundt cake-eating family, and I long to hear (or see)  these words lingering around a bundt in my own house.  My Husband is not so much a sweets eater, so I live vicariously through these words - and I make this bundt cake in the height of zucchini season when I have friends for supper.  Perhaps when my kids grow big enough to leave me notes, I'll be as lucky as Deena's friend...


chocolate zucchini bundt cake


Since adding copious amounts of shredded vegetables to cake is usually always a good idea, I took Susan from Wild Yeast's lead and made a cake with a whole lot of shredded parsnip.  The original cake was made with carrots, and it too is one of my favorites.  I try to leave myself a supply of sourdough ends to dry and grind up, just so I have the ability to make it on a whim, since there is no flour in this recipe - only dried bread crumbs!  I wonder how this cake would fare with well-drained zucchini?

baked parsnip bread crumb cake
Sourdough Breadcrumb Parsnip Cake.

Most recently, I made these Carrot-Banana Muffins, which were devoid of refined sugar and gluten.  In my opinion, they are the perfect near-dessert muffin - and they really satisfy a sweet tooth.  And we all know that I have a whole mouth full of those that I'm trying to deal with.


carrot banana muffin

Hopefully, I'll be bake to my Daring self next month and able to concoct something new and exciting.  But I'm glad I had a chance to think back on all of the ways I've been successfully able to hide vegetables in the baked goods here at my house.  Be sure to check the Daring Baker blogroll and website for more inspiration!

Wednesday, March 20, 2013

Sourdough Surprises March 2013: Cake!

It was funny that cake was the sourdough theme of the month for the Sourdough Surprises baking group.  Just before the announcement,  my Facebook friend (and all-around good, real food maven) Holly was talking about some amazing changes she made to a chocolate sourdough cake.  It took me a few days to realize that the reason her cake looked so good and so familiar was because I had already made it - and changed it with similar results!  I've said it before but it's true that it is a good thing that I have this space to write things down or I'd never remember half of what I've made.

sourdough chocolate cake

The sourdough cake that we both loved was this one from King Arthur Flour.  I had played around with it quite a bit (apparently, that was a year ago already), and then in my quest for not eating as much dessert, I let it go for too long a time.  As Holly did, I had cut the sugar in half, but in my experiments this month, I used a different hydration sourdough starter - and both coconut and olive oils for the fat.  The result was a moister version of that butter cake I made a year ago, and one that was not really high in sugar.  Not counting the frosting, and allowing for 9 large slices in a 8x8 glass pan, I figure it around a tablespoon per serving.

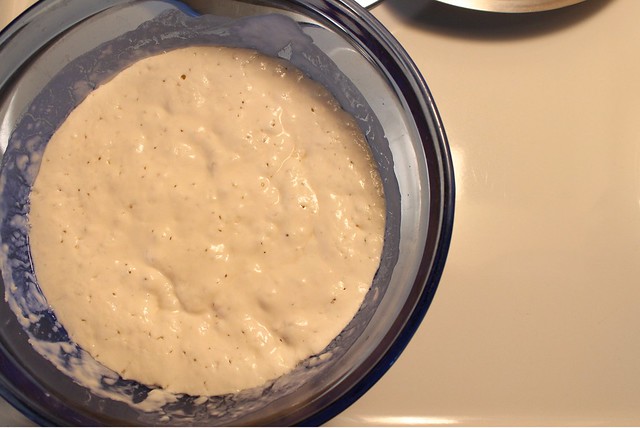
I've been in full swing with Ken Forkish's breads - all of them turning out stellar, and I may be hooked on the 80% hydration starter that he calls for.  I'm still figuring out the best feeding schedule for both my baking and waste reduction, but meanwhile, I'm turning 80% starter into all of my old favorites:  crackers, cake and pancakes all turning out better than with my 100% liquid levain.  The only thing I forgot about making this cake is that it takes some serious arm power (and lack of concern for gluten toughening) to incorporate the starter into a homogenized looking batter.  

Don't be afraid to beat this cake until you are certain you have overbeaaten it, otherwise you may have traces of white sourdough bits in your chocolate cake, which you can't really taste, but they aren't as pretty.  And a stand mixer might work, but avoid using a hand mixer... I learned the hard way that the batter tends to climb up the beaters and generally make a huge mess of things.

Chocolate Sourdough Cake (adapted from King Arthur Flour, with regard to Holly Langenburg, and my previous chocolate sourdough cake post)

makes one 8x8 inch cake
  • 1/2 c. well-fed 80% sourdough starter (about 150 g.)
  • 1/2 c. milk
  • 1 c. AP flour
  • 1/4 c. melted coconut oil
  • 1/4 c. olive oil
  • scant 1/2 c. sugar
  • 1/2 t. salt
  • 1 t. vanilla
  • 6 heaping T. cocoa powder (natural process)
  • 3/4 t. baking soda
  • 1 egg
Combine starter, milk and flour in a mixing bowl and let ferment. (KAF says at least 3 hours, I ferment at least 8, and this particular cake fermented for 16.  It's okay to leave it at room temperature during this fermentation time.) After ferment time, proceed:

Preheat oven to 350 degrees.

In a good sized bowl, mix the oils, sugar, and salt together well.  Add the vanilla, cocoa powder, baking soda, and egg, and mix thoroughly.

Add the sourdough/milk/flour ferment to the chocolate-butter mixture. I found it easiest to use a sturdy spatula to mix the two - be firm but not vigorous and also be patient. Stir to combine until very few streaks of sourdough remain, and the batter looks like batter. It's sticky stuff!

Pour into a greased 8x8 glass baking dish, and use a metal knife or spatula dipped in water to spread batter evenly in the pan. The cake does "dome" a little, so you can try to push a bit more batter into the corners than into the center if this matters to you. Bake for 30-35 minutes until a tester in the center comes out clean.

You can use whatever frosting you like to top it after it cools completely - I just went with a simple American-style buttercream in a thin layer..
lithuanian coffee cake.
Sourdough Lithuanian Coffee Cake.

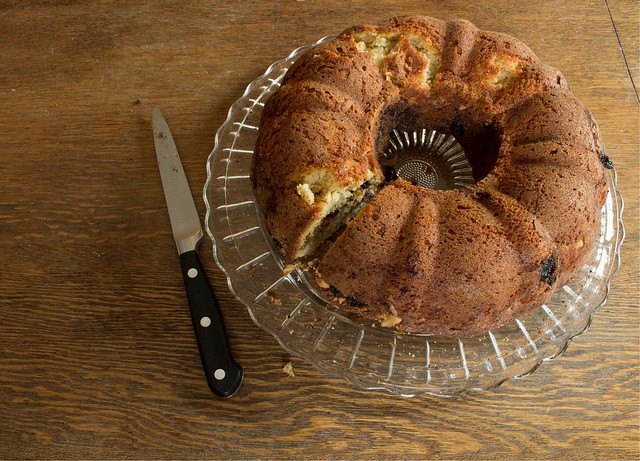
I have made a number of cakes with sourdough starter - and also talked about them before.  Most recently, I was excited about this Lithuanian Coffee Cake.

I also truly love this fully fermented Applesauce Cake, which uses a whole pint of home-canned applesauce and is based on a Spanish Bar Cake recipe my Gram used to make.

I'm fairly certain that sourdough cakes are not something I'm done experimenting with - and I'm sure I'll find plenty of links this month to convince me to consume a bit more sugar!  Take a look below to check some of them out!

Sunday, January 27, 2013

Daring Baker Challenge January 2013: Speculaas Gevulde

Francijn of Koken in de Brouwerij was our January 2013 Daring Bakers’ Hostess and she challenged us to make the traditional Dutch pastry, Gevulde Speculaas from scratch! That includes making our own spice mix, almond paste and dough! 

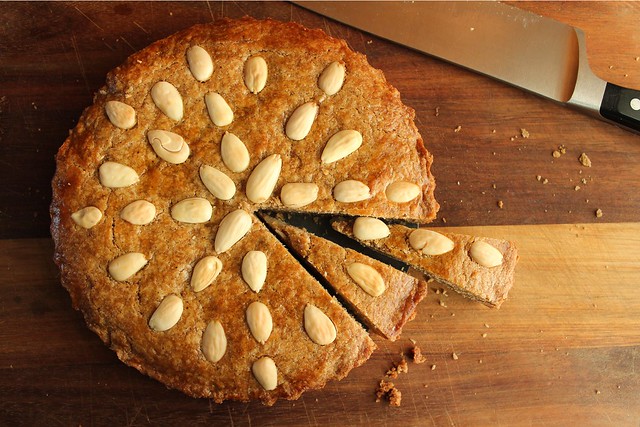
speculaas.

This month, the Daring Baker challenge was another thing I've never eaten, speculaas.  Indeed, I've never really heard much about it my neck of the woods.  The closest I ever came to any experimentation was when I read this piece by David Leibovitz over 2 years ago.  I imagined what the flavor of that speculoos spread tasted like, and wondered if I'd ever see a jar of it here, or better if I could make some myself.  Then I promptly forgot about it until this month when it rang a bell once again.

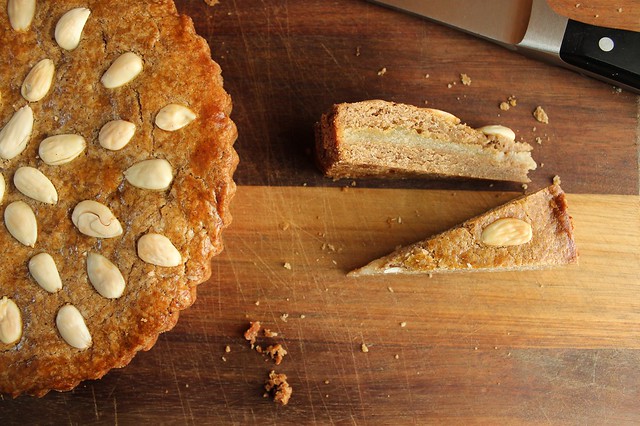
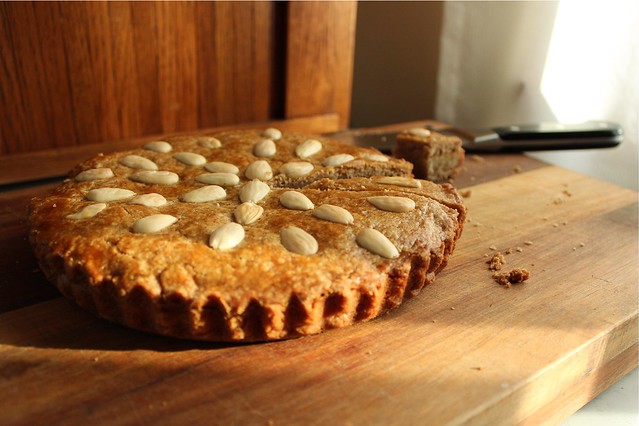
Speculaas Gevulde is Dutch, comprised of an almond paste center and a top and bottom layer of spiced shortbread.  There apparently are famous cookies, bearing the traditional shapes of their Dutch (or Belgian) counterparts.  This piqued my interest.  Some of the only non-homemade cookies I remember at my Gram's house were perpetual boxes of "Windmill Cookies".  They were almondy and brittle thin, slightly spiced and excellent when dunked in milk.  In fact, many cookies in my possession went submerged too long and turned into that miraculous cookie sludge in the bottom of my glass, that I happily drank after no doubt negotiating more cookies to replace them.  Perhaps that wasn't far off from the speculoos spread that Leibovitz heralded...

It appears that "speculoos" and "speculaas" refer to the same thing, names bound by a common Latin moniker I'd imagine, and used by citizenry of different countries.  What little online research I did prying into the past of speculaas didn't confirm much in the way of how a brittle spice cookie turned into a semi-soft, layered confection.  The term "gevulde speculaas" is Dutch for filled speculass, which is what this cookie-cake is called.  It really makes no difference to me how it came to evolve, because this little cake was actually very easy to make and incredibly delicious!

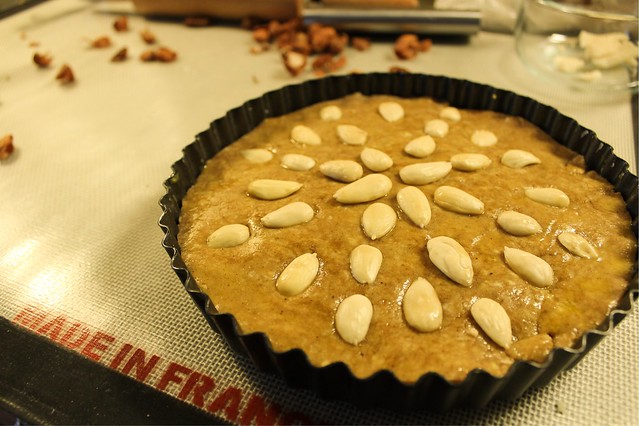
speculaas.

Our challenge was actually to make the almond paste middle as well, and since I had stashed some homemade almond paste in the freezer from last September (when I made this wonderful gluten-free upside down cake from the Bojon Gourmet), the cake came together even more quickly.  I used 12 oz. of stored almond paste that I made according to this recipe (except I added extra almond extract - I can never get enough almond!).  I let it thaw overnight in the refrigerator, and it was a perfect consistency to roll for the center of this dessert.  (I used my strange-sized tart tin, which measures 7 inches across the bottom and 8 across the top.)

Maybe 2 days before actually baking the speculaas, I mixed up the spice mixture and then the dough.  Using my food processor, which seemed to be the easiest and least messy way of cutting a good amount of butter into a floury spice mix, I had speculaas dough in short order.  I think the time in the fridge was good for marrying the spicy flavors as well.

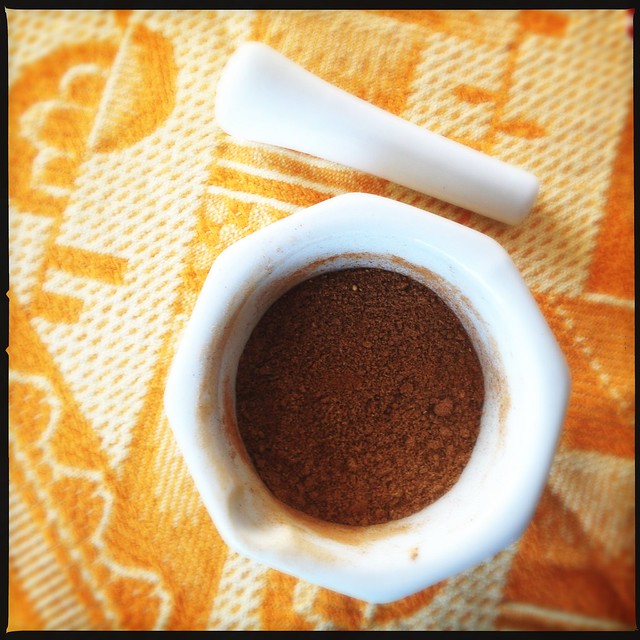
speculaas spices.

One of the most interesting things about this challenge was the combination of spices.  Having never tasted the real thing, I relied on the formula our host provided.  In additions to mandatory inclusions like cinnamon, cloves, and ginger, optional spices like nutmeg (mace, nutmeg's weblike exterior coating, interestingly was also a mandatory spice), coriander, and white pepper.  Francijn suggested the parts of spice, but it was basically individual taste that dictated the final flavor.  I added extra ginger powder, but next time I'd like to increase the "spicy-hot" factor by adding more white pepper, and perhaps by using cassia cinnamon which has a hotter profile than Ceylon cinnamon.

Speculaas Spice Mix
(enough for several batches of gevulde speculaas dough)
  • 2 t. cloves
  • 1 t. mace
  • 1 1/2 t. ginger powder
  • 1 t. cardamom
  • 1/2 t. coriander powder
  • 1/2 t. anise seed, crushed to a powder
  • 1 t. nutmeg
  • 1/2 t. white pepper
After weighing the base spices (about 12 g.), I added the cinnamon.  I started with 8 g., which was a little light.  10 g. bumped it up to perfect.  To see Francijn's suggested measuring system for speculaas spices, click here.

speculaas.

The original recipe did not call for specifically for milk, but only to add some if the dough felt dry.  I poured it through the top of the processor as it was pulsing and stopped as soon as the dough pinched together like a pastry dough should. 

Speculaas Gevulde Dough (Francjin, via The Daring Kitchen)
  • 250 g. (1 3/4 c.) AP flour
  • 1 t. baking powder
  • 150 g. (3/4 c. packed) brown sugar
  • pinch of salt
  • 2 T. speculaas spices, see above
  • 175 g. (3/4 c. or 6 oz.) butter, cut into pieces
  • enough whole milk to hold it together, about 2-3 T.
Combine all ingredients except butter and milk in a food processor and pulse several times to combine.  Add the butter, and pulse several times until the mixture resembles "coarse meal".  Add milk as described above if the dough doesn't come together.

Transfer the dough to a plastic bag, form into a disc, and refrigerate at least two hours, and up to several days.  The dough can also be frozen for several months.

Assembling the final Speculaas Gevulde:

When it comes time to assemble your gevulde speculaas, roll out the speculaas dough in two equal pieces exactly the size of your chosen pan.  Use two pieces of cling wrap and roll between them. (It helps to work with the dough cold, as it gets sticky as it warms.) Roll out the almond paste to the same size as well.  Beat an egg for an egg wash, and have some blanched almonds ready for decoration.  (You can easily blanch the almonds and remove the skins yourself:  Bring a small pot of water to a boil.  Add almonds, cover and remove from heat.  Let stand for 1 minute, then drain and the skins will pop right off between your fingers.)

Butter your baking dish (glass pan, tart pan, etc.) well, then fit a layer of speculaas dough into the bottom.  Brush liberally with egg wash, then fit the almond layer over the top.  Brush again liberally with egg wash.  Top with the second piece of speculaas dough.  Brush a final time with egg wash, then decorate with the blanched almonds.  Bake in a preheated 350 degree oven for 40 minutes.  The top will be nicely browned, and the cake will feel set and dense.  Cool completely in the pan before removing and slicing.

speculaas.

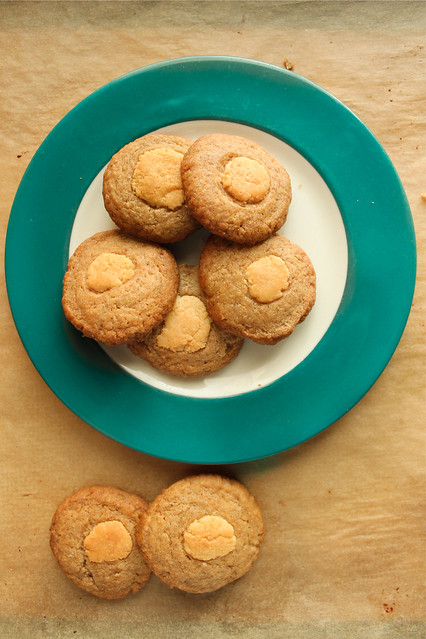
I had just a small amount of speculaas dough left over and an even smaller amount of almond paste.  This came from trimming to fit a circular tart tin.  I made 9 small balls of the speculaas dough, and 9 tiny almond past balls, fit the two together, then pressed with a glass to an even thickness.  I refrigerated them until the gevulde speculaas was done baking, then popped them into the oven at 350 until they were browned and crisp, about 20 minutes.  They were much crunchier than the layered speculaas, and I liked them a lot!  I probably like the layered cake better, so I wouldn't make the dough especially into cookies, but it's a great use for the leftover trimmings.

speculaas.

 I really enjoyed this cake as it aged.  I stored it in my new obsession: these reusable, beeswax coated, hemp and cotton flats that can be made into envelopes around food.  I can't thank Deena enough for sending me a package of them - I had never heard of them, and I really love them!  The wrapping kept it moist and dense, and I feel like the flavors deepened as the days passed.

I'm so pleased with the way this challenge went.  An elegant, petite spice cake, spiked with almond and nearly endlessly adaptable to your liking?  How could I feel anything but pure love for this dessert?  Thank you to Francjin for a wonderful challenge selection!  Be sure to check out the original recipe, and a short history of the spice trade and the Netherlands role in this confection!


Friday, November 9, 2012

Sourdough Lithuanian Coffee Cake

battered.

Do you ever stand in your kitchen, a fingerfull of raw batter in your mouth, and just smile because you already know that you've hit the mark?  Food police everywhere warn against the consumption of raw and undercooked things, especially eggs, but I am a full-fledged batter tester and nothing anyone says to me will ever change it.

That moment of shear delight, when raw cake stands perched and ready to go into the oven, that is when I take early pleasure in knowing if my baked good has succeeded.  This morning when I waited impatiently for the minutes of baking time to tick by, and comforted myself with those early raw tastes, I already knew this cake was going to be a favorite.

Last Sunday, I finally made the Lithuanian Coffee Cake taken from the book Welcome to Claire's.  I had wanted to make the cake for months, a true testament to my ability to refrain from too much sugar this year.  However rigorous I think I have become in the sugar-free department, I am fairly certain that from birth I was raised to enjoy a little sweet nibble with the morning coffee, whether it be named cake or otherwise.  There is something about the way a bit of sugar complements the bitterness of coffee that makes the day complete.  If I'm going to bake, let me always be able to bake something to be enjoyed in the morning.

lithuanian coffee cake.

My son reminds me, "Coffee cake is a cake that you eat when you are drinking coffee, not a cake that has coffee in it."  While that is true, I didn't want to confuse him by telling him that there is sometimes coffee in coffee cake.  In fact, I add coffee to nearly everything chocolate that ever comes from my kitchen.  I feel sneaky and underhanded, upping the flavor of the chocolate by included heavy pinches of espresso powder when no one is the wiser.  But some cakes, like this Lithuanian Coffee Cake, actually do have coffee in them.  Not enough to replace your caffeine consumption for the day, but enough to enhance your coffee drinking experience.

Claire's version was a butter cake made in the standard way and baked in a bundt pan.  I liked it a lot, but it seemed a bit dry after it aged a few days, and the filling ingredients included raisins which when baked on top (the bottom when inverted) were a bit burnt tasting to me.  That is just nit-picking, however, since I really loved the flavor of the cake, and made my half of the bundt (I gave half to a friend) last until yesterday.  


sourdough cake, overnighted batter
This is after the sourdough, flour, and milk fermented overnight.

I've been increasing my amount of well fed, "discard"starter lately, and out of curiosity (and lack of cake) I decided before bedtime last night to mix up a true sourdough cake: one that ferments overnight to reduce all of the indigestible parts of the wheat flour.

After all, if I'm going to go on a cake-making and cake-eating binge, I may as well make it the healthiest possible way, right?

sourdough coffee cake

Sourdough Lithuanian Coffee Cake (inspired by Claire Criscuolo)

For the filling:
  • 1/4 c. dark brown sugar
  • 1/4 c. chopped walnuts
  • 1/4 c. raisins
  • 1 T. finely ground coffee
  • 1 t. cinnamon
  • 1 T. cacao nibs
  • merest pinch of salt 
For the cake:
  • 1 c. well-fed sourdough starter (100% hydration)
  • 1 c. AP flour
  • 1 c. whole milk
  • 3/4 c. raw sugar
  • 1/3 c. olive oil
  • 1 egg
  • 1/4 t. salt
  • 1 t. instant espresso powder
  • 1 t. vanilla extract
  • 1 t. baking soda
The night before (or at least 7 hours before you want to bake), combine the starter, flour, and milk and mix well.  Let stand at room temperature well covered.

When ready to continue, preheat oven to 350, and butter an 8x8 glass baking dish very well.

Mix all of the filling ingredients together in a small bowl, and set aside.

To your fermented sourdough base, add the sugar and stir until well combined.  In a 1-cup liquid measure, measure out olive oil.  Add to it the egg, salt, espresso powder, and vanilla, and whisk well to combine.  Just before ready to pour the cake into the pan, add the baking soda to the rest of the ingredients in the measuring cup and whisk well.  Immediately pour into the sourdough base, and stir well to combine.

Pour about half of the batter into the prepared pan.  Sprinkle about 2/3rds of the filling over the top, making sure to include most if not all of the raisins.  Top with the remaining batter.  Sprinkle the last of the filling over the top.  Using a long spatula, knife, or chopstick, swirl (as if to marble) through the cake.  The intent isn't to create a true marbled effect, but rather to gently incorporate the filling through the dough, since the sourdough batter is a bit foamy after adding the baking soda.

Bake in preheated oven for about 50 minutes, until the tester comes out cleanly from the center.  Cool for as long as you can in the pan before cutting.  You may wish to top with an icing or a thinned buttercream frosting, but it is perfectly good as is.

sourdough lithuanian coffee cake

I actually liked the cake more than I suspected I would.  Even after tasting the batter - it surprised me.  It's incredibly moist, and seems sweeter on its own than the non-sourdough version (which really did need frosting to help it along I think... not that there is anything wrong with that).  The final sprinkle of sugar makes a crispy crust, perfect for alongside your first cup of coffee for the day.  Those few cacao nibs that I added on a whim were a good idea, when still a bit warm they were a true chocolate nuance without any of the sugar of chocolate chips or chunks.  Making sure the raisins were all tucked underneath the batter was a good idea too since they all plumped up adding sweetness without any burnt caramel undertones.

I was actually curious what makes this cake deserve the name "Lithuanian". When searching for Internet answers, all that came up was Clare's Corner Copia in New Haven, Connecticut and this insanely popular dessert that has been served there for the past 35 years.  I'm thinking that  the marriage of raisin and coffee is a decidedly Eastern European combination, and maybe one that resonates so well with me because of my ancestral roots in that part of the world.

In any case, making either the traditional version (from Claire's, read here), or this very worthy sourdough version will make the side of your coffee cup very happy.  

Friday, June 15, 2012

Golden Slumbers: California Extra Virgin Olive Oil

I feel like we've reached the age where there doesn't seem to be anything new left under the sun. We've already put men on the moon and the Beatles have conquered. In the past 10 years alone the world has shrunk immeasurably due to the Internet; the vastness of what we can now find on a whim is staggering, yet I still feel the thrill of new discovery in my own food world. I have found real olive oil, and it is indeed like hearing the Beatles for the first time all over again.

I haven't eaten much olive oil for the past few years. I tried brand after brand of mediocre oil, organic and non-organic, imported and blended. I really had no idea what I was looking for - but my taste buds told me that I hadn't found it yet and I began to wonder if I would ever find that oil I had read about: silky, sexy, health improving oil that knocked my socks off and was worth every cent. Oil that I felt confident in using, without fear of rancid bitterness plaguing the back of my throat.

Meanwhile, I'd been upping my consumption of coconut oil, which I still use frequently. Two years ago, I finally ditched health-industry sponsored canola oil for good and replaced it with flavorless grapeseed oil (which, to be honest, I am still leery of so I use it sparingly). For most things baked or sauteed, I've opted for coconut oil or plain old butter. Unfortunately I'd all but given up on olive oil.


I recently decided I needed to find out more about olive oil, and that I needed to find an exceptional version that I was unafraid to serve to friends and family, one that was impressive and didn't put me (further into) the poor house to buy. I found California Olive Ranch oil, and the one bottle I've been sampling - living with really - for the past month and a half has really changed my life.

I knew the minute I got this bottle that it was something special. It came when my Mom was here visiting, and we opened and tried it with a fresh loaf of bread. My Husband poured more into his dipping bowl, a motion that caught my attention immediately. This wasn't old, ordinary oil, it was fresh and grassy, it tasted of olives and was a beautiful green color. It was oil to be proud of and I started to use it everyday and in nearly everything I made.

walnut-hazelnut-<span class=
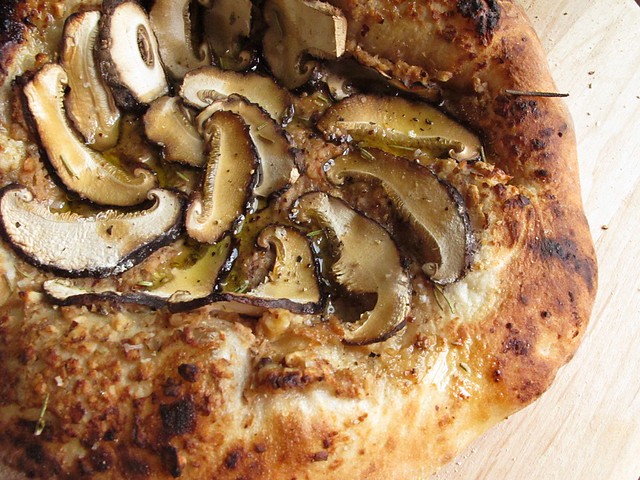
vegan walnut- hazelnut shiitake pizza...

Olive oil is the only "commercially significant" oil produced from a fruit. When thinking of olive oil as fruit based, it makes perfect sense that most of the lesser quality oils I've had in the past had rancid, unpleasantly bitter tastes. True extra virgin olive oils, made carefully without heating and with first rate olives, yield uncompromising flavors like complex wines. They are released to the public with nuances of the land they grew up in, the olive varietals they are pressed from, and their numerous healthy olive compounds in tact.

<span class=
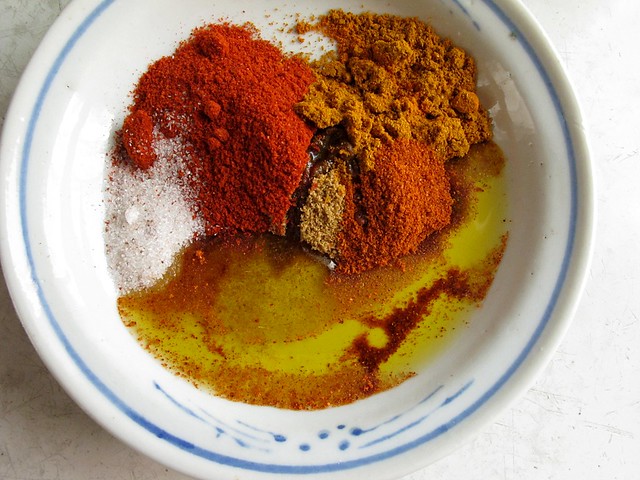
my favorite spice paste, used in Sourdough Msemmen (flatbreads).

About the same time I received my bottle of Everyday Extra Virgin Olive Oil, I began reading the book Extra Virginity by Tom Mueller. It chronicles the sordid history of the olive, how it was important to the ancients for commerce, health, and vitality - and how increasingly it has become a commodity that has been tampered with. True extra virgin olive oil is made with first rate fruits still on the tree, not those that have fallen to the ground and then collected, and it is milled within hours of picking. Essentially it is a fresh fruit juice, pressed at the proper moment of ripeness and hopefully then minimally processed and laid to rest in tinted bottles where it is protected from too much heat and light.

(I haven't quite finished this book yet, but it is fascinating, and I recommend reading it if you are curious about the world of olive oil. You can also catch an NPR interview with Tom Mueller here.)

As I read through the early pages of Mueller's book, I began to wonder if the California olive oil was as good as Mediterranean oil. While our climate in North American can only approximate the Mediterranean climate in parts of the west coast, certainly oil produced here is more "environmentally friendly", since it is only shipped across the country to reach me than around the world. I found that there are many quality olive oil producers in California, and many of them are certified by the California Olive Oil Council, a quality control panel that ensures the Extra Virginity of oils being sold under that name.

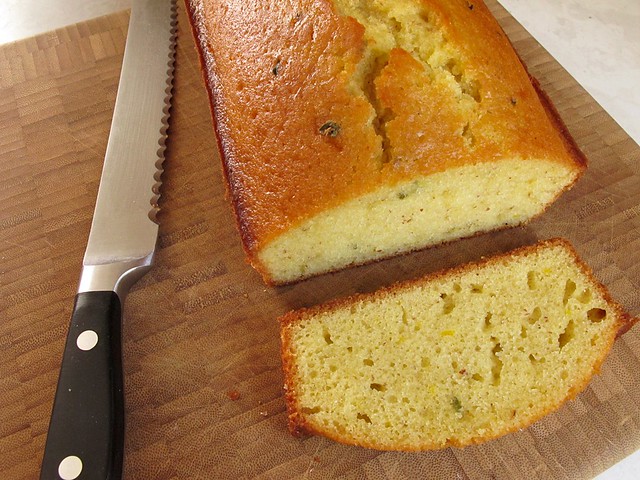
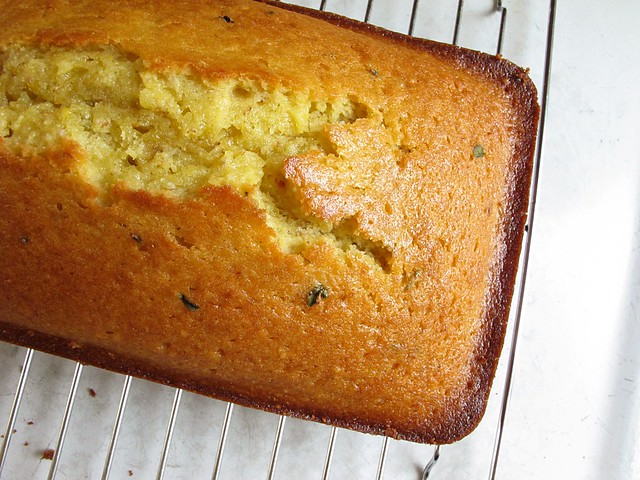
French yogurt cake, with olive oil

I really felt like I experienced a wide range of this olive oil's abilities. I ate it plain on bread, with vegetables, drizzled on the best steak I've ever personally made. I used it over higher heat with no smoking whatsoever, and griddled zucchini and peppers and onions in the heat of post-tortilla-making cast iron skillets. I drizzled it plain over grain and vegetable salads, and finally I made an olive oil cake.

I based my cake on Dorie Greenspan's French Yogurt Cake, and added some blossoming lemon thyme from my garden. The slightly herbal lemon thyme was a good match for the grassy underpinnings of the olive oil. I infused some sliced strawberries with more lemon thyme for a shortcake-esque dessert topping.

My loaf pans are standard 9 x 5 bread pans. I'd like to get some 8 1/2 x 4 1/2 tea loaf pans, because I think cakes baked in that size would be prettier when sliced. You can also bake this cake in a 9 inch round cake tin, slice it horizontally in half when fully cooled, fill with berries, and top with whipped cream.

(French) Olive Oil Yogurt Cake (adapted from Dorie Greenspan)
  • 1 c. ap flour
  • 1/2 ground almonds (or an additional 1/2 c. of flour)
  • 2 t. baking powder
  • pinch of salt
  • 1 c. sugar (I will cut this to 1/2 c. or 3/4 c. next time, it was a little sweet)
  • zest of one lemon, microplaned
  • 1 t. or more of lemon thyme leaves
  • 1/2 c. plain yogurt
  • 3 eggs
  • 1/2 c. extra virgin olive oil

Preheat oven to 350. Butter a loaf pan (or other baking tin), and place it on a rimmed baking sheet.

Mix the flour, almond meal, baking powder and salt together and set aside.

Put the sugar and lemon zest in a medium bowl and rub together with your fingers until the sugar is lemon yellow, slightly damp, and scented with lemon. Add the thyme leaves, and carefully mix them around with your fingers - not so much that they are beat up, but enough for them to release some of their thymey oils.

Then, add the yogurt and eggs and whisk until well combined. Add the dry ingredients while still whisking, until very well blended. Switch to a rubber spatula, and add the olive oil. Using folding motion, fold the oil into the batter. It will take a few minutes for the batter to come together. Scrape it into the prepared pan, smoothing the top.

Bake 50-55 minutes or until a tester comes out cleanly from the center and the cake begins to pull away from the sides of the pan. Cool 5 minutes in the pan set on a wire rack, then remove from the pan and let cool completely.

(To make infused strawberries, freeze a quart of whole (hulled) strawberries overnight then let them partially back to room temperature. When still partially frozen, slice and place in a bowl. Add sugar to taste (I used only about 1 T.), and a few sprigs of lemon thyme leaves. Refrigerate until defrosted completely, stirring every so often to encourage even distribution of flavor. Will keep several days under refrigeration, and remove the spent thyme sprigs before serving.)

French yogurt cake, with olive oil

This is a perfect, sophisticated version of strawberry shortcake. I served it for a friend's birthday, specifically because I knew it would pack up well. It was actually 2 days old when we first sliced it, and I think the flavors improved with time. I gave away the remainder of the cake to the birthday girl, and then mixed up these easy chocolate olive oil truffles. Even though I used the Everyday Extra Virgin Olive Oil instead of the single varietal Arbequina. I shouldn't have been shocked at the flavor of these, but I was. It is crucial to let the truffles come back to room temperature for 10 minutes before letting them slowly melt in your mouth...

olive oil truffle.

I had always heard that heating olive oil was not good and that it destroyed the health benefits of the oil. Now, I'm reading that good olive oils can reach temperatures upwards of 400 degrees with no deterioration, and that extra virgin olive oils are actually a very stable oil for sauteing and frying. I had no instances with sauteing this past month that showed the slightest wisp of smoking... and I've been liberally using olive oil once again as a go-to oil on top of the stove. It's so refreshing to embrace olive oil confidently!

I've now reached the end of my bottle, and spent part of this morning calling the various Sendik's locations listed on the California Olive Ranch website as a local retailers. On my 5th store, I called all the way up to Mequon (which would have been quite a drive for me), the manager happened to be with his specialty foods rep. They actually ordered the Everyday Extra Virgin Olive Oil to come in to the Franklin store for me early next week! Thanks to Sendik's outstanding customer service I will be out to pick up a new bottle locally next week. If you are interested in picking up a bottle and in are in the Milwaukee area, I'd try calling their service desk before making the drive out to 51st and Rawson just to be sure. I think it is an oil they would be able to get consistently if there was enough demand.

I will also likely place an order through the California Olive Ranch website if I'm not able to source the varietals locally. They offer discounts for recurring shipments, and I'm thinking that I will order with a friend and split the shipping costs. I can't wait to taste the Arbequina varietal in particular, and later this year I'll hopefully get some of the seasonal Limited Reserve as well.

It's easy to be excited about re-tasting something for the first time. It's wonderful to know that there are some quality extra virgin olive oils being produced in the US, and it feels terrific to be able to count on a consistent, healthy alternative to the confusing and suspicious claims on supermarket shelve bottles. Hopefully, this isn't the last of the California-produced extra virgins that I am able to sample!

Disclaimer: I did receive a bottle of California Olive Ranch's Everyday Extra Virgin Olive Oil for review, but the opinions expressed here are entirely my own. I loved this oil and would recommend it to anyone looking for an affordable, quality extra virgin olive oil!

Friday, April 27, 2012

Daring Baker's Challenge April 2012: Armenian Nutmeg Cake

The Daring Bakers’ April 2012 challenge, hosted by Jason at Daily Candor, were two Armenian standards: nazook and nutmeg cake. Nazook is a layered yeasted dough pastry with a sweet filling, and nutmeg cake is a fragrant, nutty coffee-style cake.

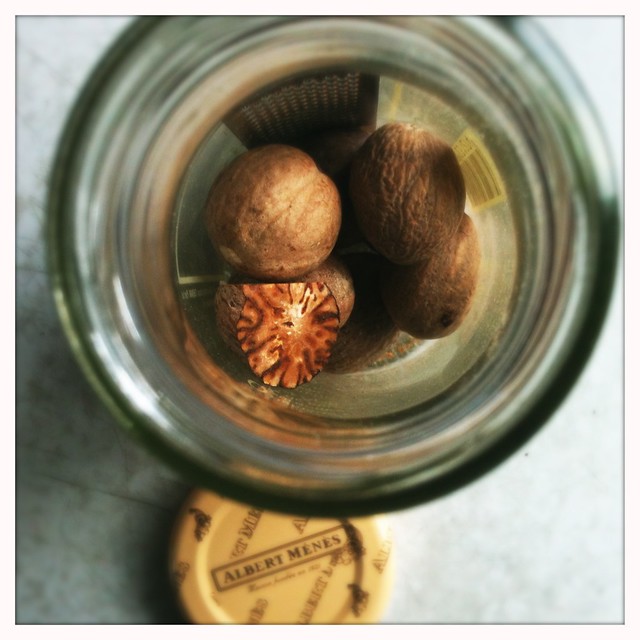
nutmeg

I did this challenge mid-month when I simply couldn't go another day without cake. I take no small amount of pride in my continuing quest for a less-sweet life, and now when I look back on the amount of sugary desserts I've eaten daily for so long, I cringe. I'm not saying that I don't still love to bake, and that I don't still love cake (or all sweet things) with a preternatural, bear-hugging grasp, but somehow my mind has changed and I don't crave sweets on an hourly basis like I used to.

But... this little gem of a cake! I actually made a petite half recipe and baked it in a little vintage 8-inch springform tin - and I made the entire thing in the food processor. I know what you already may be thinking, "doesn't a food processor beat up the gluten in the flours, making a tough crumb?" That's actually what I thought too but it's not the case, and it makes a cake in a single bowl in such a short amount of time that I can see this lovely little cake in my oven just after you phone to say you are stopping over in a half hour.

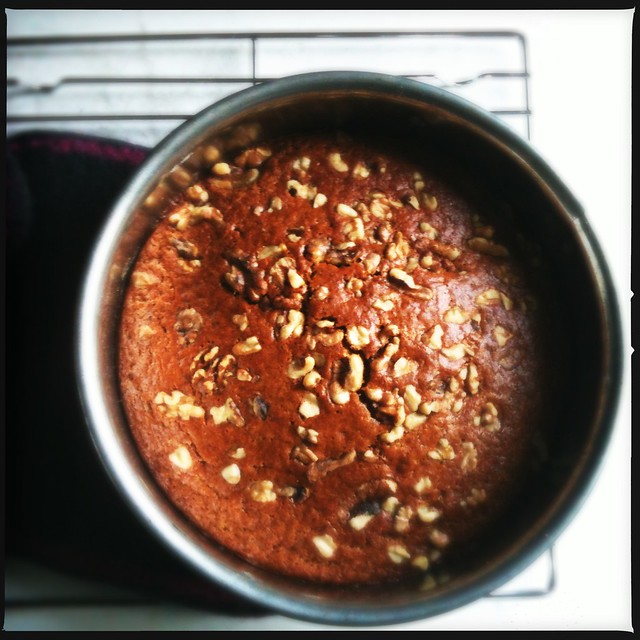
nutmeg cake

Nutmeg is one of my most favorite spices. Whenever I think of it, all shy tucked up into a rough-skinned nut, growing in trees cloaked in a web of more delicately flavored mace, I think of baking logic I picked up somewhere along the way. Improper logic if I am honest, since it called for judicious use of nutmeg due to it's overwhelming nature. Overwhelming? I can hardly be overwhelmed by such an alluring spice. I almost always add additional nutmeg to spice cakes and cookies, a faint additional grating over rice pudding or even oatmeal.

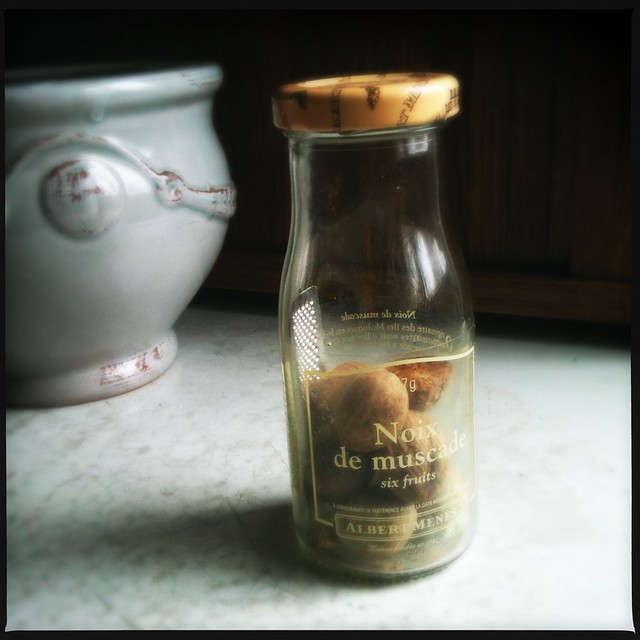
A little additional reading, and I wonder if judicious use of nutmeg was recommended due to a history of purported psychoactive effects, some of which seem very valid according to this article I read from just a year and a half ago. While I'm not likely to grind up 3 whole nutmegs and down it with a glass of wine to experiment, I will happily make this cake again with a whole teaspoon of freshly ground nutmeg, and I'll do it for some while with this beautiful jar that E brought me from France, even though it caused a slight stir in security since it looked like a liquids container on the X-ray machine.

nutmeg

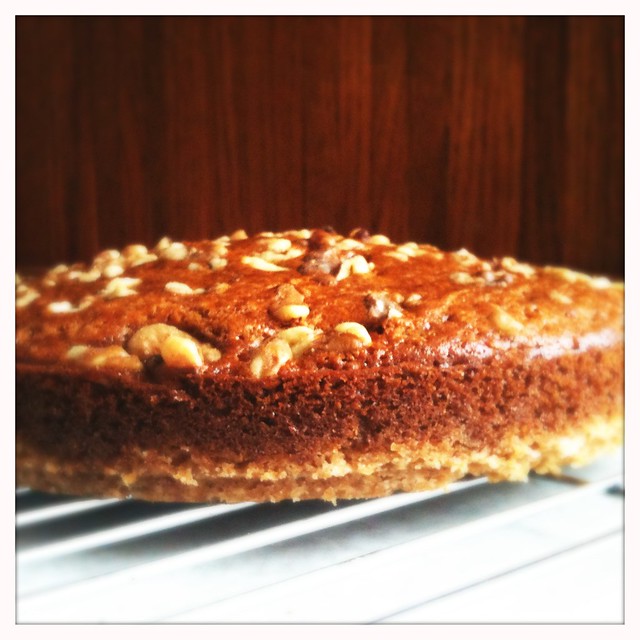
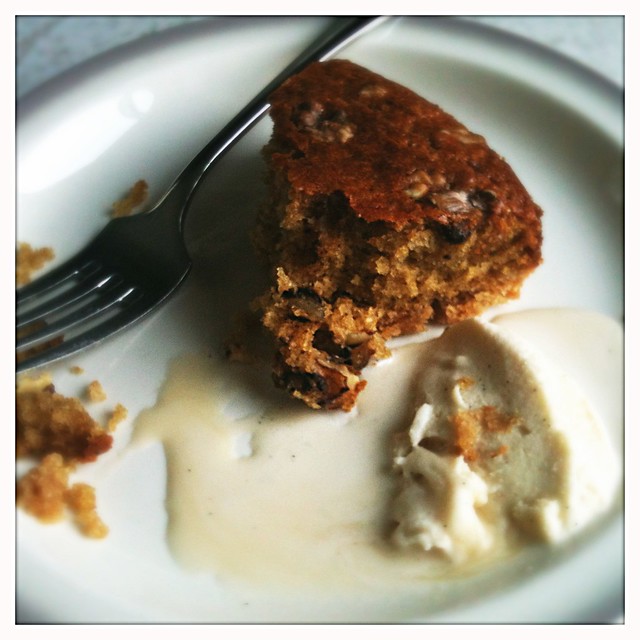
This cake makes its own bottom butter crumb crust, which is endearing because it gives a little textural difference to the cake. I also cut the sugar in half for my purposes, and both my picky boys (the one who rarely eats dessert, and the one who could live only on dessert) loved it. This little cake didn't last long because we had three happy eaters; next time I will make a double amount and increase the baking time ever so slightly. Serve it with some vanilla ice cream for an impossibly elegant dessert, or by itself, a plain, happy wedge with the morning coffee.

Armenian Nutmeg Cake (adapted from DB host Jason of DailyCandor)
1 8-inch cake, 8 small but satisfying servings
  • 1/2 c. whole milk
  • 1/2 t. baking soda
  • 1/2 c. ap flour
  • 1/2 c. whole wheat flour
  • 1 t. baking powder
  • 1/2 c. brown sugar
  • 6 T. (6 oz.) cold butter, cubed
  • 1/4 c. walnuts (or more)
  • 1 t. freshly grated nutmeg
  • 1 egg

Preheat oven to 350.

Mix the baking soda (not baking powder) into the milk, and set aside. Put the flour, baking powder, and the brown sugar into your food processor, and pulse until uniformly mixed. Add the cubed butter, and pulse until uniformly mixed into tan-colored crumbs.

Pour HALF of the crumbs into your springform (I used an 8-inch for this half recipe, a 9-inch is recommended for a full sized recipe) pan. Press out a crust using your fingers.

Crack the egg into the food processor with the rest of the crumbs still in it. Grate the nutmeg into the crumbs, and pulse until well-incorporated.

Pour in the milk and baking soda mixture. Continue to mix until a slightly lumpy tan batter is formed. Pour the batter over the crust in the springform pan. Gently sprinkle the walnut pieces over the batter. Unafraid of hallucinations, I grated a few whispers of additional nutmeg across the top.

Bake in the preheated oven for 25 minutes or so, until the top is golden brown, and when a toothpick comes out clean.

Cool the cake in the pan for at least 10-15 minutes before unmolding. You may need to run a thin knife around the edge to help it. (I removed the sides of the springform when the cake was still warm, and then waited until it was cooled completely to remove the bottom.)

Note: You can find the original recipe here. It calls for 1 egg for the whole cake, and only white, all-purpose flour. I found the texture with whole wheat and a whole egg in a half cake recipe to be perfect, but you may want to make the original version if you prefer lighter cakes - although I wouldn't say this one was dense per se.

nutmeg cake nutmeg cake

It might be impossible to describe the scent of this cake when it was in the oven, calling my family members from other rooms to ask what it was and could they eat some. This response could be another reason why this cake is a new favorite, sure to become a standard for years to come!

Many thanks to Jason for this reason to bake up a well-deserved cake, and be sure to check out the Daring Kitchen websites for the original recipe, the gorgeous looking recipe for nazook (which I will likely make someday when I'm not obsessing about desserts consumption...), and the blogroll of Daring Bakers and their takes on the challenge this month.

photo

Wednesday, February 15, 2012

Cake Made from Crumbs... and Parsnips.

I love to be able to make something from nothing, and when the something turns out to be a cake, I like it even more. Of course, this cake isn't really made from nothing, but it is a clever form of recycling since it uses dried sourdough bread crumbs instead of flour. It has a few other staple ingredients too, but the premise of making flour out of flour is just plain genius.

It's not my idea, but rather it belongs to Susan at Wild Yeast. This cake was originally a carrot cake, and the first time I made it I told nearly everyone I knew about it. It had loads of cardamom, it kept well for a week, it was the most exotic thing to bake something out of nothing. These were the talking points that kept me fascinated with a more healthful version of dessert, a cake that was unusual enough to stand out amongst its more refined relatives.

shredded parsnips

Over the weekend, I planned a dinner around more of the Volger veggie burgers that I'm still so obsessed with. I had decided that I wanted to showcase this bread crumb cake, but that I already had too many carrots in my dinner plan. Enter the parsnip: earthy, slightly vegetal, kind of sweet, and plays well with spices. I did some minor swapping, pineapple for pears, cardamom for ginger and suddenly a new version of bread crumb confection was done. The best thing is, I'm now dreaming of vegetable cakes in rainbow colors, bread crumb cakes made with earthy beets or sunny sweet potato. Maybe even a celery root cake. That will really get them talking...

parsnip cake batter

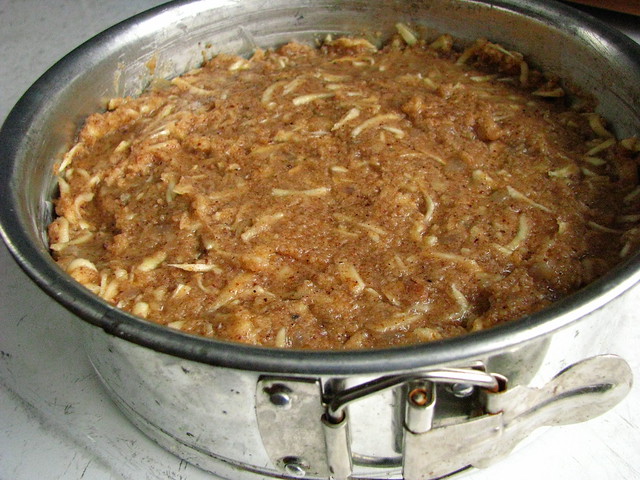
I'd imagine you could use any grate-able root vegetable in this cake, and then choose spices to complement. I used an 8 inch springform pan, since you really do need to be sure the cake tin you use is at least 2 inches tall. Next time, I'll use some fresh ginger in this as well, the spiciness seemed to wear off after a day or two using the powdered spice. If keeping the cake longer than 2-3 days, I'd recommend putting it in the refrigerator - it's very moist in the center. I bake this cake by metric weigh measure, a good conversion tool can be found here.

Sourdough Bread Crumb Parsnip Cake (adapted from Wild Yeast)
  • 172 g. fine sourdough bread crumbs (about 1 c.) (I grind to nearly a powder in my VitaMix)
  • 1 t. baking soda
  • 1/2 t. cinnamon
  • 1/2 t. nutmeg
  • 1 1/2 t. ground ginger
  • 1/4 t. cardamom
  • pinch of kosher salt
  • 87 g. butter, room temperature
  • 86 g. dark brown sugar
  • 86 g. sugar
  • 2 eggs
  • 98 g. plain yogurt (I use my homemade, which is the thickness of buttermilk, so I'd assume that would also work)
  • 2 t. vanilla extract
  • 144 g. grated parsnip
  • 131 g. pureed pear (about 1 whole canned pear, drained)
  • 100 g. walnuts, toasted and chopped

Preheat oven to 350. Butter an 8 inch cake pan that is at least 2 inches deep.

In a small bowl, sift bread crumbs together with dried spices and salt. In another small bowl, combine yogurt with vanilla.

In the bowl of a stand mixer fitted with a paddle attachment (or in large bowl if working by hand), beat butter with sugar for several minutes until lightened. Add the eggs, one at a time, beating one minute after each addition. (Scrape down sides of the bowl as necessary.) Add the dry ingredients alternately with the yogurt/vanilla mixture, beginning and ending with the dry ingredients. (The mixture will look "curdled".)

Spread the batter into the prepared pan, smooth down the top and bake for about 50 minutes until a tester inserted near the center comes out nearly clean, and the cake begins to pull away from the sides of the pan.

Remove from oven to a wire rack and cool 15 minutes before removing from pan.

baked parsnip bread crumb cake

A little care is needed in dealing with this baked cake, after all it is essentially flourless, and the gluten present is converted. This cake is very good the day it is made, but seems to improve and taste even better in the following days. Moisture soaks into the dried bread crumbs, and the shredded vegetable also seems to tenderize. It really is just a cake you need to try to be able to understand, to taste this something made from nothing is almost like eating stone soup.

However you arrive at them, breadcrumbs are a worthwhile, homemade food as well. I used to have them in more ample supply before I started turning out better loaves of bread, but now I specifically dry out the heels so I can grind them into powder. Their keeping power is almost surreal; I store them in glass jars my dark spice pantry and they last very well for several months.

After this last cake, I found my supply to be running quite low on breadcrumbs, so I sliced the last 1/3 of my current loaf of bread and popped it into my already-running dehydrator to dry. I had never done that before, and the texture of the dried bread surprised me! It seems worth experimenting to make dehydrated croutons, or crostini...

parsnip cake

If you happen to be looking for a new cake to experiment with, look no further than this one. It is a miracle of cake, and a delicious alternative for vegetables. It's just sweet enough to not need frosting, but perfectly at home if you desire to make some (I'd have gone with a ginger cream cheese frosting if pressed.) It's also a good candidate for the "everyday cake" category, as well as refined enough for dinner party status. It's sure to win you some kitchen points for creativity and frugality as well!


This post has been Yeastspotted, appropriately, since Yeastspotting is Susan's weekly roundup of yeast-related posts from submissions. Check it out for immediate inspiration!