Showing posts with label chocolate. Show all posts

Wednesday, March 18, 2015

Old is new again: Chocolate Olive Oil Bundt Cake.

I don't spend so much time around adults.  Because of this, I find that I carry on whole conversations with myself in my head.  As I'm washing the dishes I think about recipes, where things originate and who changed them to accommodate what was in hand.  I'll waiver my opinion if necessity was the mother of invention, or if times changed and so did palates.  I'll wonder just how many times the same chocolate cake was recycled and made new.  And then I'll revisit my stacks of old timey recipes and see what I would do differently or if I would even bother making half of them anymore.

I don't make nearly as much dessert as I used to (although it would seem that is usually what I end of writing about), and when I do feel the need to make something I slash the sugar mercilessly.  I almost make a point to see how much I can cut before a boy will notice, and to my endless amazement it never happens.  They see chocolate.  They eat.  Maybe that is just the way our brains work.  (That also works with adding vegetables into chocolate covered things: zucchini, squashes, carrots, and beets have all been eaten this way too, none the wiser.)

I might not have a knack for a lot of things, but I have the uncanny ability to remember desserts that were eaten and enjoyed and who ate them and enjoyed them.  My special skill allows me to recall then that the last time I made this recipe, a faded photocopy of a Hershey's chocolate bundt cake that my mom wrote upon in her perfect penmanship her mark of highest approval "very good!", was in 2011 when we had a houseful of my husband's friends over to watch the Pacquaio/Marquez fight.  For that occasion I didn't cut the sugar or use olive oil, I made it pretty much as directed and frosted it with melted chocolate chips.  And it was eaten completely.  But my tastes have changed since 2011, and one thing that I find myself loving even more than less sugar is olive oil and chocolate together.  
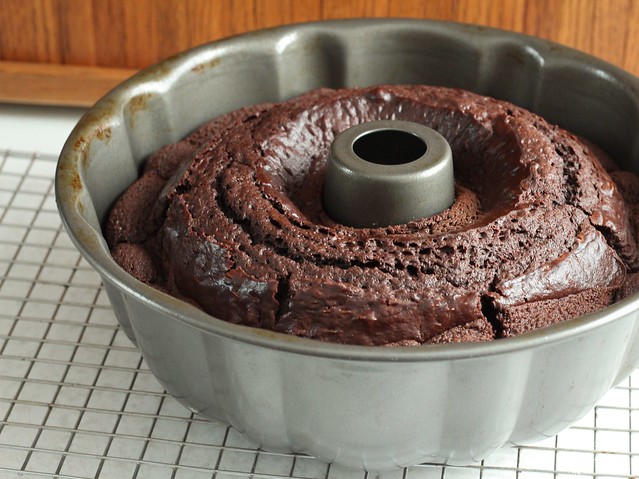
olive oil chocolate bundt.

For at least the last year, pretty much every time I see a baked good call for canola or sunflower oil - any "flavorless" oil really -I use olive oil instead.  I never worry about the density or richness of olive oil overpowering things... and maybe because I love the flavor of good olive oil so much it never does.  I am able to find the once elusive California Olive Ranch oil easily now, and it is my baking staple.

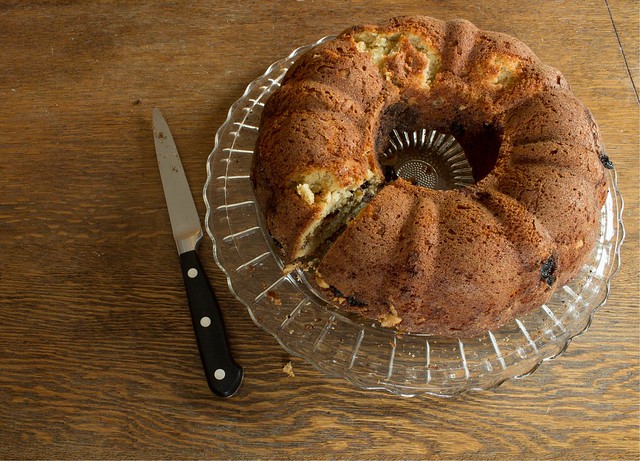
This cake lasts well for about 4 days if covered well.  I generally store cake at room temperature, and this one develops better flavor on the second day - although the texture is really very nice the day it is baked.  You would do well to serve this sans frosting and with a scoop of vanilla ice cream, or just dusted with powdered sugar.  I made half of the recommended amount of frosting "glaze", which is glossy when first topped and then dries matte. Beating the batter well causes the cake to dome up (as seen in the picture above), but when inverted it isn't noticeable. 

Chocolate Olive Oil Bundt Cake (adapted from Hershey's)
serves 8-12
  • 1 2/3 c. ap flour
  • scant 1 c. sugar
  • 1/2 c. cocoa powder (I use a blend of natural and dutch cocoa)
  • 1-2 t. espresso powder, optional
  • 1 1/2 t. baking soda
  • 1/2 t. baking powder
  • 1 t. kosher salt
  • 1/2 c. olive oil 
  • 1 1/2 c. buttermilk
  • 1 t. vanilla
 Heat oven to 350 degrees and butter and flour a 12 cup bundt pan and set aside.

Combine flour, sugar, cocoa powder, espresso powder (if using), baking soda, baking powder and salt in a large mixing bowl.  Measure olive oil, buttermilk, and vanilla into a smaller bowl, and add all at once to the dry ingredients.  Beat on medium-high speed with a hand mixer (or by hand if you like) for a full 3 minutes, making sure the sides are scraped well into the batter.

Pour into prepared pan, and bake in the center of the oven for 50-60 minutes or until a tester comes out clean.  Cool in the pan on a wire rack for 10 minutes before inverting and allowing to cool completely before frosting.

Chocolate Glaze
(double this amount for a thicker topping)
  • 2 T. sugar
  • 2 T. water
  • 1/2 c. bittersweet chocolate chips
Bring the sugar and water to a just boil in a small saucepan, stirring to be sure the sugar is dissolved completely.  Remove from the heat and stir in chocolate chips, stirring well with a spatula to melt them evenly.  Immediately spoon (or spatula) the thick glaze onto fully cooled cake.

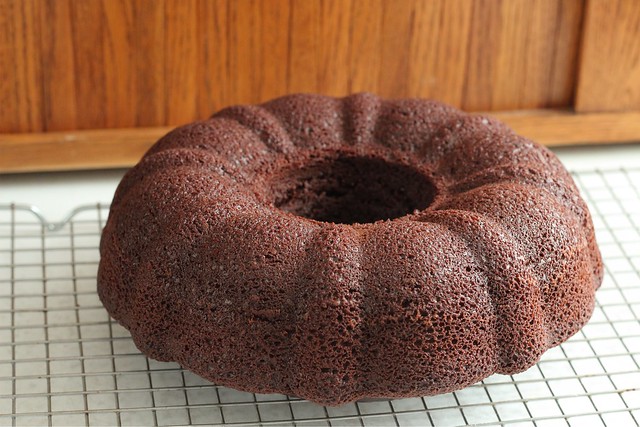
olive oil chocolate bundt.

I have no completed cake picture.  In part because I didn't feel like setting up a tripod in the fading light just before the daylight savings time change... but also in part because I feel the increasing need to only photograph things when I feel like it.  Another thing I think about when washing dishes is if there are any food bloggers that can tell stories without the aid of photography?  While the two go hand in hand, sometimes it's more important to just eat the end results and be satisfied with the enjoyment of cake.  Especially when they have been few and far between.

Saturday, May 3, 2014

Chocolate Tahini Tea Cake.

Spring really seems to be taking the time in arriving this year.  We've had more downright cold and rainy days than moderately sunny and mild ones, and just when I think I should be craving more bright and light food, I'm drawn back to rib-sticking, carb heavy, comforting things.  Not that I ever need an excuse to bake.  Even in the hottest part of the year, I brave the lighting of my oven.  No matter the season, baking is akin to life-giving breath for me - especially in the sourdough department.  Quick bread making, however, seems to dwindle in the summer months, becoming much more of an occasional task than a weekly one.  

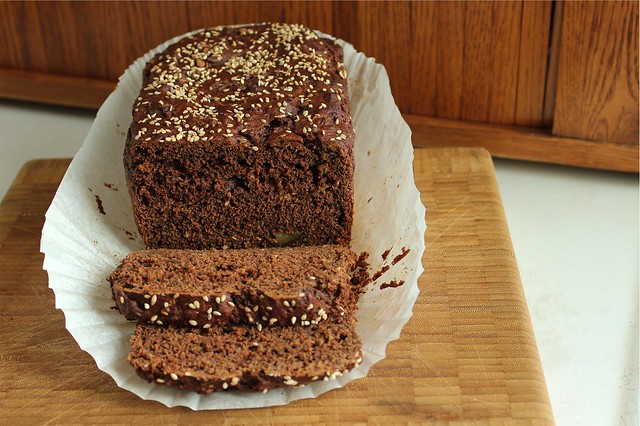
chocolate tahini bread

I was thankful for a rainy day yesterday to sneak in another quick bread before the world heats up, one that was more of a tea cake baked in a loaf form and healthy enough to be breakfast if so desired.  I had been thinking about making something with tahini all week, remembering this piece that Deena wrote recently highlighting it.  I love sesame, but never really have tahini on hand.  It seems that my co-op only stocks unhulled sesame seeds, which turn into a fairly bitter butter when ground and processed in the Vitamix.  On a recent shopping trip, I discovered they had packaged tahini themselves and I couldn't resist picking up a little container even though it goes against my grain of making things myself.

During the week Deena sent me more tahini links, and I was almost sold on this one for flatbreads rolled with sweetened tahini.  But couldn't shake both the feeling that I needed a quick bread, AND a little bit of chocolate.  I certainly didn't expect to hit that sweet spot on the first go, but I did!  A perfect concoction of not-too-sweet, reasonably healthy, and just a tad elegant.

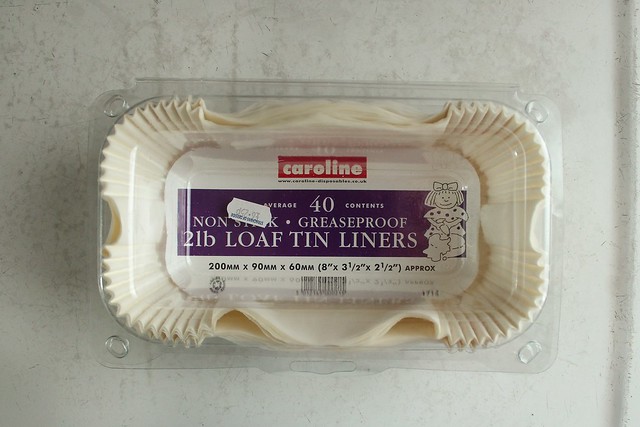
loaf pan liners.

I used loaf pan liners that my parents brought me back from a trip they made to the UK. They are smaller than the standard 9x5 or 10x4 loaf tins I have, but fortunately a friend gave me a couple of Ziploc brand (they said "made in Italy" on the labels) glass loaf dishes.  They come with plastic lids for storage - and I love making loaves in them because it's like I have built in storage after baking.  This recipe fits perfectly into the 2 lb. loaf mold, it will likely bake faster and look a little more shallow if using a different sized tin.  I might actually seek out a metal tin this size, since I like a smaller loaf cake or quick bread that has some height to it.
As I searched for a starting point for this cake, I ended up "de-veganizing" a recipe I found on have cake, will travel.  I took a cue from the apple-walnut tea cake I love so much and used a shredded whole apple, peel and all.  It translates as near-applesauce bits and almost disappears altogether.  Some additional sesame seeds lend a little toothsome interest, and using raw honey makes me feel good in a way that agave nectar would never.  And of course, no new baking adventure happens lately without the addition of milk kefir...

I made this cake by weight - approximate amounts for conventional measure are also given.

Chocolate Tahini Tea Cake (inspired by have cake, will travel)
  • 40 g. cocoa powder (about 1/2 c.)
  • 180 g. ap flour (about 1 1/2 c.) (I used local Lonesome Stone Milling flour which is more wheat than most ap flours)
  • 1 1/2 t. baking powder
  • 1/2 t. baking soda
  • 1/4 t. fine salt
  • 96 g. tahini (1/4 c. + 2 T.)
  • 210 g. honey (1/2 c. + 2 T.)
  • 113 g. shredded apple, peel and all but core/seeds removed (1 small, 4 oz. apple - or about 3/4 c. shredded)
  • 154 mL whole milk kefir (scant 3/4 c.)
  • 3 T. sesame seeds, divided
 Preheat oven to 350.  Prepare glass loaf tin with a liner or butter generously and flour well.

Sift cocoa powder, ap flour, baking powder, baking soda, and salt together in a large bowl.  In a medium sized bowl, mix the remaining wet ingredients.  Add the well mixed wet ingredients to the dry and use a spatula to fold together until just mixed and no dry areas remain.  Fold in 2 T. of the sesame seeds, and mix just to distribute evenly.

Transfer mixture to prepared loaf pan, and use a knife to smooth the top evenly.  Sprinkle with remaining 1 T. sesame seeds.  Place in the center of the oven and bake for about an hour until a tester comes out clean.  Remove from oven to a wire rack, and cool for 45 minutes before removing the bread from the loaf pan to continue cooling.  Try to let the bread cool completely, about 2 hours, before slicing.

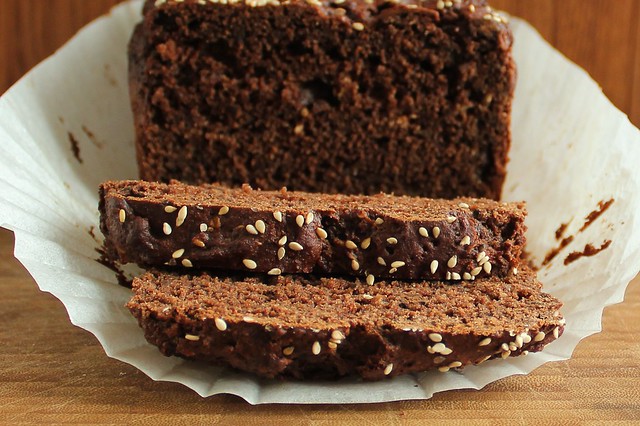
chocolate tahini bread-2

This bread has such a nice texture, almost "puddinglike" in the way that some British puddings are steamed and then marvelously moist-centered.  It has a satisfying sesame flavor, that if you wanted could be further complemented by spreading a slice with equal parts tahini and sugar (or honey), but that wouldn't really be necessary.  It's good enough to enjoy a fat slice alone, with the company of a cup of coffee or tea.  I've taken to storing the leftover in the refrigerator, as much to prevent myself from eating it too quickly as to protect the dense structure and ample fruit moisture.

I love how a tangent can take over my food life, winding away over a few days and inspiring me more by the hour.  I love having dedicated friends who are up for chatting spontaneously about the best uses for ingredients or which recipe to use or tweak for which occasion... and better yet don't find it the least bit strange when the overwhelming craving for sesame seed hits.

chocolate tahini bread-3

Not sure if I ever officially mentioned it here that I broke down and joined Pinterest.  You can find me under the same name: rcakewalk.  I've been enjoying it, and even more, I enjoy following the whims of my friends and seeing how pins morph and manifest into new inspirations.  I'm doing pretty good at going back over things I've saved for later too.  Unfortunately, I rarely make things more than once (when cooking and not baking, that is), but this social tool is also helping me remember things that were wonderful, and is a quick reference when I try to recall or share.  I probably won't (definitely won't) be adding paper straws to things to photograph, but a pin did lead to my Easter Lamb Cake! 

Monday, February 24, 2014

Salad Dressing Cake.

I guess it all started when I wanted a tuna sandwich for lunch one day last week.  I love tuna sandwiches, but I hate hate hate the conundrum of purchasing mayonnaise.  I like lacto-fermenting my own, but haven't done that so much since I made the commitment to higher quality olive oils.  I don't have any "neutral flavored oils" in my kitchen arsenal at all anymore; if it can't be made with butter, olive oil, coconut oil or bacon grease, I probably will opt out.  But that tuna sandwich was nagging me, and I recalled this recipe for super quick mayonnaise made with a whole egg and an immersion blender.  Armed with a new bottle of olive oil, I figured I'd give it a go.  I didn't have any purchased mayo on hand, so it was my only option if that tuna sandwich was going to become a reality for me...

salad dressing cake

To the basic mayo recipe, I added a spoonful of dijon mustard and extra lemon juice; the recipe did work (although the texture wasn't quite as lovely as the yolks-only, lovingly hand whisked versions).  My only complaint was that the quality extra virgin olive oil I used made the mayo seem a bit too rich and mineral-y.  It was edible, but I didn't want to go through the trouble of lacto-fermenting it, and I didn't have a good excuse to go all out on a mayo binge to use up the cup or so I had leftover.  I also didn't think I could pass it off on the rest of the family - I have one kid who can't even eat condiments yet, another who won't eat them out of choice, and finally a husband who is a harder sell than I am.

Fortunately I remembered about salad dressing cake.  Salad dressing cake could very well be the first cake I ever made myself, mixing the simple, pantry-staple ingredients with a whole cup of mayonnaise, Miracle Whip actually, which was what we called mayo at my house growing up.  It was proof that miracles do indeed exist.  How on earth could you make a chocolate cake with a cup of sickly sweet and thick Miracle Whip that left no trace on the tongue of mayo?  How could you make a cake that was so perfectly full of moisture, a good keeper at room temperature or in the fridge, and barely messed up the kitchen?  It's magic.  And I'm glad I remembered it now. 

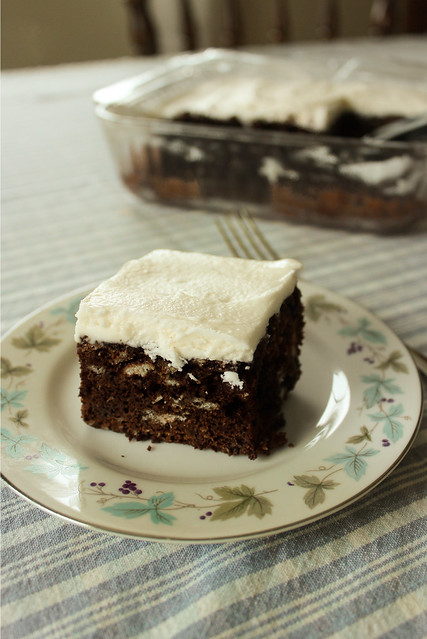
salad dressing cake

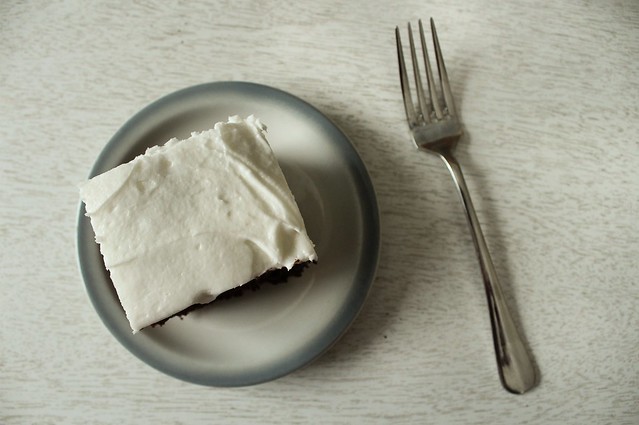
You can frost this cake however you see fit, but I can't properly enjoy an everyday chocolate cake at my house without a simple butter infused, powdered sugar based buttercream spiked with almond extract.  I don't ever measure, I just try not to make too much, and if I do, I store the leftover in a glass jar until I need to make another cake - which will then usually happen sooner than later because I have extra frosting.  It's a vicious cycle.

I also encourage you to make immersion blender mayo with 100% olive oil for this recipe.  You get a nuance of olive in the background for those that are interested in tasting it, yet it's subtle enough that the rest of your family won't go noticing it.  They'll just think you made the best chocolate cake ever.

Salad Dressing Cake
makes 1 8x8 inch cake
  • 2 c. ap flour
  • 1 c. granulated sugar
  • 1/2 c. cocoa powder
  • 1/4 t. kosher salt
  • 2 t. baking soda
Preheat the oven to 350 degrees.  Butter a glass 8x8 inch baking dish.

In a 4 cup measure (or medium sized bowl), combine the mayo, cold water, vanilla, and espresso powder if using and stir well to combine.  (I still had a dirty immersion blender from making the mayo, so I used it to blend the wet ingredients.)

In a large mixing bowl, sift or mix well the dry ingredients.  Pour the wet ingredients over the dry and stir until just mixed thoroughly and no dry spots remain.  Use a spatula to ease it into the prepared baking dish, and smooth the top out towards the corners to counteract some of the doming action in the center as the cake bakes.  Bake in the preheated oven for 35-45 minutes, until a tester comes out clean.  Cool completely before frosting.

salad dressing cake


Friday, May 10, 2013

Crackers & Dips: Ivy Manning's Latest Book (And Giveaway!)

Ivy's Skinny Mints

When I think about Ivy Manning's new book, I can't believe that I've been looking forward to seeing the final result since October of 2011.  Time seems both to linger and fly in waves, and looking back over the amount of time that has passed since I first became acquainted with Ivy and was welcomed into cookbook testing with vigor seems oddly surreal.  

Ivy and I have never met; we were introduced online by another online friend who I have actually met in person, Deena Prichep.  Last Thanksgiving, I looked forward to an evening dinner with Ivy as she visited her homeland of Wisconsin, but an unfortunate flu plagued her (and I was iffy about eating, being newly pregnant) and the opportunity slipped by, drowned under the weight of even more passing time.  The good thing about this passing time is that I know Ivy and I will one day finally sit down to supper together, and when dark days hit, I think about this with great anticipation.

I read a lot of cookbooks.  Some year, I should actually keep track and write them all down.  I've talked about this before, how my library was my greatest resource when I was somewhat economically challeged this past year. Kind souls have somehow graced me with copies of books found in thrift shops or book sales, even the occasional author sent me a review copy of a new work I really wanted, when even those $13 meager dollars sent to Amazon were going to be a stretch.  Good things have a way of making themselves available to those who really appreciate it I think...
Amaranth Crackers with Cheddar and Pepitas served with Roasted Tomatillo and Avocado Dip
 (Photo courtesy of Chronicle books.)
 
While things on the personal finance front are finally looking up, my bookshelves could quickly grow heavy with new titles that are worth owning, and Ivy's newest book is definitely among them.  Crackers & Dips:  More than 50 Handmade Snacks is a DIY foodist's dream: and I should know, because I got to make and taste firsthand quite a lot of the contents.  The books that usually find permanent residence in my house are the ones that I grab not only for inspiration, but because I know that the recipe will work on the first go - if I'm making it for the 20th time, or just last minute for company.  The other necessary criteria for cookbook ownership is beautiful design, and this book is also beautifully photographed and illustrated, a unique combination of photography (by Jenifer Altman) and chalk drawings (by Kristina Urquhart).  There might not be a better book suited for both gift-giving and practical use!  Every recipe in this book is going to work for you, for snacking, appeasing the kiddos, gift giving, or party-going.

A School of Fish Crackers (Gluten-Free!)
(Photo courtesy of Chronicle Books)

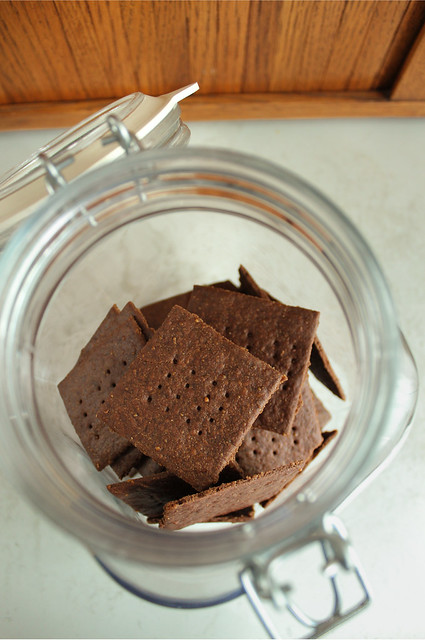
I decided that to celebrate the release of this book, I'd make one of the crackers that I didn't get a chance to test: the Skinny Mint Chocolate Grahams.  Billed as a dessert cracker, these would remind you of a much tastier version of the classic Girl Scout classic.  And after reading this article on the suspect ingredients in them, I feel all that much better to have a really good DIY version!

I love baking by weight, since it is much faster than measuring all the ingredients traditionally, and is more consistent.  This book has metric weights for all of the ingredients listed. I know that when doing my portion of the testing, I double checked the volume to metric ratio, so even if you bake by volume, you can be assured of a good result.
"
Skinny Mint Chocolate Grahams (Ivy Manning, Crackers & Dips: More Than 50 Handmade Snacks)
  • 14 T. (200 g.) unsalted butter, at room temperature
  • 1/2 c. (100 g.) sugar
  • 2 T. honey
  • 1 1/2 t. peppermint extract
  • 1 1/2 c. (185 g.) all purpose flour
  • 1 c. (130 g.) whole wheat flour
  • 1/3 c. (30 g.) unsweetened cocoa powder
  • 1 t. baking soda
  • 1/2 t. fine sea salt
  • 1 c. (170 g.) bittersweet chocolate chips
  • 1 t. canola oil
Preheat oven to 350 f. (180 c.).

Line two baking sheets with silicone baking mats or parchment paper.  In the bowl of an electric mixer or in a large bowl using a handheld mixer, beat the butter, sugar, honey, and peppermint extract together until fluffy, stopping occasionally to scrape down the sides of the bowl.

Sift both flours, the cocoa powder, baking soda, and salt into a medium bowl.  Add the dry ingredients to the butter mixture and mix on low speed until the mixture forms moist crumbs; do not overmix.  Gather up the dough with your hands (it will come together when squeezed), and divide the dough into two equal-size pieces.  Form each piece of dough into a rectangle measuring 4x6 inches, cover in plastic wrap, and refrigerate for at least 30 minutes and up to 2 days.

Place a piece of parchment paper on a work surface and lightly dust it with all-purpose flour.  Place a portion of dough on the paper, dust it with flour and place a piece of plastic wrap over the dough.  Roll the dough out until it is 1/8" thick, picking up the plastic once or twice to make sure there are no creases in the dough.

Cut the dough into the desired shapes using cookie cutters, and use a lightly floured spatula or bench scraper to transfer the crackers to one of the prepared baking sheets; reserve and chill the scraps.  Prick each cracker a few times with a fork or comb and bake until they are crisp and smell chocolaty, 10-12 minutes, rotating the sheet once from front to back while baking.  Transfer the crackers to a cooling rack.

While the first batch of crackers is baking, repeat the rolling and cutting process with another ball of dough; the chilled scraps can be re-rolled once.

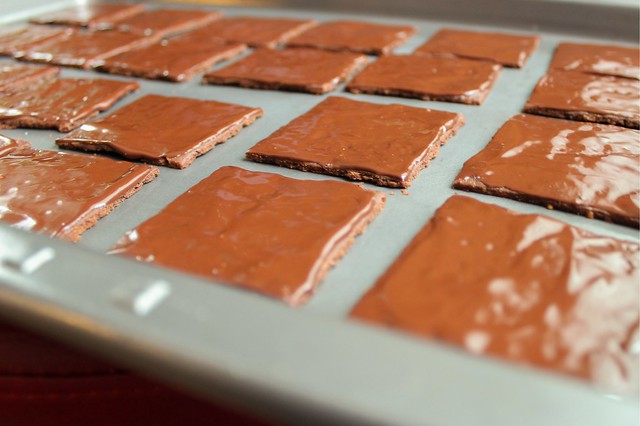
In a small microwave-safe bowl or a double boiler, melt the chocolate chips until smooth.  Remove from the heat and whisk in the canola oil.  Using an offset spatula, spread about 1/2 t. of the melted chocolate mixture over each cracker and place them on a baking sheet.  Refrigerate the graham crackers until the glaze is set, about 30 minutes.  Once the glaze has set, store the crackers in an air-tight container in the refrigerator for up to 2 weeks.
"

Ivy's Skinny Mints
Ivy's Skinny Mints

In my whole foods kitchen, I successfully substituted sucanat for the sugar, and olive oil for the canola.  I also like to roll out the crackers directly on a silicone mat with a piece of plastic wrap over the top.  I found that I didn't need to use any additional flour that way.  I also cut the crackers into squares in part because I was a bit lazy, but also because there is less waste that way.  And besides, that way I get to nibble every ragged edge of chocolate mint graham cracker myself.

Ivy's Skinny Mints

So now for the fun part:  I was given a copy of this book to giveaway!  This is the first giveaway that I've had that didn't contain something that I made myself (Pomegranate Jelly or Candied Jalapenos), or something that I bought to giveaway (WMSE Rockabilly Chili Cookbook).  Historically, I am a small blog with a dedicated readership, so your chances to win this beautiful book are very good.  I wouldn't mind if you share the post and the word about Crackers & Dips with your friends however, because I know they would appreciate a homemade batch of crackers too.  To enter, just leave a comment below before midnight next Friday, May 17th.  I'll choose a winner using a Random Number Generator on Saturday the 18th, and post it here and on the CakeWalk facebook page.

I'll leave you with the image of my favorite recipe from the book:  another dessert cracker made with rich olive oil, orange blossom water and aniseed.

Spanish Olive Oil Tortas
(Photo courtesy of Chronicle Books)

This recipe is alone is worth the cover price, especially when you consider that a gourmet, wax papered bag of pretty Ines Rosales crisps costs quite a bit in specialty food markets... and isn't it so much better to make it yourself anyway?

Congratulations to Ivy Manning on a gorgeous accomplishment!


Disclaimer:  I did receive a copy of this book for review, and another to giveaway.  My opinions of this book are my own, well deserved, and are not embellished!

Wednesday, April 10, 2013

(Magic) Bars. And Paleo Diet.

My state is known as the drunkest state.  It's a fact that I'm not so proud of, and certainly one that bears no bragging rights in my opinion.   My city is founded on capitalizing breweries and brewers, Eastern European immigrants taking advantage of our excellent water resources and creating an environment where it's pretty easy to find a good beer, if not a few too many good beers.

Perhaps working in tandem with the drunkest state moniker are the  numerous corner bars dotting the city.  They give us the feeling of a being larger city than we are, and if you are not participating in the binge culture, there is also a sense of civic pride in our hand-craftiness.  Good things are indeed made in Wisconsin.

Not the least of which are bars of another sort, the cookie type hastily pressed into pans to avoid the more time consuming labors of shoveling drop cookies into and out of the oven every 12-15 minutes.  I assume it's a trend passed down by the same ingenious Midwestern predecessors, that at every church potluck and every summer picnic someone brings a pan of bars.  I think I took this for granted (or maybe didn't even acknowledge it) until a dear out-of-town friend visited years ago with her boyfriend at the time.  He had never been to the Midwest, and it was he who first mentioned the connection about bars and the Midwest to me.  And, wouldn't you know, my mother-in-law came over that very afternoon with a delicious pan of "Hello Dollys", a classic bar cookie for me to serve to my company...  I remember he was thrilled.

Paleo magic bars.

In my own kitchen, where I can't really spend too much time, cookie baking usually rules outright.  But cookies also run the risk of being too easily snatched and hastily eaten by yours truly.  They also have a lot of sugar, usually both white and brown to tame the tenderness issues often plaguing them.  I'm still dutifully trying not to give in to sugary temptations, and this results in not baking so many cookies anymore.  And then there is the business of all that grain...

I am endlessly interested in health as it pertains to staying out of the mainstream medical system.  That is probably the most driving force in my personal sugar reduction:  I know that nothing good can come from sugar.  Lately I see an increasing interest in the Paleo diet, or other similar diets that preach the exclusion of glutenous grains, adopting a more primal way of eating.  In general, I'm never going to subscribe heart and soul to a diet that leaves me devoid of all carbohydrates, especially when I am a baker at heart.  But more and more I can really see the appeal and benefit of these diets to mainstream America.  It's good to spread the gospel of heavy helpings of fruits and vegetables, and it's good to demonize the processed food industry.

So many people are so much busier than I am, and have far less time to soak, sprout, and obsess over what kinds of grain should be eaten.  In these cases, perhaps it is better just to cut grain out altogether?  Most people can benefit from eating more vegetables, and even more quality (well raised and sourced) meats too.  After all, paleo diets really are just whole food diets that focus on raw materials and not packaged cheats - and that is what is most important.  I'll support that type of diet!

Aside from health issues, I find it a great challenge to bake healthy, low or no-sugar desserts that satisfy both my need to bake and my desire for sweets.  I'm finding that desserts labeled "Paleo" fit that bill nicely.  One of my best recent finds has been a Facebook link called Just Eat Real Food.  It is exactly what it purports to be, real food links from across the Internet where it seems I'm spending less and less time.  It's nice to have a resource of links like that, one where I found this recipe for Paleo Magic Bars the other day.  Last night after supper I mixed them up and baked them, and I could barely get the kiddo out the door to school fast enough this morning to finish them up.  Our stormy morning was good for cracking a few more of the in-the-shell pecans my neighbor gave me anyway.

Paleo magic bars

For the date or date/fig paste called for in this recipe, I used leftover from the raw/vegan fig bars I made recently.  To make it, soak dates (and/or figs) in boiling hot water for about a half hour, then run them through a food mill or food pro with a bit of the soaking water until they have a jammy consistency.  I would think a half cup of dried fruit would give you more than enough paste for this recipe.  Also, make sure that your honey is "runny" and not crystallized and you will have an easier time of things.

Paleo Magic Bars (barely adapted from the Healthy Foodie)
makes 1 9x9 inch pan

bottom layer:
  • 1/3 cup date (or date/fig) paste(see note above)
  • 1/2 an avocado
  • 3 eggs
  • 2 T. raw honey
  • 1 t. vanilla
  • 2 T. coconut flour
  • heaping 1/4 c. cocoa powder
  • 1/4 t. baking soda
  • 1/4 t. cream of tartar
  • pinch of kosher salt
  • handful (50 g. as the Healthy Foodie suggested) sprouted almonds, medium chopped
top layer:
  • 1 1/2 c. unsweetened, shredded coconut
  • 2 T. melted coconut oil
  • 2 T. softened coconut "manna" or butter (like this, or make your own)
  • 1 T. raw honey
  •  2 egg whites, beaten to soft peaks in a medium sized bowl
chocolate drizzle:
  • 1 T. melted coconut oil
  • 1 heaping T. cocoa powder
  • 1 T. raw honey
  • handful of toasted and chopped pecans for garnish
Preheat the oven to 365.  Brush a 9x9 glass pan with coconut oil, and line with crisscrossing sheets of parchment paper.  (This aids in removing from the pan later.)

In a food pro, combine the date paste, avocado, 3 eggs, honey, and vanilla.  Process until very well blended, about 30-60 seconds.  In a small bowl, mix coconut flour, cocoa powder, baking soda, cream of tartar, and salt with a fork until well blended.  Add to the contents of the food pro, and pulse just until combined, about 5 good pulses.  Spread the bottom layer into the prepared pan, taking care to smooth into the corners.

Rinse the food pro container out well, and add the coconut, coconut oil, coconut manna, and honey and process until well blended, about 1 minute.  Add this mixture to the soft peaked egg whites, and fold in gently until well combined.  Spread this mixture carefully in an even layer over the chocolate layer.

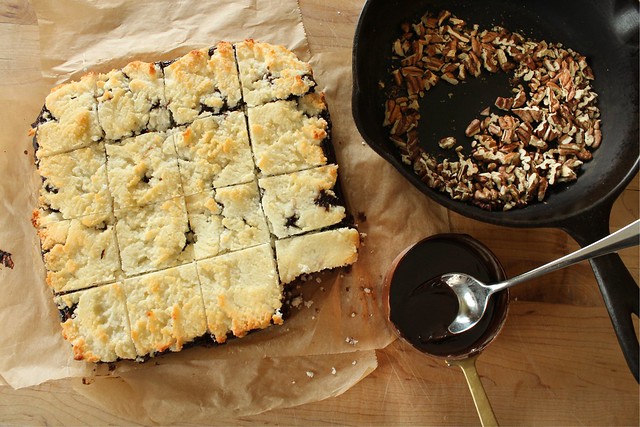
Bake in the preheated oven for 22-25 minutes until lightly browned across the top.  Cool on a rack for an hour (until room temperature) then refrigerate overnight or until well chilled (about 6 hours).

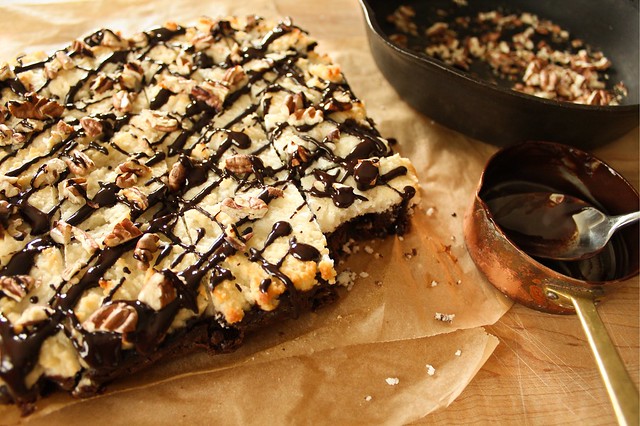
When chilled, make the chocolate drizzle by combining the coconut oil, cocoa powder and honey in a small bowl.  Add a little extra coconut oil if it seems too thick, you are looking for a thin drizzle consistency.  Drizzle across the top of the bars, and sprinkle with the pecans.  Store in the fridge, in part so you don't eat them all right away.

Paleo magic bars

These bars are much less sweet than traditional sweetened condensed milk versions of magic bars... but they still really satisfy.  I won't claim that they satisfy as much as a giant wedge of traditional magic bar, but they do not leave you feeling guilty and with a "why-did-I-just-eat-that-whole-thing" kind of feeling.  And, they are made entirely with real, whole foods.  I especially like that my picky kid liked them, and that they sneak in avocado, which is tremendously underused in chocolate bakery...

Paleo magic bars.

So what about you?  Are you also seeing a shift to more healthful, whole foods with less refined carbohydrate emphasis?  I think the Paleo trend is here to stay for awhile, and I am kind of glad.  I'm not about restriction and arguing over the color of my potato (though for the record, I do prefer sweet potatoes), but there are a lot of valid ideas surrounding this more natural way of eating and viewing food.

Wednesday, March 20, 2013

Sourdough Surprises March 2013: Cake!

It was funny that cake was the sourdough theme of the month for the Sourdough Surprises baking group.  Just before the announcement,  my Facebook friend (and all-around good, real food maven) Holly was talking about some amazing changes she made to a chocolate sourdough cake.  It took me a few days to realize that the reason her cake looked so good and so familiar was because I had already made it - and changed it with similar results!  I've said it before but it's true that it is a good thing that I have this space to write things down or I'd never remember half of what I've made.

sourdough chocolate cake

The sourdough cake that we both loved was this one from King Arthur Flour.  I had played around with it quite a bit (apparently, that was a year ago already), and then in my quest for not eating as much dessert, I let it go for too long a time.  As Holly did, I had cut the sugar in half, but in my experiments this month, I used a different hydration sourdough starter - and both coconut and olive oils for the fat.  The result was a moister version of that butter cake I made a year ago, and one that was not really high in sugar.  Not counting the frosting, and allowing for 9 large slices in a 8x8 glass pan, I figure it around a tablespoon per serving.

I've been in full swing with Ken Forkish's breads - all of them turning out stellar, and I may be hooked on the 80% hydration starter that he calls for.  I'm still figuring out the best feeding schedule for both my baking and waste reduction, but meanwhile, I'm turning 80% starter into all of my old favorites:  crackers, cake and pancakes all turning out better than with my 100% liquid levain.  The only thing I forgot about making this cake is that it takes some serious arm power (and lack of concern for gluten toughening) to incorporate the starter into a homogenized looking batter.  

Don't be afraid to beat this cake until you are certain you have overbeaaten it, otherwise you may have traces of white sourdough bits in your chocolate cake, which you can't really taste, but they aren't as pretty.  And a stand mixer might work, but avoid using a hand mixer... I learned the hard way that the batter tends to climb up the beaters and generally make a huge mess of things.

Chocolate Sourdough Cake (adapted from King Arthur Flour, with regard to Holly Langenburg, and my previous chocolate sourdough cake post)

makes one 8x8 inch cake
  • 1/2 c. well-fed 80% sourdough starter (about 150 g.)
  • 1/2 c. milk
  • 1 c. AP flour
  • 1/4 c. melted coconut oil
  • 1/4 c. olive oil
  • scant 1/2 c. sugar
  • 1/2 t. salt
  • 1 t. vanilla
  • 6 heaping T. cocoa powder (natural process)
  • 3/4 t. baking soda
  • 1 egg
Combine starter, milk and flour in a mixing bowl and let ferment. (KAF says at least 3 hours, I ferment at least 8, and this particular cake fermented for 16.  It's okay to leave it at room temperature during this fermentation time.) After ferment time, proceed:

Preheat oven to 350 degrees.

In a good sized bowl, mix the oils, sugar, and salt together well.  Add the vanilla, cocoa powder, baking soda, and egg, and mix thoroughly.

Add the sourdough/milk/flour ferment to the chocolate-butter mixture. I found it easiest to use a sturdy spatula to mix the two - be firm but not vigorous and also be patient. Stir to combine until very few streaks of sourdough remain, and the batter looks like batter. It's sticky stuff!

Pour into a greased 8x8 glass baking dish, and use a metal knife or spatula dipped in water to spread batter evenly in the pan. The cake does "dome" a little, so you can try to push a bit more batter into the corners than into the center if this matters to you. Bake for 30-35 minutes until a tester in the center comes out clean.

You can use whatever frosting you like to top it after it cools completely - I just went with a simple American-style buttercream in a thin layer..
lithuanian coffee cake.
Sourdough Lithuanian Coffee Cake.

I have made a number of cakes with sourdough starter - and also talked about them before.  Most recently, I was excited about this Lithuanian Coffee Cake.

I also truly love this fully fermented Applesauce Cake, which uses a whole pint of home-canned applesauce and is based on a Spanish Bar Cake recipe my Gram used to make.

I'm fairly certain that sourdough cakes are not something I'm done experimenting with - and I'm sure I'll find plenty of links this month to convince me to consume a bit more sugar!  Take a look below to check some of them out!

Sunday, January 20, 2013

Sourdough Surprises: Babka

 babka

The January Sourdough Surprises bake along was babka, and I felt particularly excited to experiment since I am finally feeling more like myself.  I can't tell you how disappointed I was for so many weeks to have my stomach turn at the mention or sight of bread!  It was like my lifeblood was replaced with someone else entirely and while my brain knew that it was likely to be temporary, my heart worried that I would never return to my old self.

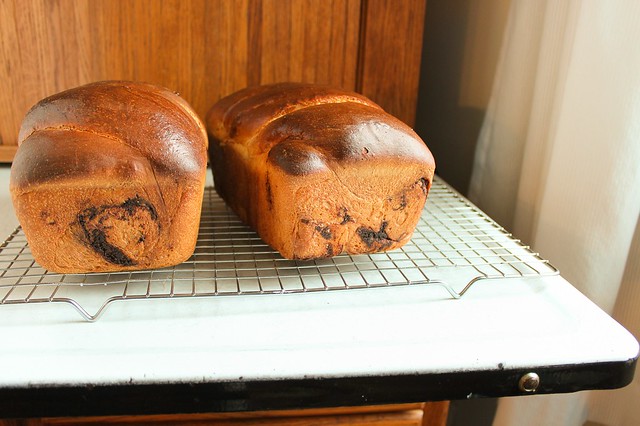
Well, the carbohydrates look appealing once again - and not a moment too soon, since this fortified bread is one of the lovliest I've ever made.  There is something about working with large amounts of eggs and butter and coaxing it into a durable dough that is so satisfying.  The bread seems to take on a life of its own too, changing ever so slightly as the days wear on but still wonderfully tasty in new ways.

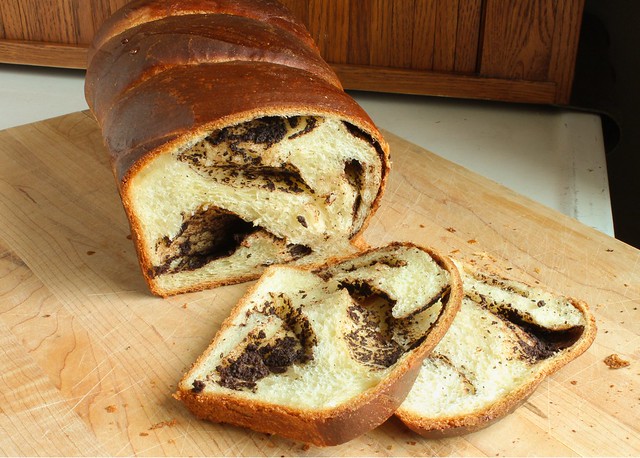
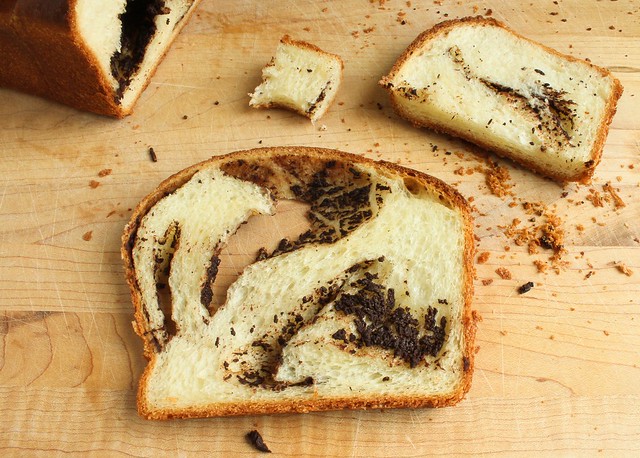
I have never eaten a babka.  Not once.  Until recent years, I left all heavy duty, enriched breads to my imagination, never making the excuse to play around with them.  But no more.  Like for most people I'm assuming, babka conjures images of 90's television, when Jerry Seinfeld and Elane Benes are disheartened at the prospects of bringing an inferior offering to a dinner party.  Even though I'd never had one, I knew that my sourdough babka would need two things:  to be based on a recipe by Nancy Silverton (a native Los Angelean who no doubt knows her bread) and to have both chocolate and cinnamon twisted into the middles.  Both turned out to be good requirements.

rising babka

babka risen

I based the bread dough on Silverton's brioche recipe, using my 100% hydration starter that had been recently fed.  In her book Breads from the La Brea Bakery, she writes the recipes by days.  This bread for example takes 3 days, and I will follow her writing format since it is a good way to keep track of what you are doing.  While I usually prefer bread weights in metric, her book is written with conventional measurements.  I will keep them as she had them.

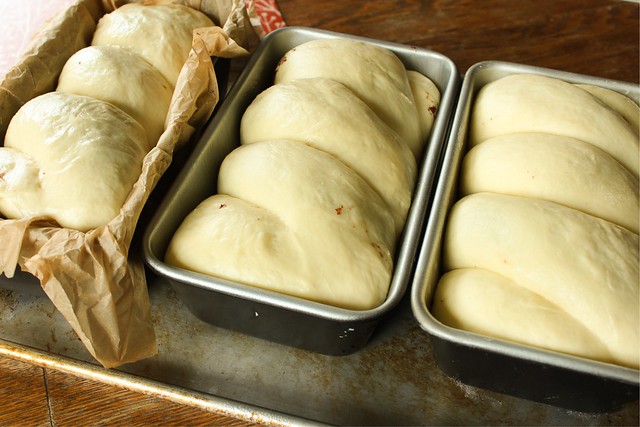
Her recipe yielded almost 4 pounds of dough for me, and I got 3 loaves from it (each about 1 lb, 5oz. prior to baking).  I recommend using a wider, shallower pan rather than a longer, deeper one - and I also recommend using melted butter to coat them.  The parchment test wasn't such a success.  It "sliced" into the sides of the bread as it baked and made for an unattractive loaf.

Sourdough Babka with Chocolate and Cinnamon (inspired and adapted from Nancy Silverton and Peter Reinhart)

First Day (best to start in the morning)

  • 6 oz. (about) 3/4 c.) cool water
  • 1 t. active dry yeast
  • 6 1/2 oz. (about 3/4 c.) 100% hydration sourdough starter
  • 4 oz. (about 1/2 c.) milk
  • 10 oz. (about 2 1/4 c.) bread flour
Make a sponge by combining everything in a large mixing bowl and stirring well to combine.  Cover tightly with plastic wrap, and leave it at room temperature for 10-12 hours.  The dough should have bubbles across the top.  Transfer to the refrigerator for another 10-12 hours.

Second Day
  • 5 eggs, room temperature
  • all of the sponge from the first day (above)
  • 1 pound (about 4 cups) bread flour, plus extra for dusting
  • 3 oz. sugar (about 1/3 c.)
  • 1 T. Kosher salt
  • 9 oz. (2 sticks, plus 2 T.) unsalted butter, cut into tablespoon sized pieces and at room temperature
Beat the eggs gently in a small bowl just to break them apart and set aside.

Remove the sponge from the refrigerator and take off the plastic wrap.  Place sponge, half of the eggs, flour, and sugar in the bowl of a stand mixer fitted with a dough hook.  Mix for about 2 minutes.  (Dough should be kind of wet and sticky, but may not be depending on how much of the eggs were added.)

Add the salt, and continue mixing for 2 minutes, scraping down the sides of the bowl if needed.  With the mixer still running, add the rest of the eggs a little at a time, making sure they are incorporated into the dough each time before adding more.  Once all of the eggs are in, increase the mixer speed to medium high (Silverton recommends holding on to the mixer - and I had to!) and continue mixing until the dough is smooth and satiny and begins to "climb" up the dough hook, about 8 minutes.  (The dough will also clean itself from the sides of the bowl.)

Turn the mixer speed back down to medium, and begin adding the butter one piece at a time.  Make sure each piece is incorporated before adding the next.  After adding all the butter, increase the mixer speed again to medium high and mix the dough until "smooth and shiny (but not greasy)", about 4 minutes.  Silverton notes that the internal temp of the dough should be 76 degrees, mine didn't make it quite that high.  (You may have to add a bit of flour to encourage the dough to wrap around the hook, but I found that after the mixer stopped, the dough seemed more slack than it did as it was mixing.  I added more flour as I had it out on the counter.)

On a lightly floured work surface, turn out the dough and knead by hand for a few minutes.  Use a bench scraper to help you, the dough will be quite sticky.  Try to avoid adding too much extra flour. Coat a clean, large mixing bowl (or clean the mixer bowl you just used) with oil, and place the dough in it.  Put it in the refrigerator, to let it continue fermenting 12-24 hours.

Third Day

Mix up chocolate cinnamon filling as described in the recipe below.  Melt a little extra butter to coat the loaf pans, and brush the melted butter on them until they are well covered.  (My pans were 9"x5"x3".)

Remove the dough from the refrigerator.  It should be noticeably risen to a twice the starting size.  (If it isn't, let it rise at room temperature about an hour to continue rising.)  Turn the dough out onto a lightly floured surface.  The dough is easier to work with cold, and it may be somewhat sticky as the coldness leaves it.  Weigh the bulk of the dough, and then divide into 3 equal loaves.  Put the portions of dough you aren't working with back into the fridge to keep cool.

On a very lightly floured surface, or not floured at all, roll out the dough until it is about twice the length of the loaf pan you are using.  (The width is not as important as the length - I watched this video, and you can see about the size around 2:06.)  Don't aim for dough that is too thin, about 1/8 of an inch is what mine was.

Spread 1/3 of the chocolate mixture evenly over the dough, leaving a bit of a border so that the dough will seal.  Starting with the long edge nearest you, begin to roll the dough up until you have a long snake.  Find the mid-point, and slice through it so that you have two equal sized pieces.  Place the pieces side by side, seam down, so that the cut edges are opposite (about 5:10 in the video above), and then gently twist from the center out so you have a nice, even twist throughout the bread.  Tuck it carefully into the buttered loaf pan, and set aside while you complete the others.

When all three loaves are completed, put them on a sheet pan and cover with a clean cloth.  The best way to proof the breads is by this setup:  Arrange the oven racks so that there is one on the bottom and one in the second position from the bottom.  Put an empty cake pan on the bottom rack, boil some water, and fill it.  As soon as it's filled, put the tray of breads on the rack above it and close the door.  Leave to rise until the dough is cresting the top of the pans, about 2 hours.

Just before the dough is about done rising, remove them from the makeshift proofer, remove the cake pan full of water, and preheat the oven to 500 degrees.  (The oven racks can stay in the same position.)  Let the oven heat for a good half an hour to ensure it is hot enough.  When ready to bake, beat an egg with a teaspoon of water and brush the tops of the breads.  Open the oven, and place the tray of three breads on the second to the bottom rack of the oven.  Immediately reduce the heat to 450.  Set the timer for 20 minutes.  After 20 minutes, the breads should already been a deep golden brown, but they still need to bake for an additional 15-20 more minutes.  Cover them with a sheet of aluminum foil if they are in danger of getting too dark.

After the breads have baked a total of 40-45 minutes, remove the tray from the oven.  One at a time, immediately remove the breads from the pans to a wire rack.  (If you buttered well, they should come out easily.)  If the sides of the breads feel firm, the breads are done - if they have some give, they will cave in as they cool... so return to the loaf pan and pop them back in the oven.  As with all breads, let them cool before slicing, but since there are three loaves, you can be impatient with one and slice into it after 20 minutes if you can't wait.

Chocolate - Cinnamon Mixture (adapted from Peter Reinhart via the Purple Foodie)
  • 225 g. dark chocolate (about 1 1/2 cups), grated (I used Callebaut bittersweet)
  • 1 heaping t. cinnamon
  • 1 heaping t. espresso powder
  • pinch of Kosher salt
  • 55 g. butter (about 1/4 cup), melted
Grate the chocolate over a medium sized bowl, then add the cinnamon.  Melt the butter and pour over the chocolate.  If it doesn't melt completely, use a microwave to carefully melt it fully or put the bowl over a saucepan of simmering water.   If the mixture cools as you are working with it, just heat it again and stir until smooth.

babka

Is this bread worth three days of waiting?  Yes.  And aside from just eating it still warm from the oven, it makes marvelous toast or French toast.

I hope I'm back to stay in this baking group!  I sure was happy with the experimenting this month - and I can't wait to see what's up next!

(This post has also been Yeastspotted.)

babka

babka

Friday, September 7, 2012

More Adventures in Gluten-Free Baking

I somehow feel like it's my personal goal to bake gluten-free treats that taste so good no one has any clue they are gluten-free.  It's not because I have trouble with gluten, and it's not because I'm vying for blog clicks and cashing in on a trend:  it's purely because baking is an adventure and gluten-free baking is the biggest adventure of all.

It's been awhile since I tried my first experiments with GF baking.  It began when I realized that my Vita-Mix could easily turn any whole grain into flour.  Since I run a fairly "whole food" kitchen, I already had tons of  raw material to work with - and the only thing standing in my way were a few minutes of prep time and the mess involved when grinding up lots of miscellaneous grains at once.

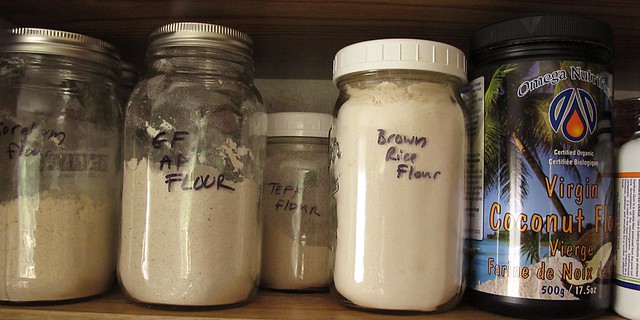
I've gotten a little smarter since I've discovered I love baking with GF ingredients, and I made a shelf in my pantry for all of my supplies.  Instead of grinding what I need when I need it, I can usually reach for a quart jar and then only occasionally run into the need to refill it.

GF baking pantry shelf

What exactly is on the shelf?  I keep jars of sorghum flour, brown rice flour, teff flour, tapioca flour (also called starch), potato flour, xanthan gum, a gluten-free AP mix that I make up according to this recipe, and a canister of coconut flour that a friend gave me and I haven't tried it in anything yet.  I personally have not yet found much difference between brown rice flour and white rice flour, so I only keep brown rice - and a nice bonus is that it is available in bulk at my co-op without being prohibitively expensive.  (Purchased rice flour is also much more finely ground than what I can produce in my Vita-Mix.)  Now that I've got a basic GF pantry going, it's easy to keep things in stock - and grind things from my other whole food staples like quinoa, millet, and oats on an as needed basis.

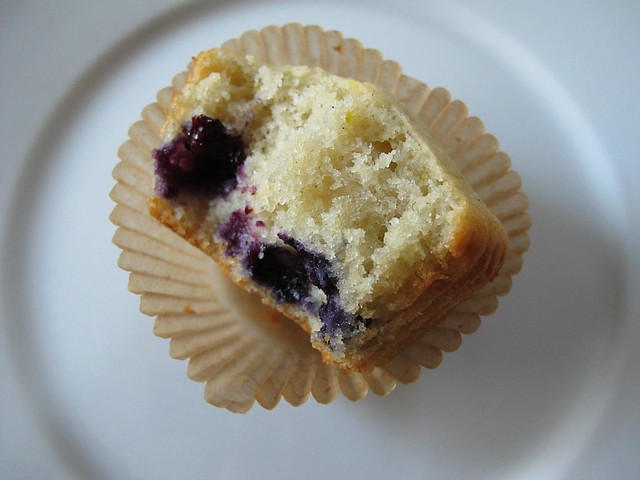
And, can I add that sorghum flour is my most favorite flour ever?  It's absolutely worth the expense, and I adore the texture and flavor it gives baked goods.  In fact, there was a whole cup of it in the blueberry muffins I decided to make yesterday...

GF blueberry muffin

These muffins, admittedly, were best fresh from the oven.  In fact, all of my tasters didn't suspect they were GF at all, and the texture was exactly like that of a regular blueberry muffin.  When I tried one this morning, the texture had changed a little, but was still very good - especially with a cup of coffee.  I should have tossed the frozen berries with a tablespoon or two of the floury mix to keep them from congregating towards the bottom of the muffins... I'll remember next time.

When I want muffins, I usually decide last minute - so waiting on butter to come to that magical room temperature isn't always an option.  I used coconut oil to great effect, it's 10 tablespoons by weight (the weight of butter),  I've given you the gram measurement.

Gluten-Free Blueberry Muffins (adapted from Gluten-Free Girl)
  • 142 g. coconut oil, soft room temperature
  • 1 c. white sugar
  • zest of one orange
  • 2 eggs
  • 1 c. brown rice flour
  • 1 c. sorghum flour
  • 1 c. tapioca flour (also called tapioca starch)
  • 1 1/2 t. baking powder
  • 1/2 t. baking soda
  • 1/2 t. kosher salt
  • 1 c. + 2 T. plain yogurt (I used full-fat)
  • 1 c. blueberries, not defrosted if frozen
Preheat oven to 350.  Ready 18 muffin liners in muffin tins.

Mix the brown rice, sorghum and tapioca flours, the baking powder, baking soda and salt together in a medium sized bowl and set aside.  (Toss the frozen berries with a tablespoon of the flour to keep them from sinking to the bottoms of the muffins.)

In a large bowl, mix the coconut oil, sugar, and orange zest with a hand mixer until just well combined.  Add the eggs, one at a time, mixing well after each.  Add half of the flour mixture, and mix until just combined.  Add 1/2 c. of yogurt and mix until just combined.  Add the rest of the flour mixture, then the rest of the yogurt, mixing after each addition as previously described, taking care not to overmix.

Fold in the blueberries.  Portion into the muffin liners, about 2/3's full, and bake for 20-25 minutes.  They should just be starting to brown around the edges, and a tester should come out clean from the centers.

I considered juicing the orange I used for zest and mixing it with enough powdered sugar to make a glaze.  They didn't need it, but would be pretty and perhaps more dessert worthy if you do it.

GF blueberry muffins.

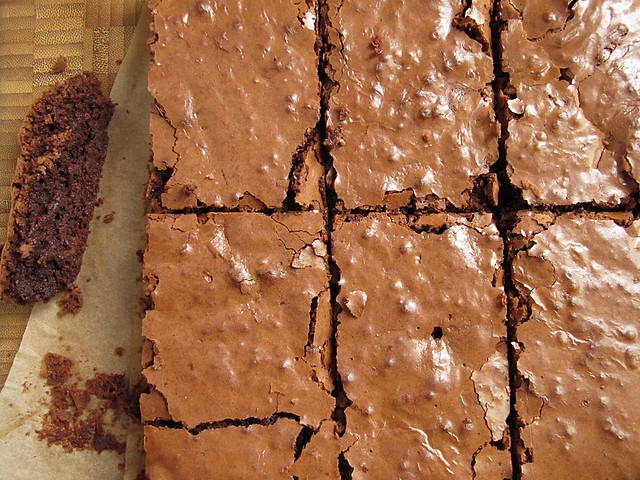
For a picnic last Sunday, I baked up some GF brownies - and I have to say they were better than any brownies I've ever made before.  They were also adapted from a Gluten-Free Girl recipe taken from Alice Mendrich, so I knew before I even began that they would be amazing.  What I didn't know is that they would age well.  I saved one a full 4 days to test this theory, and they were even better than when fresh.  I didn't bother with a double boiler to melt the butter and chocolate, and I didn't bother with the cold soak to stop cooking either - I just made sure to heat the chocolate over low heat and watched not to over bake.

Gluten-Free Brownies (adapted from Gluten-Free Girl/Alice Mendrich)
  • 8 T. butter (1 stick), cut into 8 pieces
  • 4 oz. dark chocolate (I used Callebaut), chopped
  • 1/2 c. white sugar
  • 1/2 c. raw sugar
  • 2 eggs
  • 1 t. vanilla extract
  • 1/4 t. kosher salt
  • 1/4 c. brown rice flour
  • 1/4 c. tapioca flour
  • large handful of raw walnuts, broken by hand over the batter
Preheat oven to 400.

In a small, heavy saucepan, melt the butter together with the chocolate.  Remove from heat and let cool slightly.

Line an 8x8 square pan with parchment paper (I use 2 pieces that overlap in a criss cross, so that I can lift them out easily).  In a medium sized bowl, blend the sugar and eggs for a full 3 minutes - until the sugar starts to break down a little and the mixture looks thickened.  Add the vanilla and salt and blend in well.

Add the flours, and use a spatula to blend in thoroughly.  Scrape in the melted chocolate and butter mixture, and fold in well until no streaks remain.  Crumble some walnuts over the batter and fold them in too.  Then, spread the mixture into the prepared pan and bake until the pan isn't jiggly when tapped, and fudgy crumbs cling to a tester inserted into the middle of the pan.  I started checking at 20 minutes - and they were perfect within 24 minutes.  Remove pan from oven to a cooling rack, and let cool completely in the pan until room temperature before slicing.

Store any leftovers tightly wrapped (I used foil, since we were picnic-ing).  They will remain very good for several days.

gluten free brownies

Like all alternative kitchen adventures, GF bakery can have the connotation of being healthier.  These two examples of baking are not necessarily healthier for you, but they are proof that GF bakery can taste amazing and fool anyone who may have the predisposition to think that by their very nature, GF bakery tastes rubbery and awful.

In general, I'm baking a lot more thoughtfully these days.  I'm not baking just for the joy of baking as I usually do;  I have successfully stopped eating so many baked goods personally.  So I'm making the most of each opportunity I have at my oven: taking care to ensure that no matter your dietary need, there can be a quality, homemade baked good made to amaze you.  If you happen to have a GF challenge for me, let me know... maybe it will be my next gluten-free kitchen adventure!


Friday, August 10, 2012

Gluten-Free Chocolate Banana Bread.

It almost felt too good to be true, when I woke up this morning two hours before anyone else even started to stir. Even the accidental clanging of loaf pans as I tried to quietly dislodge them from their slumbering place didn't bring any little feet running to see what the noise was. Better still was the cool breeze blowing in the windows, gorgeous dark grey storm clouds ominously layered across the sky, just waiting for the cue to empty themselves over my depressed and wilty tomato plants.

Yesterday, the new King Arthur Flour catalog came in the mail. I perused it before bed, as I always do when a new one comes. Rarely do I order, but there is some solid information in the King Arthur catalog, and they always include a few recipes that are worth the time and effort. One for Chocolate Chip Banana Bread caught my eye, and I started to scheme in my dreams of a gluten-free version. When I bounced from my bed, I got right to work - happy with my end result and feeling quite productive all before 7 a.m.

GF chocolate banana bread

The last GF quick bread I made was so delicious it was difficult to keep around more than 2 days. This one will also meet that same fate. My loaf pans are wider, leaving me with (in my opinion, not as attractive loaves) a shallower bread, but the texture and flavor is so wonderful it's hard for that visual afterthought to matter. It's a deep chocolate flavor, not too sweet because I slashed the sugar content and didn't add any chocolate chips, but fully ripe with banana and a touch of cinnamon. A future note will be to add a little espresso powder or perhaps even ground coffee. A java jolt may be a very good addition.

I always feel the need to stress that I am not gluten-free myself, or in need of keeping to a gluten-free diet. But more often than not, I wish I was. Everything baking experiment ends up enchanting me far more than the conventional glutened counterpart. Maybe it's the thrill of a new challenge, or the appreciation of a tender crumb. Maybe, it's because it is a truly healthful alternative to traditional baked goods. This bread just feels healthy, like you are doing yourself a favor by enjoying a slice.

GF chocolate banana bread

You may wish to up the sugar content. I am fully reformed in my sugar consumptions for the most part, and have taken to preferring things decidedly unsweet. I tested this out on the Kiddo, who loved it as it was. I also ate a slice augmented by soft butter and sprinkled with additional cinnamon sugar, which wasn't a bad way to go either. I have a feeling the texture of this bread gained some density as the day wore on. I'll know for certain tomorrow, but either way I don't think a bit of fudge-like intensity is a bad thing.

Gluten-Free Chocolate Banana Bread (adapted from King Arthur Flour's August 2012 catalog)
  • 2 c. gluten-free all purpose flour (I used this method and mixed my own)
  • 1 t. baking soda
  • 1 t. xanthan gum
  • 1/4 t. salt
  • 1/2 t. cinnamon
  • 1/4 c. cocoa powder
  • 3 1/2 oz. coconut oil (I used room temp, just softened oil, not melted)
  • 1/4 c. sugar (up this to 1/2 c. if you prefer it sweeter)
  • 1 large egg
  • 1 t. vanilla extract
  • 2 bananas (8 oz.)
  • 1/2 c. plain yogurt (4 oz.)
  • up to 1 c. or so of optionals (nuts, chocolate chips, seeds, etc.)

Preheat the oven to 330. (Yes, it's lower than 350 and not a typo. I read here that perhaps baking at a slightly lower temperature is good for helping maintain the integrity of the loaf. That link is also a great resource template for vegan GF quick bread baking!) Line a loaf pan with a crumpled sheet of parchment paper. (You can use reused parchment for this, and may be able to get a couple of bakings out of the sheet you crumble as well.)

In a medium bowl, combine flour, soda, xanthan gum, salt, cinnamon, and cocoa powder.

In a larger bowl, mash bananas and add the coconut oil, sugar, egg, and yogurt. Mix well to combine thoroughly.

Add the dry ingredients to the wet ingredients, and use a spatula to make sure everything is well mixed. Add in any optionals, and spread evenly into prepared loaf pan. (I sprinkled the parchment lined pan first with cinnamon sugar, and then sprinkled a little more on top of the unbaked batter as well. It adds a little extra sweetness and crunch.)

Bake for 45-55 minutes, until a tester inserted in the center comes out clean. Cool in the pan for 5 minutes before removing to a wire rack to cool completely before slicing.

GF chocolate banana bread

Today was such a departure, weatherwise, from the whole of our Summer that I finally cleaned my oven. The little bit of residual warmth actually felt good in context of the cool breeze and overcast sky. Just like that, I felt the pang of Autumn, the way I do every year and somehow still feel surprised by it. Just a few weeks remain until the calendar turns and school begins for an eager 1st grader, and I gain an official year on my life. Just this evening, I was considering that my birthday is the perfect excuse to make whatever sweet I desire, and I wonder if this year it may just be gluten free? We'll all have to wait until September to find out.

Link
GF chocolate banana bread

Postscript:
Just so you know, King Arthur is a deep love of mine. Their website and on-demand staff is just plain amazing, and they never would ask me to tell you so. I am able to find their flour locally, and it consistently performs so well and tastes so good that I make excuses that I don't source more local or organic flour. I haven't yet tried their gluten-free flour, but I'm sure it is also consistently good.

Friday, January 27, 2012

Daring Baker Challenge January 2012: Biscuits.

Audax Artifex was our January 2012 Daring Bakers’ host. Aud worked tirelessly to master light and fluffy scones (a/k/a biscuits) to help us create delicious and perfect batches in our own kitchens!

sourdough biscuits

Tireless is probably a more than apt description of our host this month. Since I have joined the Daring Bakers, I've looked forward each month to Audax Artifex's take on our challenges, his lightening fast completion times, and the phenomenally articulate recipe notes that he shares nearly immediately. For his hosting of a challenge, I would have expected something wildly complex, but instead he chose biscuits (called scones in Australia), and he really mastered them. Go have a look!

I started my testing of biscuits near the beginning of the month, and only did 6 batches, 10 short of Audax's 16. I fully intended on making his recipe at least once, but I got so sidetracked by sourdough that I never made it that far. In fact, I did my last full dessert biscuit application yesterday, not leaving myself any time to get to his original recipe. Maybe I was just so inspired by Audax's tireless approach to mastering a recipe that I figured I'd adapt a single recipe until I had it nearly foolproof myself.Link

sourdough biscuits
this batch didn't rise so high because I patted the dough thinner, about 1/2 inch.

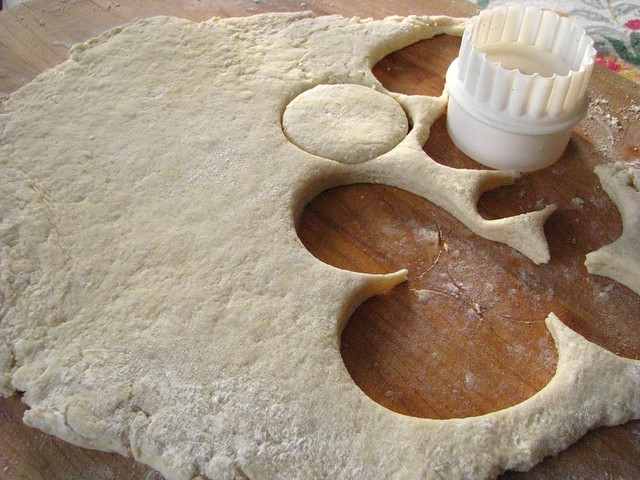
I have made baking powder biscuits in the past. I know that you are supposed to be careful with the dough, not to beat it up, treat it with a lick and a promise and make sure that they touch each other when you pack them lightly onto a baking sheet. I have never made sourdough biscuits however, which I have to assume are the predecessor to the more modern baking powder version. The base recipe I found tasted so good on the first go (except that I used butter right out of the box... I would not be found messing around with butter flavored vegetable oil), that I varied my fats, baking temperature and roll-out method and found my favorite combination fairly quickly in only 6 batches.

The base recipe (by Phil Mahan) I used was designed for a camp cooking experince. It is extraordinarily simple, and it's very easy to make half batches of which is good when you can polish off a whole batch warm from the oven. I found it best to use sourdough starter (100% hydration) that I had fed about 4 hours prior. I also tried adding baking powder along with the natural leaven of the sourdough, and found no real discernible taste difference. The rise took about half as long, which was maybe convenient, but my personal feeling is to let the biscuit be naturally leavened. I think I am just still intrigued that the jar on my counter can lift dough, and if given the time, it does a stellar job of it.

ham and juusto

In my first trials, I mixed room temperature soft butter with sourdough starter, added my flour/salt/sugar mixture and basically "kneaded" it in a large bowl by folding it over onto itself until it formed a ball. I tried to do this purposefully, so I wouldn't beat up the dough, but with a sturdy hand so that the dough would come together somewhat swiftly. Then, I simply patted the dough out into a rough block about 1 inch thick. (I also tried patting it thinner, and they didn't rise as high.) Using a round cutter, I used the classic method of pressing straight through the dough and then twisting to cut out the biscuit. I gently pressed my scraps together, and even though they were not quite as pretty and didn't rise quite as high, they still tasted great - lightly sweet and still a little sourdoughy. They are a perfect match for sweet or savory, I don't think I'd change a thing to turn them into strawberry shortcake or drown them in gravy.

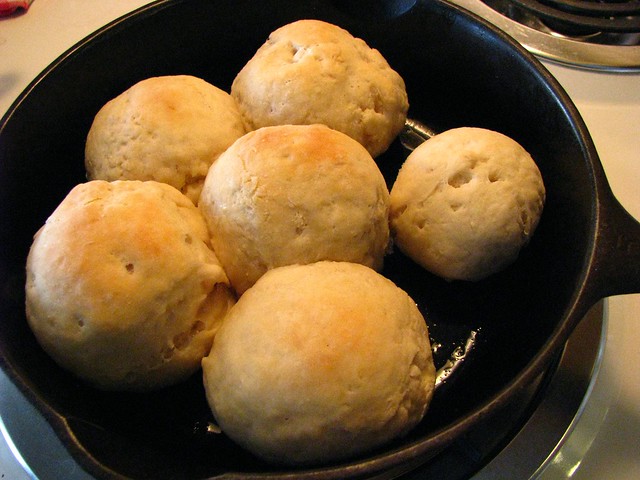
The original recipe I used for sourdough biscuits didn't call for traditional biscuit cutting, it called for forming the dough into balls. Not only is this faster, I found that they rose better too. After forming a batch of biscuit balls, I decided that something could easily make its way into the middles of round biscuits and stay put. The month wasn't long enough to try all of the ideas that popped into my head.

round sourdough biscuits

The first combination I tried was ham and a slow melting "baked" cheese called Juusto. I love this cheese, and it's actually made just down the road from my Parents. Not knowing if the biscuit balls would pop open on me, I was a little stingy with filling them. I remedied that yesterday when I decided on making a chocolate and tart cherry version. I packed them with as much filling as they could hold, pinched the dough firmly to keep it in place, then rolled it lightly between my palms.

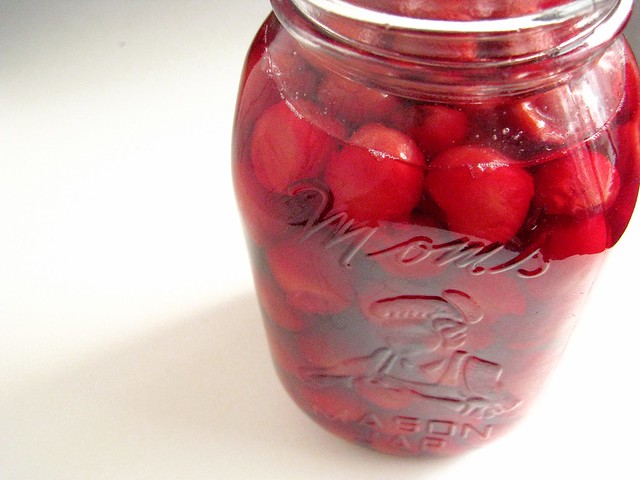
homecanned sour cherries

This was the first jar of tart cherries I opened from last Summer. I got 27 lbs. of already pitted fruit from Cherryland's Best with a group of area food bloggers. I canned my whole cherries in an light syrup (1 part sugar to 4 parts water), and they tasted so good when I popped a few into my mouth, as good as they did the day I got them, reminding me exactly why canning appeals to me so much.

chocolate cherry biscuit forming

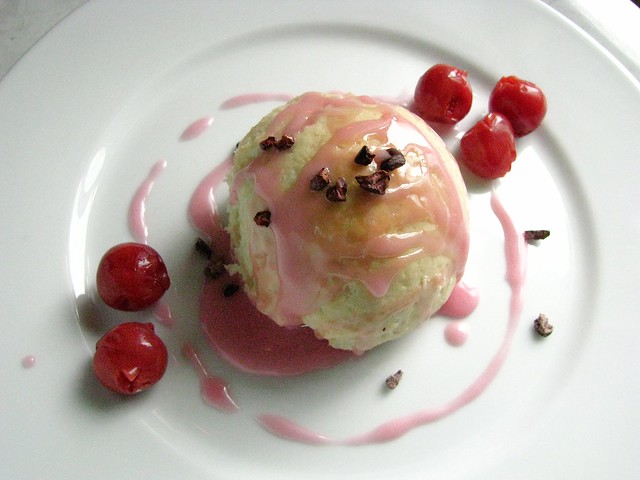
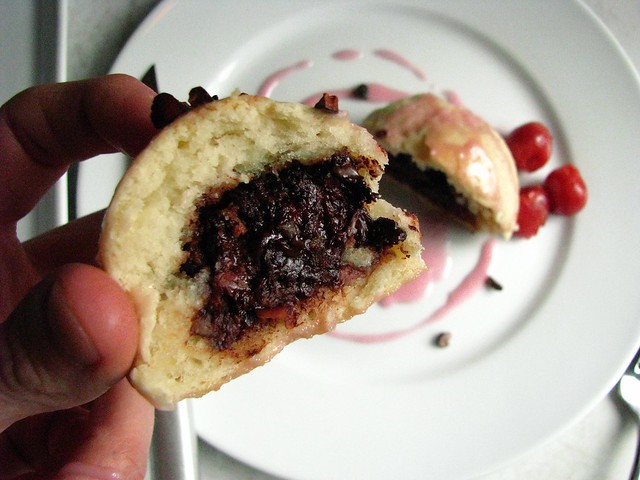
While the mixture of wrung-dry cherry and chopped chocolate doesn't look the prettiest, it makes up for it in flavor. The cherries are undeniably good, but I have to believe that part of the reason is also that I was gifted a block of Callebaut bittersweet baking chocolate. That chocolate gift was better than if someone gave me a piece of Stueben, though I treat it the same way by often admiring it's heft and smoothness. I do this for a positively certifiable amount of time. I then mixed a little cherry syrup with powdered sugar to make a pale pink glaze, and I could feel the pangs of sugar guilt running through my veins. I ended up eating 2 of them, hot out of the oven, glazed and sprinkled with cacao nibs. I didn't feel guilty at all. Well, maybe I did just a little.

chocolate cherry biscuit

I would venture to say that sourdough biscuits do taste best the second they come out of the oven, even though the unfilled biscuits I made were very good when toasted the next day. There are few things better than devouring something right after it comes from the oven, so I'd encourage you to plan it that way. When using well fed starter, I found 2 hours of rising time to be plenty. I also find it hard to get good color on these, even when I baked them longer they still barely blushed golden. It doesn't affect the eating though. Remember the recipe is easily cut in half.

Sourdough Biscuits (with Cherry Chocolate Middles) (adapted from Phil Mahan)
makes 12
  • 2 c. well fed starter
  • 1/4 c. soft butter, warm room temperature
  • 2 c. AP flour
  • 3 T. granulated sugar
  • 1 t. salt

Stir to combine flour, sugar and salt in a medium sized bowl. Butter a cast iron skillet large enough to fit your batch (a 5 or an 8 worked for me for half and whole batches respectively).

Measure starter into a large bowl and add butter. Using a spatula or the back of a spoon, mash the butter into the starter until it is no longer visible. Add the flour mixture, stirring with spatula or spoon for a few strokes to help it begin to combine. Then using one hand, begin to fold the batter onto itself until it begins to form a dough. Work quickly, gently, and thoroughly. Stop as soon as all the dried parts of the flour are incorporated, and the dough feels like a dough. (If you can tell it is too dry, add a tablespoon or two of water before you have worked the dough to completion. If the dough comes together and there is still some flour in the bottom of the bowl that didn't get worked in, just discard it and the batch will be slightly less in volume.)

Press the dough out to a uniform thickness, about 1/2 inch (aim for 1 inch if you are going to cut biscuits using the method described above). Cut into 6 pieces. Working with one piece at a time, put a good amount of tart cherry and chocolate filling (recipe below) in the center of the dough and fold up the dough around it. Pinch it tightly to completely enclose the filling, then gently roll the dough to form a ball. Place the biscuits, just barely touching each other, in the prepared skillet.

Let rise (covered with a towel) until nearly doubled in bulk, about 2 hours depending on the warmth of the room. Towards the end of the rise, preheat the oven to 375.

Bake for 20-25 minutes until tops are lightly browned. (You can brush the biscuits with butter about half way through the baking time, or upon removing them from the oven if you like.)

Tart Cherry and Chocolate Filling

  • 2 heaping cups of canned tart cherries (250 g.) drained, and pressed mostly dry, juices reserved for glaze if desired
  • 4 oz. (120 g.) excellent bittersweet chocolate, chopped finely

Mix to combine. That's it. Here's a picture of what it will look like. And you will probably have a little leftover, which you should eat right away because you can't stand waiting on the oven to produce your sourdough biscuits with cherry chocolate middles...

chocolate cherry biscuit interior

So, I'm just days away now from my month free of sugar - or really it was my month almost free of sugar. What little splurging I did do was definitely worth it. My goal of feeling committed to less sugar on a daily basis is going to stick I think. I have gotten out of the daily routine of dessert, which some may argue is heresy, but I feel great so I'll continue it. At least until my next Daring Baker Challenge.

Thanks again to Audax for his amazing effort and choice in a challenge this month. I promise I will try his non-sourdough biscuits, but I am so happy that I got obsessed with this version! I would never have considered sourdough biscuits, and now they are just another of the sourdough things that I can't live without. If you're coming to dinner and I forgot to plan a bread, you're getting sourdough biscuits, and you are going to love them.

biscuit test brunch