Showing posts with label crackers. Show all posts

Sunday, March 9, 2014

Sourdough without a recipe.

The sourdough has become so much a part of my life that now it's hard to remember a time without it.  But if I do think back, I remember the sinking feeling that I would never master it, that I would continually have too much waste (or rather discard), and never really have something that I would be proud to share.  Working with things continually is the best education, and my daily walk with sourdough has taught me so many things.  Deep things like patience, scientific things like the power of leaven, and superficial things like the cosmetics of slashing.  There are probably one hundred other things - it's been a very well-rounded education to be sure.

Just when I think that I should delve into new technique or hydration, branch out into other grains or even tackle something gluten-free just for the sake of learning, sourdough has other more basic things to teach me.  My confidence in my own intuition is sometimes lacking, and these past few weeks that leaven has showed me that I know more than I think I do.  It has given me baking confidence.
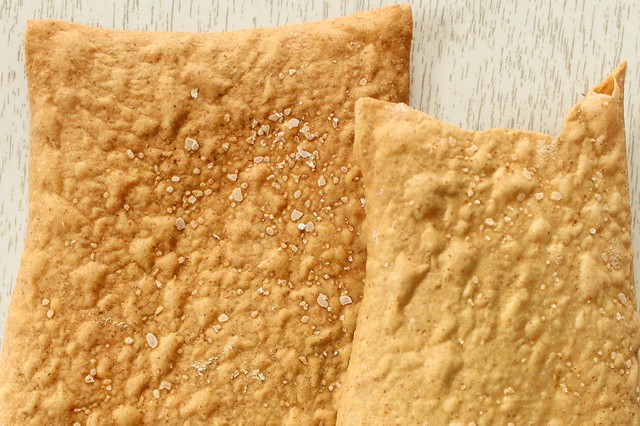
sourdough cracker

In efforts to entice my husband to healthier snacking, I've taken to more scheduled cracker making.  I've made them pretty much the same way for a very long time, more or less using this recipe.  I don't know when I stopped looking at the actual recipe, and just starting winging it, casually spooning in room temperature coconut oil and usually forgetting the salt by accident, adding whatever flour is handy.

Sometime after my Tartine #3 book came, I oogled Chad's gorgeous windowpane-thin "crackerbreads", but wasn't so enthusiastic with the way his recipes were written.  And meanwhile, I had made crackers with the 80% hydration starter that I base my bread on.  It seems less water in the cracker dough to begin with helps in the rolling out, and I was finally able to run the dough through my pasta machine without wondering why I bothered with the big mess.

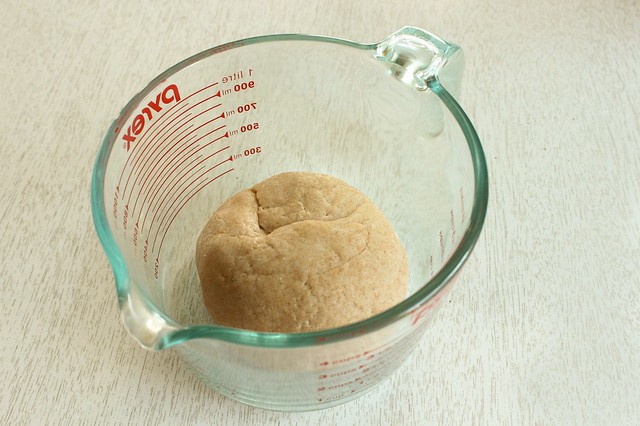
Just a couple of weeks ago, I stumbled onto my new preferred method, a foolproof way of easier crackers, without any waste or as much mess.  To whatever measure of 80% starter I have to use, I mix in a few spoonfuls of room temperature coconut oil and mash it with the back of a spoon as best I can.  Then, I mix in flour until a nice dough forms, and try to remember to put in a heavy pinch of salt too.  I knead this by hand on a bare countertop for several minutes, rolling the dough strongly with my palms to melt any little bits of coconut oil that is still solid.  I might notice it needs more flour, but I try not to add too much - figuring that like pasta and tortillas, a cracker is most tender and delicate with less flour instead of more.  Then I let it rest for 8-24 hours before running through the pasta machine.

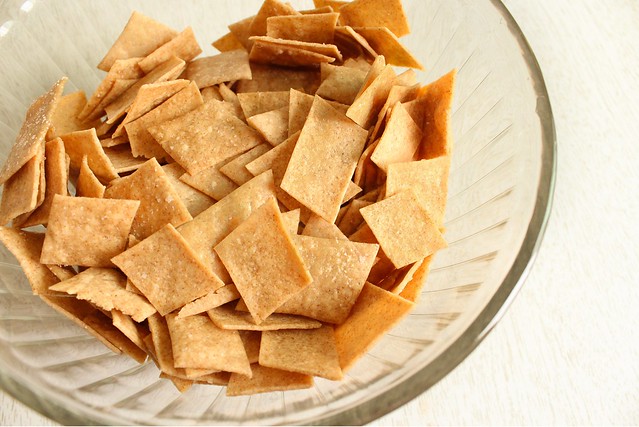
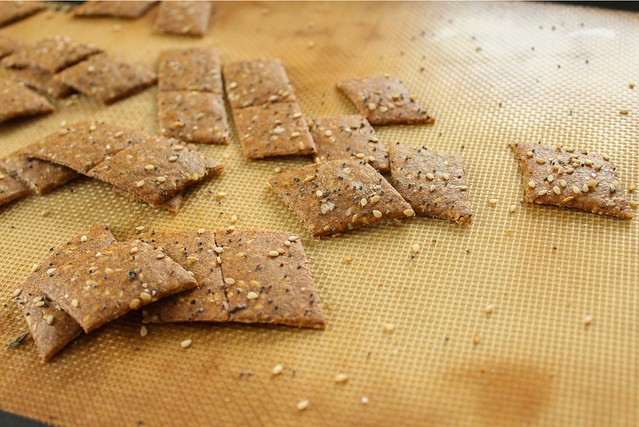
Instead of cutting the crackers into little diamonds, I started baking them in whole sheets and instead of brushing them with olive oil and sprinkling with salt, I sprinkle them first with (kosher) salt and then spritz them water to help the salt to stick.  I bake them at 350 until golden or dark golden brown depending on what other things are going on around me.  After cooling thoroughly, I break them into rough shards and store them in glass jars.

(To make my 80% hydration starter, I follow Ken Forkish's ratio in Flour Water Salt Yeast.  For 2 loaves of bread I've scaled it down to this:  50 g. 100% starter, 50 g. whole wheat flour, 200 g. ap flour, and 200 g. 95 degree water.  I mix it about 6-8 hours before building bread or cracker dough.)

sourdough "cracker"
They bake into brittle thin sheets, and depending on how long I've let the dough rest they can have a nice sour tang to them.

Yesterday, I mixed up enough 80% starter for 3 loaves although I was only going to make two.  When I set to working the bread, I also mixed up some cracker dough.  By this morning, the dough had risen out of the container signaling both the well-fed nature of the culture and the how-can-it-finally-be-spring feeling of warmer outdoor temperatures.  I knocked it down a couple of times, and it kept growing back - and then I had the idea of making it into flatbreads for lunchtime.

I mixed up some mid-eastern inspired spice mix based on the msemmen from Artisan Bread in 5 Minutes a Day, and pinched off a few ping pong ball sized pieces of cracker dough.  I rolled them the same way I did the msemmen, and baked them several minutes per side in a cast iron skillet.
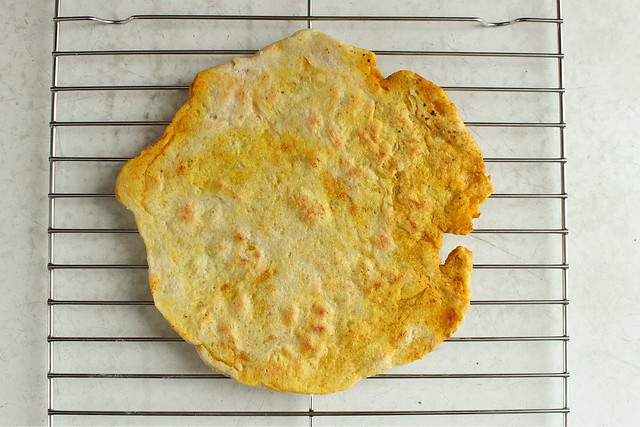
sourdough flatbread

They were crunchy in some places and soft in others and perfectly spicy.  I realized that I'd forgotten the salt in the cracker dough, so I sprinkled more on top and pressed it in.  I don't know why it's so hard for me to remember that lately; I have stopped the practice of nibbling a small bit of raw dough, and I think I need to take that back up.

I'm not sure how well these would keep - but given how simple they are to make on demand you wouldn't have to worry about that I suppose.  Instead of letting the dough rise at room temperature after mixing it, it might be a good idea to refrigerate it right away.  I'm assuming that instant flatbreads could be yours for the next 48 hours before the yeast tires.  If you were to bake the breads more thoroughly, say on a pizza stone, and let them crisp up fully, their keeping power would increase.  But I say make and eat liberally on demand.  There aren't nearly enough breads eaten directly from pans, moments after baking transforms the raw dough...
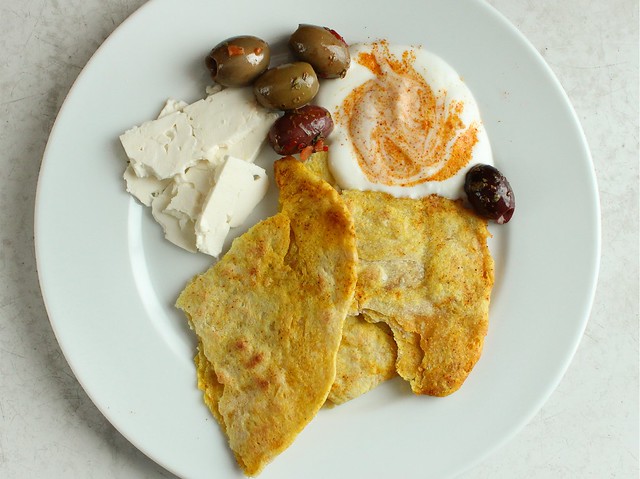

sourdough flatbread
Perfect eaten with feta, chile olives, and some delicious homemade yogurt my friend Mary gave me: I added a little of the msemmen spice mixture to it.

The sourdough is a teacher, always providing me lessons in life and good eating.  When I work with it, I often think back to a conversation more than 20 years old that I can't quite remember.  My Gram was the first to tell me about capturing wild yeasts, though I'm not sure she ever used it to bake wild yeast bread.  That day she told me about trying to find a favorable culture by leaving a piece of bread out in the woods is like a dream at this point, I remember where I was in her house when she told me, and I remember conjuring exactly where in the woods she was placing that slice of bread, just past the edges of her sprawling garden.  Like a dream, I can't quite put a finger on any more detail than that and I wonder about it all the time.  Is it in my blood to be so curious about natural cultures?  Did the wild yeast also have lessons for my Gram long before I ever would have suspected it had lessons for me?  Either way, it has turned from a unknowing teacher to a carefully chosen mentor, one I respect deeply, and one I hope to continue learning from for the rest of my life.

Tuesday, August 20, 2013

Sourdough Surprises August 2013: Crackers

I was kind of glad that the Sourdough Surprises item-of-the-month was crackers.  I think I've consistently made sourdough crackers ever since I started my sourdough starter, in September of 2010.  In those early days of sourdough experimentation, I was obsessed with finding ways to use up my discard starter - probably because I had so much of it in the beginning.  It took me some time to be more efficient with my feedings and management of my fledgling starter, and pancakes and crackers became a staple part of my kitchen life.

sourdough crackers.

The recipe I first found for sourdough crackers is still the one I use most frequently.  I've gotten so good at making them that I rarely even measure, I just mix them up according to feel - and they always turn out good.  I always let the dough rest for at least 7 hours (making them a fully cultured snack with reduced phytic acid in the grain), but usually it ends up being a whole 24 hours.  On occasion, I've let the dough sit in the fridge for a couple of days before getting around to rolling them out, and that works too, though remember that you need to allow an hour or so for the dough to come back to room temperature before rolling it out.  The longer resting times make for crackers with a little more tang, but that is fine with me.

sourdough crackers.

My best advice making these is to invest in a silicone baking mat.  I found mine for a well-spent $11 at a restaurant supply store, and I can roll the dough out directly on it without bothering with wrinkling parchment.  I use this pastry roller, which was another rummaged gift of that bread genius, ex-boyfriend's mother.  She really was an inspiration to me in the baking department, and I like having little remembrances of her in this tool I use so often.

I've made these crackers with all sorts of flours, but prefer them best with plain old whole wheat.  I've also made them with both butter and coconut oil (and olive oil too, if memory serves), but I like coconut oil the best.  When I have quite a lot of discard starter I'll make a double batch; I've found that for a single batch I can fit exactly half of the dough on the silicone baking mat, so double batches take me much longer to bake.  I really need to invest in another baking mat to bake more efficiently.  Meanwhile, I try to schedule my cracker baking when I have something else to go into the oven as well.

sourdough crackers.

  • 1 c. discard sourdough starter (any hydration seems to work fine)
  • 1/4 c. melted coconut oil (or butter, olive oil) (if the coconut oil is spreadable consistency, I sometimes don't even melt it)
  • 1/2 t. kosher salt, plus more for top
  • 1/2 - 1 c. whole wheat flour
  • olive oil for brushing the tops
Combine starter with coconut oil and salt and stir well to combine.  Begin to add whole wheat flour, starting with 1/2 c., and stir or use your hands to start kneading it in.  Continue adding enough flour to create a sturdy dough that is smooth and not sticky, but don't add so much as to make it dry.  Form the dough into a ball, place in a clean bowl, and cover well with cling wrap.  Let stand at room temperature for at least 7 hours before rolling out into crackers, or storing in the fridge for up to 2 days.

Preheat oven to 350.   Divide the dough in 2 pieces.  Working with the first piece, roll the dough as thin as you like, I like to make the amount of dough fit the entire sheet pan - which makes them very thin (1/16").  I like to roll on a silicone baking mat as I described above, but you can roll between two sheets of parchment paper.  Use a pizza cutter to slice the crackers into squares or rectangles, and transfer the sheet to a baking pan.  Using a pastry brush, brush the top of the cut crackers with olive oil and sprinkle with additional kosher salt.  Bake for 20-30 minutes depending on the thickness of your crackers.

sourdough crackers.

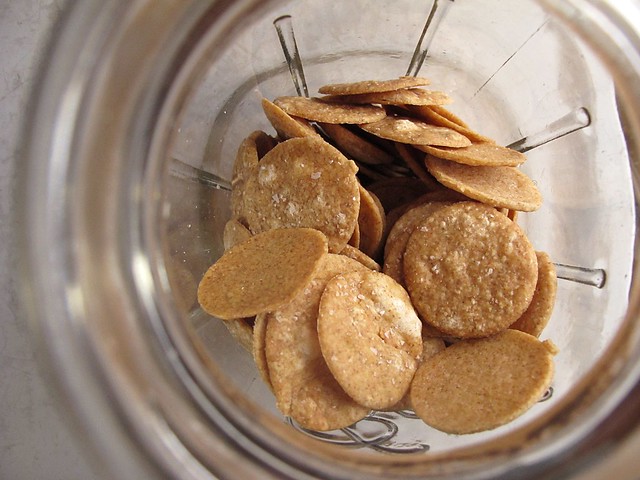
 I have also tried adding a few spices to this dough, or just to the tops prior to baking... but really none of those experiments stand out.  I just like these as plain crackers, to munch on their own or with thin slices of cheese.  They also keep an amazingly long time - if they don't disappear first.  I store them tightly sealed in quart size canning jars.

round sourdough crackers
 I have cut fancy shapes from them, but it takes a bit longer than just cutting squares or rectangles...

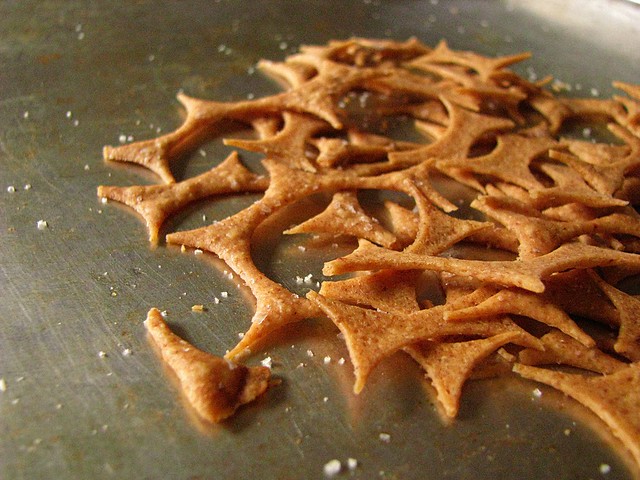
sourdough cracker ends
...but then I just baked the ends right next to the rounds so I didn't waste any dough (and didn't take too long transferring them to another pan to bake).

I'm really looking forward to seeing what other group bakers used for recipes!  While I do truly love this recipe, I could stand to break out of my mold.  But if I could ever recommend a single quick and reliable recipe to use up a cup of starter (and that is fully cultured to boot) this is definitely the one.

Friday, May 10, 2013

Crackers & Dips: Ivy Manning's Latest Book (And Giveaway!)

Ivy's Skinny Mints

When I think about Ivy Manning's new book, I can't believe that I've been looking forward to seeing the final result since October of 2011.  Time seems both to linger and fly in waves, and looking back over the amount of time that has passed since I first became acquainted with Ivy and was welcomed into cookbook testing with vigor seems oddly surreal.  

Ivy and I have never met; we were introduced online by another online friend who I have actually met in person, Deena Prichep.  Last Thanksgiving, I looked forward to an evening dinner with Ivy as she visited her homeland of Wisconsin, but an unfortunate flu plagued her (and I was iffy about eating, being newly pregnant) and the opportunity slipped by, drowned under the weight of even more passing time.  The good thing about this passing time is that I know Ivy and I will one day finally sit down to supper together, and when dark days hit, I think about this with great anticipation.

I read a lot of cookbooks.  Some year, I should actually keep track and write them all down.  I've talked about this before, how my library was my greatest resource when I was somewhat economically challeged this past year. Kind souls have somehow graced me with copies of books found in thrift shops or book sales, even the occasional author sent me a review copy of a new work I really wanted, when even those $13 meager dollars sent to Amazon were going to be a stretch.  Good things have a way of making themselves available to those who really appreciate it I think...
Amaranth Crackers with Cheddar and Pepitas served with Roasted Tomatillo and Avocado Dip
 (Photo courtesy of Chronicle books.)
 
While things on the personal finance front are finally looking up, my bookshelves could quickly grow heavy with new titles that are worth owning, and Ivy's newest book is definitely among them.  Crackers & Dips:  More than 50 Handmade Snacks is a DIY foodist's dream: and I should know, because I got to make and taste firsthand quite a lot of the contents.  The books that usually find permanent residence in my house are the ones that I grab not only for inspiration, but because I know that the recipe will work on the first go - if I'm making it for the 20th time, or just last minute for company.  The other necessary criteria for cookbook ownership is beautiful design, and this book is also beautifully photographed and illustrated, a unique combination of photography (by Jenifer Altman) and chalk drawings (by Kristina Urquhart).  There might not be a better book suited for both gift-giving and practical use!  Every recipe in this book is going to work for you, for snacking, appeasing the kiddos, gift giving, or party-going.

A School of Fish Crackers (Gluten-Free!)
(Photo courtesy of Chronicle Books)

I decided that to celebrate the release of this book, I'd make one of the crackers that I didn't get a chance to test: the Skinny Mint Chocolate Grahams.  Billed as a dessert cracker, these would remind you of a much tastier version of the classic Girl Scout classic.  And after reading this article on the suspect ingredients in them, I feel all that much better to have a really good DIY version!

I love baking by weight, since it is much faster than measuring all the ingredients traditionally, and is more consistent.  This book has metric weights for all of the ingredients listed. I know that when doing my portion of the testing, I double checked the volume to metric ratio, so even if you bake by volume, you can be assured of a good result.
"
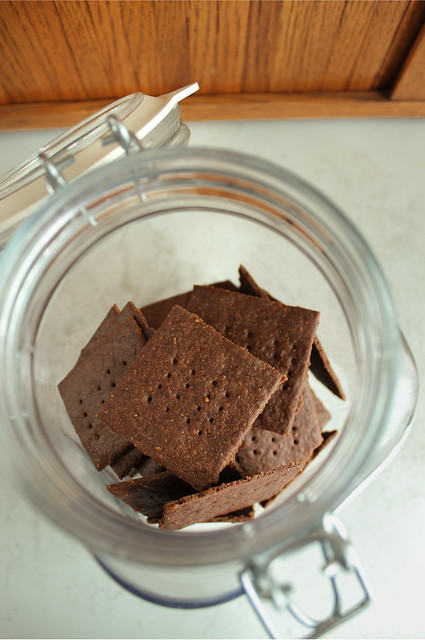
Skinny Mint Chocolate Grahams (Ivy Manning, Crackers & Dips: More Than 50 Handmade Snacks)
  • 14 T. (200 g.) unsalted butter, at room temperature
  • 1/2 c. (100 g.) sugar
  • 2 T. honey
  • 1 1/2 t. peppermint extract
  • 1 1/2 c. (185 g.) all purpose flour
  • 1 c. (130 g.) whole wheat flour
  • 1/3 c. (30 g.) unsweetened cocoa powder
  • 1 t. baking soda
  • 1/2 t. fine sea salt
  • 1 c. (170 g.) bittersweet chocolate chips
  • 1 t. canola oil
Preheat oven to 350 f. (180 c.).

Line two baking sheets with silicone baking mats or parchment paper.  In the bowl of an electric mixer or in a large bowl using a handheld mixer, beat the butter, sugar, honey, and peppermint extract together until fluffy, stopping occasionally to scrape down the sides of the bowl.

Sift both flours, the cocoa powder, baking soda, and salt into a medium bowl.  Add the dry ingredients to the butter mixture and mix on low speed until the mixture forms moist crumbs; do not overmix.  Gather up the dough with your hands (it will come together when squeezed), and divide the dough into two equal-size pieces.  Form each piece of dough into a rectangle measuring 4x6 inches, cover in plastic wrap, and refrigerate for at least 30 minutes and up to 2 days.

Place a piece of parchment paper on a work surface and lightly dust it with all-purpose flour.  Place a portion of dough on the paper, dust it with flour and place a piece of plastic wrap over the dough.  Roll the dough out until it is 1/8" thick, picking up the plastic once or twice to make sure there are no creases in the dough.

Cut the dough into the desired shapes using cookie cutters, and use a lightly floured spatula or bench scraper to transfer the crackers to one of the prepared baking sheets; reserve and chill the scraps.  Prick each cracker a few times with a fork or comb and bake until they are crisp and smell chocolaty, 10-12 minutes, rotating the sheet once from front to back while baking.  Transfer the crackers to a cooling rack.

While the first batch of crackers is baking, repeat the rolling and cutting process with another ball of dough; the chilled scraps can be re-rolled once.

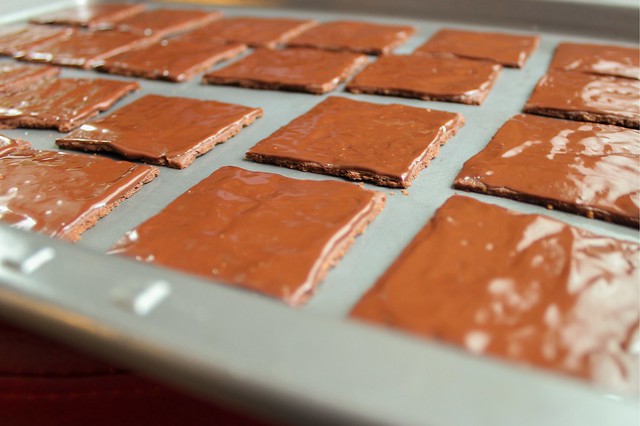
In a small microwave-safe bowl or a double boiler, melt the chocolate chips until smooth.  Remove from the heat and whisk in the canola oil.  Using an offset spatula, spread about 1/2 t. of the melted chocolate mixture over each cracker and place them on a baking sheet.  Refrigerate the graham crackers until the glaze is set, about 30 minutes.  Once the glaze has set, store the crackers in an air-tight container in the refrigerator for up to 2 weeks.
"

Ivy's Skinny Mints
Ivy's Skinny Mints

In my whole foods kitchen, I successfully substituted sucanat for the sugar, and olive oil for the canola.  I also like to roll out the crackers directly on a silicone mat with a piece of plastic wrap over the top.  I found that I didn't need to use any additional flour that way.  I also cut the crackers into squares in part because I was a bit lazy, but also because there is less waste that way.  And besides, that way I get to nibble every ragged edge of chocolate mint graham cracker myself.

Ivy's Skinny Mints

So now for the fun part:  I was given a copy of this book to giveaway!  This is the first giveaway that I've had that didn't contain something that I made myself (Pomegranate Jelly or Candied Jalapenos), or something that I bought to giveaway (WMSE Rockabilly Chili Cookbook).  Historically, I am a small blog with a dedicated readership, so your chances to win this beautiful book are very good.  I wouldn't mind if you share the post and the word about Crackers & Dips with your friends however, because I know they would appreciate a homemade batch of crackers too.  To enter, just leave a comment below before midnight next Friday, May 17th.  I'll choose a winner using a Random Number Generator on Saturday the 18th, and post it here and on the CakeWalk facebook page.

I'll leave you with the image of my favorite recipe from the book:  another dessert cracker made with rich olive oil, orange blossom water and aniseed.

Spanish Olive Oil Tortas
(Photo courtesy of Chronicle Books)

This recipe is alone is worth the cover price, especially when you consider that a gourmet, wax papered bag of pretty Ines Rosales crisps costs quite a bit in specialty food markets... and isn't it so much better to make it yourself anyway?

Congratulations to Ivy Manning on a gorgeous accomplishment!


Disclaimer:  I did receive a copy of this book for review, and another to giveaway.  My opinions of this book are my own, well deserved, and are not embellished!

Wednesday, February 27, 2013

Daring Baker Challenge February 2013: Crispy Rye Crackers

Sarah from All Our Fingers in the Pie was our February 2013 Daring Bakers’ host and she challenges us to use our creativity in making our own Crisp Flatbreads and Crackers!

 Reinhart crackers.

Crackers are kind of near and dear to my heart.  Over the recent years, I've made more of them than ever before, in part because I was honored to be a part of recipe testing for a cookbook all about them!  The book Ivy Manning wrote called Crackers & Dips, is available now for preorder (the release is scheduled for early May), and you should definitely drop it into your cart right away, because I can tell you that the recipes are all solid additions to your kitchen DIY repertoire. 

More than a year ago I wrote about testing for Ivy, and my post included a recipe for crisp rye crackers that didn't make the cookbook cut.  I also mentioned that of all the things made at home, crackers are some of the things that impress people most.  For not a lot of effort, you have truly extraordinary (indeed nearly professional) results - results that don't include ridiculous amounts of fake ingredients or preservatives, and that keep a surprisingly long time if baked crisp and stored airtight.

Already a seasoned cracker producer, I decided to make a recipe straightforward that I'd never made before for the challenge this month, one that belongs to Peter Reinhart and also includes rye flour.  They are wholesome and slightly sweet, with good amounts of pumpkin and sunflower seeds.  I meant to get around to making a version with a bit of sourdough starter, but that will have to be on the future docket as time got away from me.

Reinhart crackers.

Reinhart gave both weight and conventional measurements, I haphazardly threw these together a couple of days before I baked using a combination of the two methods.  Resting in the fridge makes the dough easier to handle, and deepens the flavor slightly.  I'd wager it is better treatment of the grains as well, akin to soaking them.

Crispy Rye Crackers (very slightly adapted from Peter Reinhart, Artisan Breads Every Day)
  •   1/4 c. (42.5 g.) sunflower seeds
  •   1/4 c. (42.5 g.) pumpkin seeds
  •   3 T. (28.5 g.) flaxseeds  (or use 28 g. flax meal)
  •   6 T. (56.5 g.) sesame seeds
  •   1 1/4 c. (227 g.) rye flour
  •   1/4 t. kosher salt
  •   2 T. olive oil
  •   1 T. honey (or agave nectar)
  •   3/4 c. (170 g.) water, room temperature
  •   egg white wash (1 egg white beaten with 2 t. water) (optional sweet wash, noted below)
  •   mixed seeds for garnish  (I used poppy seed)
  •   kosher salt for garnish
In a spice or coffee grinder, grind sunflower and pumpkin seeds in pulses to make a powder or "meal" of them.  Separately, grind the flaxseeds - unless using flax meal.

In a large bowl, combine the seed, powders with the sesame seeds, rye flour, salt, oil, honey, and water.  Stir with a sturdy spoon until a dough comes together, then turn out onto a lightly floured (rye floured) surface a knead a few times to incorporate everything well.  The dough should be a bit tacky but not sticky.  You can roll and bake them right away or put the dough into an airtight container and let it rest in the fridge for up to a week.  It can also be wrapped well and stored in the freezer for a few months.

When ready to bake, preheat the oven to 300 degrees.  Divide the dough into 3 or 4 parts.  Between sheets of parchment paper (or better, on a silicone baking mat), roll one part of dough as thin as you are able, about 1/16 inch thick.  (I like using a silicone mat with a pastry roller.  If using parchment or rolling conventionally, you may need to use a bit of flour to keep the dough from sticking.)

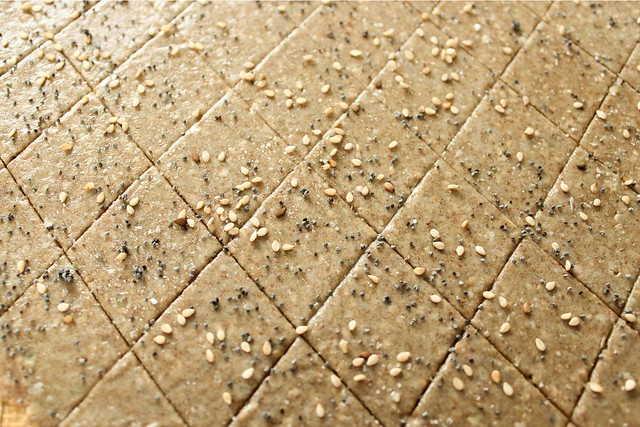
Using a pizza cutter, cut the crackers into your desired shape, I like diamonds that I don't bother to separate to eliminate any trace of waste.  Brush well with egg white wash (or sweet wash of 1 T. honey or agave beaten with 3 T. water), and sprinkle with a seed garnish and kosher salt.

Bake for 25-35 minutes, until the crackers are mostly crisp.  Remove the pan from the oven and let them cool for several minutes.  If you see some of the edge crackers done more thoroughly, remove them from the oven first and continue baking the rest until they are crisp.  (The crackers will firm up even more as they cool.)  If you bake the crackers, cool them, and then discover they are not quite crisp, return them to the oven for several minutes until they firm up.

Cool the crackers completely, then store airtight in glass jars where they will keep for at least a week, but probably longer.

Reinhart crackers.

I was surprised that both of my boys loved these and happily ate them with cheese.  I liked their nutty flavor, handsome appearance, wholesome snacking quality, and keeping power.  They are a great thing to reach for when packing a lunch or needing a snack.

Be sure to check out the Daring Baker website for more cracker recipes, and the Daring Baker Blogroll for more participating bakers and inspirational cracker ideas!

Saturday, July 28, 2012

Daring Baker's Challenge July 2012: Crackers

Our July 2012 Daring Bakers’ Host was Dana McFarland and she challenged us to make homemade crackers! Dana showed us some techniques for making crackers and encouraged to use our creativity to make each cracker our own by using ingredients we love.

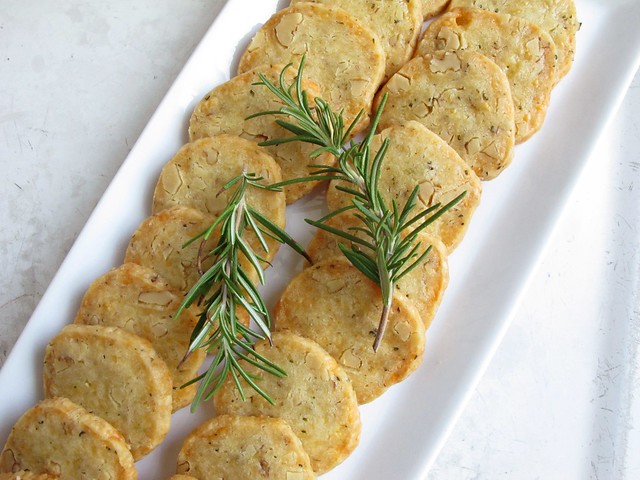
rosemary walnut crackers

I was happy with the challenge type this month, since I am still trying (trying hard) not eat so many sweets after a very sweet beginning to July. (You might have noticed that I bowed out of the challenge last month, which was the Battenberg Cake.) I have made thousands of crackers of different types over the past few years, even helping to test a recipe book of them that will be coming out next Spring, so I decided to pluck a type of recipe from our challenge that I usually don't make: icebox crackers. I made it as written, unaltered, and they were delicious.

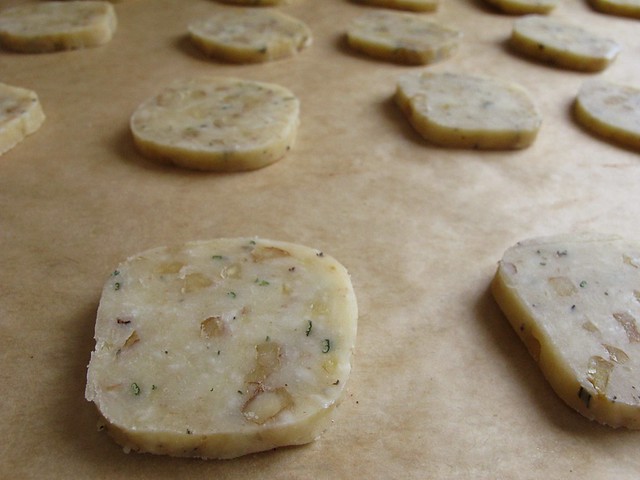
Like the cookies of the same name, icebox dough is formed into logs, chilled in the fridge or frozen, and then baked off on demand. I actually need to revisit this type of butter-based cookie, since I had forgotten how nice it is to simply slice, bake and serve. I served these as the appetizer to the dinner I've written about in the last two posts, the dinner that seems to continually keep on giving, since I stashed one of the two logs of this cracker dough in the freezer for another day as well.

sliced crackers

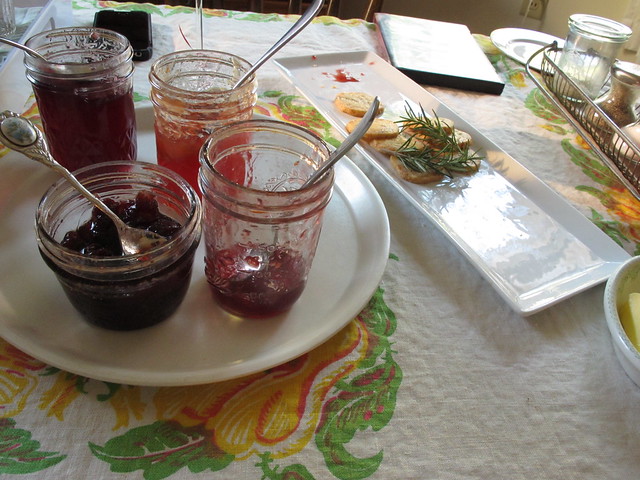
I got a 2-year aged white cheddar for these crackers, from Wisconsin of course, and the flavor was very good - especially with an array of jams and jellies spread thickly over the tops of them. My favorite preserves with this cracker were the tart cherry jam and concord grape with rosemary. For some reason, I can not have enough rosemary! The 3 of us polished off all but 2 of the 26 crackers I baked just before dinner (and just before baking my dessert). I would suspect if you fancy a salty, elegant cracker, you would find them disappearing quickly as well.

rosemary walnut crackers, unbaked

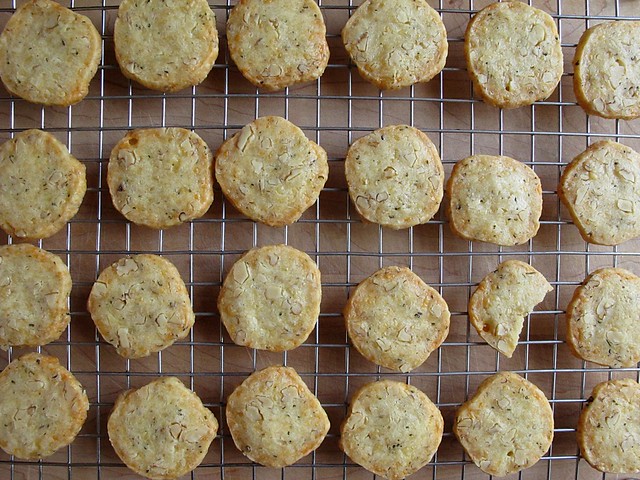
I had to bake the crackers at least 10 minutes longer than the recipe suggested. (I baked them one tray at a time in the center of the oven, and found the time to be consistently longer with both trials.) You might try turning up the oven heat by 25 degrees and keeping an eye on them. Aim for just browned crackers around the edges that don't feel soft at all in the middle.

I also made these by metric weight.

Rosemary Walnut Crackers
(Garde Manger: The Art and Craft of the Cold Kitchen)
about 48 crackers
  • 1/2 cup (1 stick) (115 g/4 oz) butter, well softened
  • 2 1/4 cups (225 g/8 oz) grated aged cheddar cheese, firmly packed
  • 1 cup plus 3 tablespoons (190 g/6oz) ap flour
  • 1 t. (5 ml) (6 g) salt (you may be able to omit if the cheese is very salty)
  • 1/2 cup (60 g/2 oz) finely chopped walnuts
  • 1 T. (1 3/4 g) finely chopped rosemary

Combine butter, rosemary and cheese in a large bowl and beat well by hand (or with hand mixer, or in a stand mixer). Add flour, salt and nuts, and stir to combine. (If the dough is much too crumbly, add a tablespoon or two of water.)

Form the dough into two logs, wrap tightly in cling wrap, and refrigerate for at least one hour and up to several days. (Can freeze for several months.)

Preheat oven to 325, and line a sheet pan with parchment paper. Slice the crackers to 1/5 of an inch (5 mm - and yes, I did measure them), and place 2 inches apart on the baking sheet. Bake for 15-20 minutes until golden brown, and eat immediately. Store any leftovers in a glass, air-tight container in the refrigerator, where they will taste good for a few days. They are best just after baking, however.

rosemary walnut crackers

The Daring Kitchen site will have the other recipes from the challenge this month. Alton Brown's Seedy Crisps made the list; they remain one of my favorites. A few other favorites from my own kitchen experimenting are the Gluten Free Multigrain Cracker, the slightly time consuming Sprouted Grain and Poppy Seed Crackers, perfectly grahamy Vegan Graham Crackers, and ultra crisp Ivy's Swedish Rye Crackers.


jams

I do really love making crackers, and I know I've said it before that nothing made at home makes people as impressed as them. For such a small time investment, you can enjoy something really singular in flavor and texture, and so many of them pair so well with things culled from the canning shelves!

Find the other Daring Baker Cracker Challenge recipes here, and the blogroll of other bakers here. Thank you to Dana for great challenge, and the inspiration to make more things icebox!

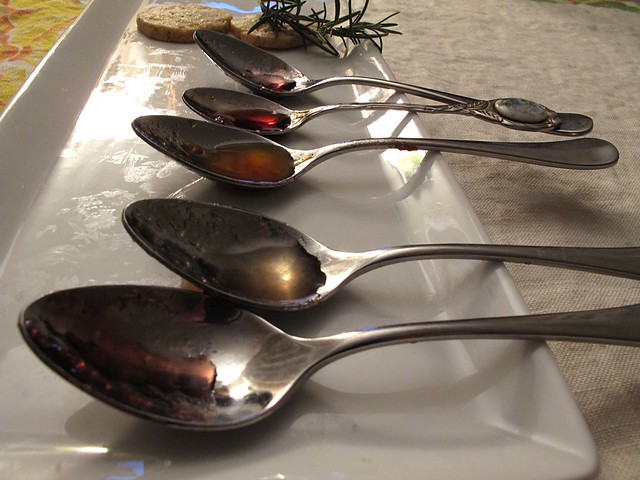
spent spoons

Friday, October 21, 2011

A New Direction and Ivy's Swedish Rye Crackers

I think it's curious that you can make almost anything from scratch, but nothing impresses people more than to tell them you made the crackers. It may be a preconceived notion that cracker origins are inexplicable: mystical, crisp things that elves or independent hippies in Vermont are lovingly packing into cardboard boxes. Maybe people consider that such things are not able to be made by human hands, but making preservative free, healthy snacks can become a rhythm backbone of the kitchen. Nothing is better than to open the pantry door and see a few jars of homemade crackers, fully deserving of your homemade dips, spreads, jams or jellies - things you can just pop out onto a plate when unexpected company arrives.


I really do enjoy making crackers, in fact I forgot how many different types I have tried and even posted about here until I searched 'crackers' in my blog search box on the right side of the page. I have some serious favorites, like the Gluten Free Multigrain Crackers or Alton Brown's Seedy Crisps - both of which are in regular rotation. Just as the school year began and I felt a lonely hole in my first few days of new solitary independence, my friend Deena emailed me and asked if I'd be interested in testing recipes, and if so if she might give my name to a friend of hers who was writing a cookbook all about crackers. I excitedly told her yes! Shortly after, I was acquainted with Ivy Manning, a cookbook author, recipe developer, and former Wisconsinite living now in Portland, Oregon.

Our first exchanges made me even more excited to be able to help. Ivy seemed oddly like me, living with a husband who is a "picky eater", fully passionate about food, and very busy. She began emailing me her recipes a few at a time, which I double checked for weights and volumes as I baked, and I tried to give her honest feedback about them. One of the first recipes I tested was for these slightly time consuming Swedish Rye Crackers - some that at the time I thought were good, but now they have grown on me so much I think I'll likely keep a batch around for emergencies on most occasions. They are very crisp, hard in fact, and they store like a dream. I've had the same batch in a half gallon canning jar for about a month and they only seem to improve. This week I ate them with a little of this incredible Walnut Lentil Pate, which I know I have mentioned before. As I ate them, I realized this cracker was the perfect pre-dinner munch, and they cemented my already warm feelings of rye flour.

Ivy decided not to use this version of Swedish Rye Crackers in her book, and granted me permission to post about them here, since I feel they deserve to have a special place in a cracker-maker's repertoire.


These are hard, crunchy crackers. If you are a fan of Rykrisp crackers or anything super crunchy, you will love them. Even though they have a good amount of rye flour, I feel like they are also distinctly wheaty in flavor. They are great for mopping up soup or mashed potatoes if you've forgotten the bread, and are good with jelly and peanut butter too - though personally I'd probably nix the caraway seeds if you plan on serving with something sweet.

Swedish Rye Crackers (Ivy Manning)
about 3 1/2 dozen crackers
  • 2 1/2 t. active dry yeast
  • 1 1/2 c. warm water
  • 1 1/3 c. bread flour, plus additional for rolling
  • 1 t. fine sea salt
  • 2 1/3 c. rye flour
  • 2 t. caraway seeds (I only put seeds on about half the batch, they are good with or without as you prefer)
  • Kosher salt, for topping crackers
In the bowl of a stand mixer, or in a large mixing bowl, dissolve the yeast in the water. Add the bread flour, and beat with the paddle attachment on medium speed for 2 minutes, or 50 strokes with a wooden spoon if mixing by hand.

Stir in salt, and gradually add the rye flour. Beat on medium low speed for 4 minutes. If kneading by hand, transfer the dough to a large ziptop bag, squeeze out the air, seal bag, and knead for 6 minutes. Do not add additional flour. Turn the bag inside out to free the dough from the bag, it will be sticky.

Coat a large bowl with oil and add the dough. Cover with plastic wrap, and let the dough rise for 90 minutes in a warm place.

Preheat the oven to 375. Turn the dough out onto a lightly flour dusted surface and divide into three pieces. Gently pat the pieces into rectangles about 1/2 inch thick. Roll one piece of dough out until it's about 1/8 inch thick, picking up the dough and rotating it frequently to make sure it isn't sticking. using a pastry or pizza wheel, trim the irregular edges and cut the dough into 4x2 inch rectangles. Place them on a baking sheet lined with parchment paper. Repeat with remaining dough to fill a second baking sheet. Prick the crackers all over with a chopstick, then spray them lightly with water, sprinkle with caraway seeds (if using) and press them in lightly so they will adhere. Cover loosely with plastic wrap, and set aside for 30 minutes. (You can re-roll the scraps once.)

Uncover the crackers and bake, rotating the sheets from top to bottom and front to back once during baking. Baking will take 25-35 minutes depending on the thinness of your cracker. (You can always take them out, and then re-bake them if you think they need to go longer.) The crackers should be browned around the edges, smell toasty, and be dry to the touch. Transfer to a cooling rack to cool completely, about 1 hour. Store in an airtight container for 2 weeks or longer...

(I baked a couple of 1/2 inch by 4 inch pieces of re-rolled dough scrap, and they puffed up hollow. Next time I make them, I may try cutting a whole tray full this way...)


So many times I wonder what I should be doing with myself. I really am content to be a homemaker, chronicling my adventures every so often so I can share some of my excitement with others. But sometimes I do get frustrated, I think I should be "gainfully employed", and then wonder what it is that I should be really be doing so that I can continue to enjoy myself as much as I have since I became a mother 5 years ago.

I know I'm not going to be the next Martha Stewart, but maybe I've found a niche in the behind the scenes of cookbook writing. This may be my first foray into this field, but it's one I hope I can figure out how to grow into more. It feels so good to see the the other side of the cookbook writing process, the amazing work that goes into it by an author, and the trials, successes and failures, and evolution of recipes. I have been reveling in cracker testing in part because it is a subject matter that is really appealing to me, but more because I feel good to be a bit unseen, a stealth baker who may just show up at your door with a little overflow of delicious kitchen bounty.


Now that Winter is on his way I feel I'll have so much more time to read, and I'm looking forward to reading more of Ivy's cookbooks: The Farm to Table Cookbook and The Adaptable Feast. Her book on crackers is scheduled for Spring 2013, but meanwhile you can find Ivy at her website. It's going to be a great book, just judging from my sneak peak testing... One recipe in particular I've made 3 times already, just because it was so delicious.

I look forward to the emails with little attachments, and like an archeologist who patiently brushes the sand away from stone bones, I have remember to discipline myself to follow instructions and be methodical. It's all a great lesson and learning experience, and I feel so thankful to have had it drop in my lap.

Saturday, April 2, 2011

Considering the Gluten-Free...


Barring my possible allergy to oysters and raspberries, there are no food allergies in my family. As I lead a pretty gluten-full existence most of the time, I haven't really given much thought as to what it would be like not to eat any wheat. No wheat. Wow, just thinking about it makes me panic a little. Everything I know about baking depends on this staple, and the way that the unseen power of gluten works its magic of stability and structure in a baked good. I have never gone out of my way to think about gluten-free baking before, and since I'll be hosting a gluten-free guest tomorrow, I figured a bit of experimentation this past week was more than warranted.

Last year, Peef and Lo went gluten-free for a whole weekend. I remember reading and wondering why they would do that. Maybe I'm of the ideal that I don't adhere to any culinary abstinence unless I have to, or maybe I didn't really know anyone first hand to stand in solidarity with, but I now fully understand their empathy with gluten-free individuals. Gluten-free is a challenge, but it's also delicious!

When I shopped this week, I made a point to peruse the gluten-free aisle at the grocery stores. It seems that the food industry is fully aware of the problems associated with this type of baking, and adjusts their prices accordingly. 5 lbs. of GF baking mix was over $20! I actually considered for a brief moment getting a box mix for $5 or $6 just to try it out. Then I came to my senses. I didn't realize just how much gluten-free material I had to work with at home, and that thanks to the Vita-Mix, I could make all of it into flour.


That's why, at 5 PM on a Friday, I was hovering around my oven, watching crackers bake. I stumbled over these crackers from Gluten Free Goddess by accident, and began looking at the ingredients. I de-veganized them by using an egg and milk, and substituted buckwheat flour for the sorghum. Tapioca starch is the same thing as tapioca flour according to Google, so I used leftover polviho (manioc) flour from my pao de queijo escapades. The result was a sturdy cracker, that will be perfect for dipping into artichoke dip.


I ground the amounts of quinoa, millet and almond in the dry canister of my Vita-Mix. Almond meal and quinoa and millet flours can also be found at food co-ops, specialty stores or online. (I'm not sure how a food pro or a regular blender would do whipping those into flour.) I had no trouble with the mixture being too dry using the amounts below, but you could add a bit of water to make a roll-able dough consistency. Be sure to check out the source recipe for dairy-free (vegan) substitutions!

Gluten-Free Multigrain Crackers (adapted from Gluten Free Goddess)
  • 1/4 c. quinoa flour
  • 1/4 c. millet flour
  • 1/4 c. buckwheat flour
  • 1/2 c. tapioca flour (also called tapioca starch)
  • 1/4 c. nutritional yeast
  • 3/4 t. baking soda
  • 1 t. salt
  • 1 t. onion powder
  • 1 t. granulated garlic (or garlic powder)
  • 1 t. brown sugar
  • 1 1/4 c. almond meal
  • 1 egg
  • 1/4 c. olive oil
  • 1/4 c. milk
Preheat oven to 350.

Mix the flours/dry ingredients in a large bowl.

Mix the egg, oil and milk in a measuring cup, beating the egg well. Add to the dry ingredients and mix well with a wooden spoon, and then your hands.

Line a sheet pan with a silicone mat or parchment paper. Roll the dough (I used a pastry roller) out into an even layer. (I liked the thicker consistency of my crackers, but you can easily use two pans, and spread the dough thinner. Just remember they will bake faster.) If you have trouble with sticking, you can use oiled hands, or put a piece of parchment over the top and roll on that.

Cut the crackers using a pizza roller or a fluted pastry wheel. I cut the edges even first, about 1/2 inch from the edge of the pan - the cutter won't reach all the way to the edge anyway, and this way, I got to eat all of the ragged ends! No need to try and separate them, they will bake up, and then break apart easily. Prick each cracker several times with a fork.

Bake for 25-30 minutes until lightly browned and crisp. They will continue to crisp up as they cool.

Eat right away, or store in the freezer.


I don't often "pretty-up" the baked goods, but these deserved it...

I think that gluten-free baking may be a challenge, but a rewarding one. Since I am already fond of alternative grains, putting them to good use instead of just having them on hand is good kitchen sense. Earlier in the week, I tested out some quinoa flatbreads, and quinoa in particular is something I'd never have though of using as a flour. If you love quinoa, and it's amazing protein profile, give them a try. I used chia seed and an egg (after reading the comments) and ate far too many hot out of the oven.


Now, off to the freezer with you so I don't eat you all up.

Wednesday, March 16, 2011

Sprouted Grain and Poppy Seed Crackers


I never knew you could sprout poppy seeds. When looking for my next kitchen project, I thought I'd give Sally Fallon's sprouted grain crackers a try, and began a 4 day sprouting adventure on some of the tiniest seeds in the world. Poppy seeds happen to be one of my most favorite things, I assume because they naturally pair well with almond extract, an elixir I'm fairly sure I could drink straight up and not feel too bad about.

I had poppy seeds in mind for my Daring Baker Challenge this month (I'll make that next week, and post it on the 27th as usual). In looking up information on the poppy seed and ways to make them into pastes, I discovered that there are between 1 and 2 million seeds in a pound - 3300 seeds making up a single gram. They are an oily seed, and as I've actually noted firsthand, they can go rancid rather quickly. Prior to my project, I got what is considered the finest poppy seed in the world, Dutch poppy seed, from the Spice House. I'll admit, I was actually wondering all the while if they would actually sprout, and what in fact the sprouts would taste like. They did sprout, and were surprisingly tasty.


I'd say that they no longer had their characteristic nuttiness, but more of a "sprouty" flavor, still packed with a fair amount of crunch. I used about half of what I sprouted in the crackers, and ate the rest for lunch on sourdough flatbreads spread with hummus and radishes. It was probably one of my favorite lunches in recent memory - the tiny sprouts reminding me of a vegan caviar.

On about day 3 of the sprouting, I re-perused Sally Fallon's recipe, and noticed that the sprouted wheat wasn't supposed to be dried - that the seeds and grains should be sprouted and then mixed up into a paste, then the whole of it dehydrated together. I knew that I didn't have enough waiting time to sprout up some more wheat (and besides, I only had hard wheat for bread-making on hand). I poked around for a new recipe to use some of the sprouted, dried and waiting-for-me-in-the-freezer soft wheat I did have.

I discovered a site that is probably no secret to most people, but it was new-to-me: Cheeseslave. I had heard of Cheeseslave, but never ventured over before, and now I have just one more devoted place to stop by on my Internet rounds. I knew right away after mixing up the cracker dough that I was smitten...


I found that rolling the somewhat soft dough between layers of parchment worked the best for me. I cut the parchment to the same size as my dehydrator trays, and then cut them into squares with a pizza cutter and slid the whole works into place. One new benefit I've discovered and love about dehydrating is the extra exercise it gives me - my set-up is in the basement, and I have to make several trips down there to load it and keep checking on it. Ann Marie (a.k.a. Cheeseslave) says that you can also bake the crackers, which would give them a nice toasty color. But despite their paleness, these are really packed with flavor. I made a half batch (the amounts listed below) just to test it out, but next time, I'll double everything and make better use of the dehydrator space.

Sprouted Grain and Poppy Seed Crackers (slightly adapted from Cheeseslave)
  • 2 1/2 c. sprouted wheat flour (purchased, or make your own)
  • 1 c. yogurt (or buttermilk)
  • 1/2 c. (1 stick) butter, mostly melted
  • 1/4 c. coconut oil, melted with the butter
  • 1 1/2 t. baking powder
  • 1 t. sea salt
  • about 1/4 c. sprouted poppy seeds
Using a stand mixer with paddle attachment (or by hand), combine sprouted flour with the yogurt. With machine running, add in the butter, coconut oil, baking powder and salt and continue to mix until a soft dough forms. Add in the sprouted seeds last, and mix until evenly distributed.

Divide the dough in half. Roll out dough between two sheets of parchment paper to about 1/8 inch thickness. Using a pizza wheel, cut dough into cracker size pieces - whatever shape or size you like. Transfer dough (I left it on the parchment) to a food dehydrator tray.

Dehydrate at 150 degrees or less for about 16 hours until fully dry and crisp. You can also use the low temperature oven method described by Cheeseslave, or bake them (on the parchment) on a sheet pan at 350 degrees for about 20 minutes.

When fully cooled, I stored mine in the freezer to ensure their freshness (and discourage myself from eating them all right away).


The crackers are surprisingly crisp and rich, but due to their fat content they are still amazingly delicate. They are rich enough, however, that I didn't feel like I couldn't stop eating them - just a few 2-inch square crackers were plenty for me. These taste like the most delicious wheat thin that you could ever imagine, and I would almost swear there was an addition of cheese to them too. That sprouted grain has such a specific, nutty sweetness to it... it's impossible to describe, and it's perfect in a cracker.


About half-way through the dehydrating process, I slid the parchment out from underneath the crackers.

I could see immediately a hundred different uses for these crackers - but since I'm trying Julia's awesome jam on everything lately, I tried that just after eating one plain. It was like a truly fancy dessert, one that upscale places serve that embrace both savory and sweet. The cracker almost took on a pie-crustiness that made me feel wildly trendy: like I could pull off charging $12 for a plate of 4 of these delectables. I smirked all the more knowing that I was tasting it mid-morning with no one else around to have to share with.


Thursday, April 1, 2010

Soda Crackers and the Mystery of Links

I have a serious link problem. I collect recipe links in three places: my iPod (recently updated to full-fledged iPhone), the little Netbook, which is my new kitchen friend, and the "big computer" which is up in the attic. I read so many different blogs, and find ideas in so many places, that the link list is seriously out of control. This is the same digital clutter that is taking over my hard drive in the form of food photos, and it's almost something I don't know how to tackle.

The digital age has presented a whole host of problems for people who love to cook. A decade ago, I had real clutter. Towers of paper clutter in the guise of magazine recipes that were too great to discard. Sometimes I cut the pages into smaller sizes, just the recipe, so that more of them were floating around until making their way into semi-organized manila envelopes, and some that were whole issues of magazines - too chock full of ideas to toss away. One good thing about moving occasionally is that I can take stock of real clutter and ditch it without thinking twice because suddenly a few crates full of "must make" recipes seems too heavy to be carrying up and down rental apartment stairs, into moving vehicles, and off to new, clean and uncluttered spaces.

The digital age enables me to mysteriously, and secretively, collect and earmark things that I have to make. Sure I don't have the physical clutter, but since there is just so much information around and so many people making amazing things, sadly many recipes go forgotten under the weight of the bookmarking itself.


Recently, I've actually been pretty successful in my attempts to stop bookmarking. Things look good to me as I'm perusing around, but I mentally note it (unless it is something too good to pass up, and that does happen) instead of adding another folder to the favorites. I do have a preternatural ability to remember such facts about which Merguez sausage recipe I wanted to try (this one from Sassy Radish) and which baked donuts I need an excuse to try (these applesauce ones from Twin Tables), just two of many examples.

Lately, I've tried to stick to making things as I find them, which is what happened when I read this post from King Arthur Flour's Baking Banter blog the other day. I got done reading, and promptly mixed up some dough. I love finding recipes for things that are kind of ordinary, but that most of us don't think of making for ourselves. Crackers are certainly on the top of that list, and it's a shame since homemade are always better, even if they aren't perfect.


I find King Arthur Flour recipes to be pretty fail-safe. They run an extremely well thought out test kitchen, in my opinion, and even have help lines for you to call. People this passionate about home baking are always going to be tops in my book.

This original recipe called for Italian-Style flour, which of course is not normally stocked in my well-stocked flours. I may have ample amounts of semolina, AP, white whole wheat, whole wheat, coarse corn meal, buckwheat, bread flour and all manners of coarse brans, but Italian-Style escapes me. I have a cart going on the King Arthur website (I need this to make innBrooklyn's pancake mix, and this to mix quickbreads with since I've wanted it for a really long time), so I think I'll order a bit of Italian flour and make these according to their published recipe. My version was good, and passable as a cracker, though perhaps not as a soda cracker which is their intended purpose.


Sometimes I think it's a sickness I have that I just can not follow instructions! Usually I have pretty good luck, and these were no exception. The dough is mixed and rested in the refrigerator for 18 hours (or more than 24 in my case, since I was gone for part of the day today), and then rolled thin. Echoing the methods used in puff pastry making, the dough is folded in thirds, and re-rolled thinly which creates layers in the finished cracker. Letting the cracker cool on the sheet pans in the oven adds crispness:


I like to keep things fairly uniform, but detest waste, so I baked up the little ends separately to have little "avant garde" crackers:


In fact, I may use my same (altered) recipe again and make the pieces smaller. They got very crunchy due to their diminutive size, and they were very addicting.

If you too are lacking in Italian flour, you can give the Rcakewalk version a try while you are waiting for your King Arthur Flour order!

Part Wheat Soda Crackers (adapted from King Arthur Flour)
  • 1/2 c. whole wheat flour (KAF)
  • 1 c. AP flour (KAF)
  • 1/4 t. salt
  • 1/4 t. baking soda
  • 1/4 t. cream of tartar
  • 1 t. sugar
  • 6 T. water
  • 2 T. butter
  • 2 T. olive oil
Mix the dry ingredients in the bowl of a stand mixer. Heat the water with butter and oil until the butter melts, then let it cool until the mixture is about 120 degrees (they mention that it should feel a little cooler than your hottest tap water). Add the liquid to the dry ingredients while mixer is on low. Once the liquid is added, increase speed to medium and beat about 90 seconds until a soft, smooth dough is formed. Put into a lidded container, and refrigerate "overnight and up to 18 hours". The dough will not rise too much, so you can use a smaller container.

Remove dough from fridge, and let sit for 15 minutes. Heat oven to 425 degrees, and line 2 sheet pans with parchment.

On a well floured surface, roll dough to about a 13x15 inch rectangle. Starting with the shorter side fold in thirds (like a letter) and roll again to about an 11x19 rectangle. Sprinkle with salt of your choice (after yesterday's post in which I ranted about salt usage, I used just a light sprinkle of kosher salt), and lightly roll over it with the rolling pin to press it into the dough. Using a knife or pizza cutter, cut into 2 inch squares and transfer to the waiting sheet pans. Poke each one a few times with the tines of a fork.

Bake for 10 minutes, maybe a shade longer, until the crackers are golden brown. Turn off the oven, and open the door wide, and let them cool on the racks until they come to room temperature. I'm thinking this would be a good project for when the weather is a bit chilly, but you don't have the heat on, since it will make your kitchen nice and warm (but perhaps a bit hazardous for small children).

I did follow the instructions from the original recipe, accidentally increasing the cold rest time since I was gone. The only difference, is that since there is higher protein content in the flours I used, the dough was much more difficult to roll out. On closer evaluation, I think I could have increased the water by a Tablespoon or so, since I used the wheat flour. This is definitely a work in progress, so if you do take up the challenge, I hope you will report back to me!


Please be sure to check out the tutorial and the original recipe over at Baker's Banter. If ever you need just one more blog to follow (and you love to bake) it is a great resource! Meanwhile, I'm mentally adding up all the things I'd like to try, and adding another lifetime to the 8 I already need to accomplish what I'd like to get done. Recipes like the one above confirm to me that I really would love to have a home-based test kitchen... one properly stocked with the right ingredients (and while I'm daydreaming, one with 3 foot deep, concrete countertops, and an extra well-lit counter for photographing!). I'll try to remember to let you know how the original recipe turns out when my flour shows up...

Saturday, February 6, 2010

Seedy Crisps and Cheese (Balls), or In Which I am the only person in America not making Super Bowl foods.

I guess you could say that I really dislike most sports. I never enjoyed playing organized sports, grew up in a family who never paid any mind to what sport was in season, and generally was never interested at all in using my free time to watch them either in person or on television. I embarrassed myself terribly each fall Friday when guessing the high school football team's final score in one of the Coach-taught classes I took, since my number combinations were never actual possibilities. I forget why I even took part in this, I think a reward was involved for the winner.

My view of sports changed somewhat when I met my Husband. I watched more baseball in the summer of 2004 than I did in my entire life to date, and to tell the truth, it did seep into my blood a bit. But baseball is not where the sporting events my Husband follows ends - in fact it is just one of many sports that interest him. If I made a list of sports I could watch that he does enjoy in order of my relative enjoyment (and I'll limit it to 10 items here...) it would be as follows (number 10 being most tolerable):

10. Baseball
9. Wrestling
8. Boxing
7. Hockey
6. Soccer
5. Golf
4. Basketball
3. Tennis
2. Mixed Martial Arts (MMA or UFC)
1. Football

I'm not sure why I hate football more than any other American alive, but I think it has something to do with the fact that I can not understand the rules at all. Can't and don't want to, if I am being honest. This past week or so, I've read a lot about what food bloggers will be having for their Super Bowl parties, or have had at parties in the past. I now have a whopping 5 Super Bowl parties under my belt - and kind of feel bad that I can't really identify to the most American of sports and food spectacles.

As a kid, Super Bowl Sunday was just another Sunday to us. I honestly do not recall my Dad or brothers ever being interested it it. And it wasn't until 1999, that I asked R1's husband and he tried explaining the rules to me a little. It was usually on Packer-football Sundays that she and I would either go for a walk or go shopping in pleasantly dead stores instead of me practicing how to understand a spectator sport. (If I am being fully honest, I will say that in 2001, I did watch the entire Super Bowl for the first time in my apartment in Wilton, armed with some now-forgotten knowledge. I was more interested in the commercials, and I think my little brother came and brought a bag of chips with him - so that was kind of a party...)

When I checked my computer this morning, George Gaston, of A nod is as good as a wink to a blind horse, had commented on one of my posts. I sometimes don't get to reading as many other food blogs as I'd like, just since I don't spend too large a portion of time in front of the computer. I clicked over to see what he was up to and read the most wonderful description of his love for spreadable cheese balls and parties when he was a child. He was chided for his love of the Cheese Ball, but he came up with a recipe for one that I knew I had to make. Since I had a free day today with dinner already complete (and a Super Bowl party to attend tomorrow with nothing to bring), I thought I'd give it a go.

But in my mental preparations, I knew that I couldn't make a Cheese Ball without first having some kind of cracker to spread it on, so this is where I began:

Alton Brown's Seedy Crisps. I love this recipe, and that it really isn't a messy dough to work with. It's fairly forgiving, has a great flavor, and even keeps well stored in glass for a couple of weeks. Whenever I think of crackers, I think of Alton, since he "doesn't trust his cracker making to elves in trees" and insists in weight measurements for accuracy in baking. I printed out his recipe from Food Network, though it was also featured in one of his books, and usually weigh the water but not the dry ingredients with fine results. You can roll them with a pasta roller as I did, or by hand. Your thickness directly determines the cooking times, so watch carefully.

Seedy Crisps (adapted (but really only the weights) from Alton Brown)

  • 5 oz. whole wheat flour (I use 1 c.)
  • 4 3/4 oz. AP flour (I use 1 c.)
  • 1/3 c. poppy seeds
  • 1/3 c. sesame seeds
  • 1 1/2 t. table salt (they are a bit salty, you could use 1 t. and be just fine I think)
  • 1 1/2 t. baking powder
  • 3 T. olive oil
  • 6 1/2 fl. oz. water (this is less than a cup, but more than 3/4 c.)

Mix all of the dry ingredients in a medium bowl and then add the olive oil. Stir with a spatula until well mixed. Then add water, and stir/mix/fold until a dough appears. Turn it out onto a lightly floured surface and knead it 4 or 5 times until it feels like a proper dough. Try not to overwork it. Cover with a towel and let it rest 15 minutes.

Heat oven to 450 degrees, and use the center and above center positions in your oven for the racks. Cut dough into 8 pieces (like a pizza, is the way I do it), and roll with the pasta machine to the thinnest setting without tearing the dough (5 on my Pasta Queen), or roll by hand as thin or thick as you like. (For thin crackers, aim for 1/16 of an inch thick, and for thick 1/8 of an inch.

Alton likes to transfer the large sheet of dough to a parchment lined sheet and bake it whole, breaking it apart when it cools. I did a couple that way, but then cut the rest into strips with a pizza cutter and transferred them to parchment lined sheets with a spatula. It's slightly more work, but less mess in the long run.

Thin crackers will bake about 4 minutes on the first side, then 2-3 more on the other (but I did mine 5 minutes, then flipped and let them bake another 3-4 until they were nice and brown). Thick crackers (according to the recipe) will bake about 6 minutes on the first side, then 4-6 minutes on the second.


The large sheets looked like rustic sheet music, and when I broke off a piece I ate it immediately with a spreading of whipped Novia Scotia blueberry honey that my Parents brought me from their last vacation. I though if I had some prosciutto with the honey, that would have been really perfect. Then I thought, an aged Swiss cheese and that spicy mustard would be really perfect, too. I imagined the possibilities as I took advantage of my hot oven to bake my sweet potato for George's recipe. It was a huge sweet potato, and took almost an hour.

Wait a minute, a Cheese Ball and I'm baking a sweet potato? Go ahead and click over now, since I know you are so curious, and I'll wait for you.

You can see why I was so intrigued by this recipe. It was actually mostly good for you, and so pleasantly absent of that port wine veining, that you know has got to be a FD&C color of some sort. I hardly altered it, too! I did use more jalapenos, and actually didn't add the nuts because I forgot, but that was it. Then, I just left it "dip shaped" instead of classically "Cheese Ball shaped", since I didn't want to fuss.

I made a half recipe since I thought I'd be snacking on it for a week by myself. I even had mental planning to make some bagels for the other 4 oz. of cream cheese, and even the Cheese Ball spread that I knew I would like. Then, I asked my Husband if he wanted to try some "dip", since I knew he already liked the crackers. Success! Am I going to divulge the secret and orange ingredient? Not unless he asks. Now I'm *almost* wishing I was having a Super Bowl party to serve it for.

Please take the time to check out the many amazing recipes and great writing on George's site. you may find a few surprises that you are now glad you won't live without! I know I'm going to be keeping closer tabs on it, too.