Showing posts with label recipes. Show all posts

Monday, June 28, 2010

Vegan Monday: Strawberry Rhubarb Cake


I kind of think every once in a while there is a recipe so well constructed that you can do virtually anything to it and it still turns out wonderful. That is the case of Maya*Made's Grandmother's One Bowl Apple Cake. Ever since I first saw the recipe, I have made it every which way, this way being my favorite, and used pretty much every type of fruit I've had on hand. I think old-fashioned recipes such as this one really are gems, and deserve the highest place in the home kitchen. Without ingenious and industrious forebears, we likely wouldn't have pantry staple cakes such as this one, and it is something I am supremely grateful for.

When I unloaded the car yesterday afternoon after being self-bombarded with strawberries and a nice big bag of fresh rhubarb from my Parents' garden, I didn't really figure that I'd be making a vegan cake for myself in the midst of many other projects that brought me deep into the night before calling it a day.

But this cake is so gloriously simple, that you can in fact do it when you have 15 other things going on, and it will turn out. It is moist, reasonably healthy, and studded with fruit that bakes into even sweeter goodness. Since I added nutmeg, I could have sworn that there was pumpkin in the batter - a trick that could flummox even the most experienced foodie palate.


Vegan Strawberry Rhubarb Cake (adapted from Maya*Made's Grandmother's recipe)
  • 1 c. diced rhubarb
  • 1 c. chopped strawberries
  • 1/4 c. agave syrup, light or dark
  • 1/4 c. vegetable oil
  • 1 flax egg (1 T. flax meal mixed with 3 T. water)
  • 1 t. vanilla extract
  • 1 c. whole wheat flour
  • 1 t. baking soda
  • 1/4 t. cinnamon
  • 1/4 t. nutmeg, freshly grated if possible
  • pinch of salt
Preheat oven to 350. Coat an 8 inch baking tin with cooking spray, or coat lightly with oil.

Stir dry ingredients together in a small bowl. In a larger bowl, stir strawberries, rhubarb, vanilla, flax egg, oil and agave syrup together. Add the dry ingredients to the wet and mix to combine. It is a thick batter, so try to be gentle and not over mix.

Press into the cake tin. You may wish to wet your hands lightly with water and press it in gently this way. Bake for about 30 minutes, until cake tester comes out clean.

Let rest in the pan for 10 minutes before turning out onto a cooling rack and cooling completely.

Since it is a very moist cake, I would suggest storing any leftovers in the refrigerator - even though I am inherently against cake refrigeration...


A bite of cake doesn't seem like a world changing thing, but I love to imagine Maya*Made's Grandmother and how she happened upon this recipe. Each time I make it, I feel some strange connection to another family's traditions, even if I am tweaking it each and every time I make it. It will always be Maya*Made's Grandmother's Cake, and I will always be thankful for it.

Monday, June 21, 2010

Vegan Monday: Almond Almond Granola


This Monday's post isn't flashy and sophisticated, but I accomplished my goal: to use up the almond pulp that is leftover from making almond milk. I have been making and drinking more almond milk since I discovered how easy it is, and it is a versatile and tasty milk alternative, that I find addicting. The only thing bothering me is the leftover almonds, finely ground, which just seem too viable to me to toss away.

I have been thinking that my homemade by-product would work well in granola, and have been waiting until I needed to actually make more to give it a try. In the name of experimentation, this is sometimes hard for me to do, and then I find myself with too much to eat up. It seems like it's been a while, but I finally ran out, and am happy to announce that I found a good and serviceable way to use up almond pulp (you could substitute almond meal, or ground almonds, if you wish), and a way to maybe somewhat satiate my complete addiction to almond extract flavoring.


This recipe could easily be transformed to Raw Vegan Muesli. Instead of baking the ingredients, just combine the ingredients raw (without the oil and maple syrup) and soak them overnight in almond milk before eating. Then I guess it would have to be called Almond Almond Almond Muesli, because of the triple almond punch of extract, milk and pulp. I would probably recommend storing it in the fridge if you make the muesli out of almond pulp, since it has a higher moisture content. Either way you try it, if you are an almond fiend, this is a nice almondy way to get your fix!

Vegan Almond Almond Granola
  • 3 c. rolled oats
  • 1/2 c. dried, unsweetened coconut
  • 3/4 c. almond pulp (or almond meal)
  • 1 t. cinnamon
  • 2 T. vegetable oil
  • 1/4 c. maple syrup
  • 1 t. (or more) almond extract
Mix dry ingredients in a large bowl. Lightly beat oil, maple syrup and almond extract in the measuring cup to combine, then add to the dry ingredients and mix well.

Spread onto a parchment lined baking sheet, and bake at 300 degrees for 40-50 minutes, stirring every 10 minutes until it is as brown as you like it. I think mine took longer than usual, since I used the leftover almond pulp, and it isn't as dry as an almond meal would be.


Feel free to add additional nuts or seeds prior to baking, or chopped dried fruit(s) after to change the flavors up a bit. It isn't the most complicated granola, and is better served as a cereal instead of eating out of hand, but I love it's soft and gentle flavor. So many granolas I experiment with are full of fruits and crunchy nuts, which I love, but this one is kind of the polar opposite. I like something a little basic for breakfast once in a while, and this is the perfect, basic, nutritious breakfast in my book, since it has no refined sweetener, a good amount of protein, and is full of my favorite almond flavor.

Happy Vegan Monday to you, and hopefully you will find this an easy granola (or muesli) to slip into your breakfasting!

Saturday, June 12, 2010

To Borrow a Phrase: Greek Hippie Salad


I consider the humble wheat berry. It is wholesome, toothsome, versatile, and completely underused in my kitchen due to it's incredibly long cooking nature. I never remember in advance that it should soak for 8 hours prior to it's 1 hour stove-top simmer, and frankly, since I don't know what I'm going to eat from day to day, planning for such ingredient usage is usually out the window unless a dinner party is involved. I do usually have a quart jar stashed under my cupboard, just in case inspiration and planning strike me.

In the past week, I have taken note of 3 separate salads: one with wheat berries, one with crunchy radish and lettuce leaves, and the last one a genre of salads given a great name - Hippie Salads. Starting in reverse order, Marisa at Food in Jars noted somewhere (and I don't remember which post) that her husband isn't always so fond of her hippie salads, salads that are comprised of whole grain and leftover and miscellaneous healthy things. I'd have to say, that my Husband is even pickier than hers, so the concept of Hippie Salad at my house is usually tailored just to suit me for lunches, light dinners, and snacks. I rather like this arrangement, since I determined a while back to no longer make enough salad to feed Guam, and successfully scaled down to accommodate only myself.

As for the crunchy radish and lettuce leaves? Just look here at the beauty that is Veggie Le Crunch! Sprouted Kitchen is really a beautiful, photo driven food blog, but she has some killer recipes as well. I actually fully intended to make a generally the same version of this salad (since I truly am incapable of following proportion and direction), but veered from my course when I stopped by the Outpost today. They had beautiful red and green romaine lettuces on sale, and I for some reason I just had to have a Greek style salad right then and there. I got a cucumber (knowing the leftovers will be tossed in some homemade sour cream that I just made and need to use), and some imported French sheep's milk feta. The bones were laid.

Mid week, Boy-O and I visited R1's place, and I was perusing a magazine and saw the picture for this salad on an olive oil advertisement. I perceived the edamame to be bright green peas, and thought immediately of a pea type version of a wheat berry salad that would be worthy of the new innBrooklyn Virtual Veg of the Month Club. This month's selection is peas and/or pea shoots, and while I haven't scored any fresh from the Wisconsin earth peas yet, the hippie salad I concocted used a healthy amount of the frozen variety.


A couple of thinly sliced and quartered radishes that I had to buy earlier in the week after drooling over Sprouted Kitchen's Veggie Le Crunch.

When I have inspiration, it's easy to concoct, but I still had the pesky problem of the soaking and cooking of the wheat berries. I didn't remember last night that I wanted to cook some today, but I did know that I did around noon. I figured since I love my pressure cooker for pinto beans (and had used it yesterday and still had beans leftover), I would use it for the wheat berries. Thanks to this site, I found charts for pressure cooking everything! I soaked a half cup of rock hard berries in 3 times their water, and went to a birthday party across the street. When we got home around 4, I put them in the pressure pot with plenty of water to cover them by at least 2 inches, and cooked them on medium for 30 minutes. I quick-released the pressure by running the pot under cool water, and was rewarded by perfect, fat berries ready for a Greek Hippie Salad!


As with all hippie salads, you can omit, add or augment however you see fit. My half cup of raw wheat berries yielded a bit more than a cup of cooked berries. All told, my salad was a bit over 2 1/2 cups. Instantly veganize your salad by omitting the feta.

Greek Hippie Wheatberry Salad (inspired by the sources above)
  • 1/2 raw wheat berries, cooked using whatever method you prefer
  • 2/3 c. frozen peas, cooked in boiling water until done - 3 to 4 minutes
  • 1/2 cooked beans, I used pinto
  • 1/3 cucumber, peeled, seeded and finely chopped
  • 2-3 radishes, thinly sliced and quartered
  • 1 1/2 oz feta cheese, imported sheep's milk is strongest
  • 2-3 T. chopped red onion
  • 1/2 lemon, juiced (about 1 1/2 T.)
  • 2 T. extra virgin olive oil
  • 1/2-1 clove garlic, minced or grated on a microplane
  • 1/4 t. oregano
  • salt and pepper to taste
  • romaine lettuce leaves for serving
In a small bowl, combine lemon juice, olive oil, garlic, oregano and a little salt and pepper. Whisk to emulsify into a dressing. In a larger bowl, combine all other ingredients and toss gently with dressing. That's it! Serve it on the lettuce and add a little more black pepper if you like.


I tasted it and loved it, of course, since I made it to suit exactly what I had a taste for. I didn't originally add red onion, because I didn't think I had one - but luckily I found one that was in desperate need of using, so I added it after the photos. It was the the missing link. I then thought I could have gone and added red and green pepper, and even some other colorful and hotter peppers, but I'll save that for next time.


The missing component.

Hippie salad, or not, my Husband thought he'd even try a bite, though he hasn't yet. I ate mine rolled up in a lettuce leaf like a taco, and then had to have another big scoop on the side. I'd bet the avocado dressing that Sprouted Kitchen made would be good as a wheat berry salad dressing... but then I'd bet that each and every reader could add or subtract one thing that would improve upon the Greek foundation that I was craving this chilly June day.

How many salads have you seen that just call your name and have to be made? I know I'm not alone, when it is a numberless amount for me. They are probably one of my favorite things to make and eat, which is a lucky predicament to be in indeed. I find, that any kind of salad of this nature, stuffed into a tortilla (homemade of beans or corn masa), garnished with cheese and hot sauce is pretty much foolproof.

Not sure how this Greek version would fare in my my old standby, but I have a feeling I'll be making some flat breads after church tomorrow...

Sunday, June 6, 2010

Beet Gnocchi. Enough Said.


This is only the second time I have ever made gnocchi. Or eaten gnocchi. A few years ago, I was watching Mario Batali make it on the Fine Living Network, and I had a revelation. He made it look so easy! Like I should just be able to do it tonight, while conversing with friends over a glass of wine. I also discovered during that Molto Mario episode, that I personally owned a gnocchi paddle. My Mom had given me a bunch of kitchen tools, probably from an auction or rummage, and among them was this paddle. When I had limited wooden utensils, I tried using it to stir and couldn't fathom why it would have grooves. It seemed like the worst idea ever for a kitchen implement. It spent a long, lonely decade in the bottom of a drawer before, fortuitously, Mario showed me it's intended use, and thanks to his enthusiasm, I went right from the couch to the kitchen and made my batch. After all, if I had this neglected piece of kitchen software, I may as well put it immediately to good use.


InnBrooklyn's Veg of the Month Club selection this month is beets, and I felt a particular inclination to outdo myself, since it was my beet pasta experiment that first attracted them to CakeWalk as readers and now to me personally as "froggers" (friends+bloggers). I actually was acquainted with them first through a connection at flickr, and ever since I feel like I'm chatting with old friends when we write (or now Skype) on a fairly regular basis. I feel renewed in my creativity since joining forces with them for LIFEyear, our 365 photography project, and am really happy that I was able to forge such a meaningful connection with people so far away, that I would never have met if it weren't for the Internet!

I also personally wanted to try making gnocchi again; my first attempt with plain russet potato was alright, but far from perfect. Since I really had no way of knowing, I made the dumplings, and then let them sit covered at room temperature for several hours until I boiled them. I've learned since, that if you don't intend to boil them right away, you should freeze them in a single layer on a sheet pan, and then pull them directly from the freezer and introduce them to the boiling water when needed. I'd say I'm still a ways off from perfect gnocchi, but at least I'm having fun and gleaning a bit of extra nutrition along the way.


I used Mario Batali's recipe for gnocchi, but used 1 part beet to 2 parts russet potato. I also opted for roasting the beets and potatoes, to preserve the color in the beets - boiling tends to wash them out.

To roast the beets and potatoes, preheat oven to 375, lightly coat them (unpeeled) with olive oil, and let them stay in there until a piercing knife yields very little resistance. The beets will likely take longer, so start them 20 minutes before adding the potatoes. When they are done, cool them just enough so that you don't burn yourself when handling them, and then scrape off the skins. You'll want to rice them (or finely shred them) when they are still warm, but more on that below.

Beet Gnocchi (adapted from Mario Batali) with Brown Butter and Crispy Lemon Thyme

makes 4 main courses or 8 side portions, but I suspect this will vary with your state of hunger.
  • 1 lb. beets, roasted
  • 2 lbs. russet potato, roasted
  • 2 cups, AP flour (plus additional for rolling)
  • 1 egg
  • pinch of salt
When potatoes are roasted and peeled, use a ricer to finely grate them onto a clean sheet pan. (I have no ricer, but one is now on my list! I rub them through a fine stainless sieve which works well.) If you have a ricer, it may be strong enough to rice the beets, but since I don't, I cut them into large chunks and processed them finely in my food pro. Then, I added them on top of the potatoes, and let them cool slightly.

Mound the beets and potatoes together to make a brilliant pink mass, sprinkle liberally with about a cup of the flour and a pinch of salt, then make a well in the center. Crack in the egg, and beat well, adding more of the flour to the egg and then mixing it in well with the egg. When you have a dough forming, knead it by hand gently into a ball, continuing to add flour as needed, until you have a relatively smooth ball that isn't too sticky.

Have two sheet pans lined with wax paper or parchment paper ready. Cut off small portions, and roll into long "snakes" a little larger than the diameter of your thumb. Use plenty of flour (I found that I actually kneaded more flour into the small portions prior to rolling them out into snakes), to keep them from sticking. Using a sharp knife, cut them into 1 inch portions.

When you have a "snake's" worth of dumplings, roll them across the gnocchi paddle or the tines of a fork. (A good explanation of how to do this: here.) Dust the resting gnocchi with flour if they are sticky, and keep them in a single layer. If you are making them for later, freeze in a single layer, then transfer them to a jar or zip top bag and store in the freezer.

Bring a kettle of water to a boil, and add a bit of salt - as if you were cooking pasta. When the water is at a rolling boil, add gnocchi. (Mario has a bowl of ice water standing nearby to stop them from cooking as you remove them. I will remember to do this step next time! Mine were a touch sticky since I didn't.) When gnocchi floats to the top, remove them from the boiling water using a slotted spoon and plunge them into the ice bath. Let them sit there for a minute, and then drain. Mario tosses them with oil to hold them, but I did not since I made browned butter.

Browned Butter with Lemon Thyme
  • 3 T. unsalted butter
  • 3 or 4 sprigs of lemon thyme
In a small saucepan, heat butter over medium heat until it begins to foam. Add thyme (it will crackle and spit at you), and continue to heat until the butter turns brown. Watch it carefully or it will burn. Spoon the butter over the finished gnocchi, and garnish with crispy thyme.


I wasn't sure what to expect when I took the first bite of hot beet gnocchi. Since I had neglected to do an ice bath, they were a bit sticky... Happily, they tasted terrific with a deep, beet-y flavor, and a very dumpling-esque texture. I had a gnocchi expert for dinner, since Sasa grew up eating it, and she told me that the texture was good, so I'm taking her word on it. I really don't think I have ever eaten gnocchi anywhere, so I have some more homework and experimentation to do. If anyone has a good recommend of any Milwaukee area restaurants making exceptional gnocchi, please let me know so I can go and eat it! I feel like I should have added more flour to my dough, but found myself likening it to egg pasta dough, which definitely can not be an accurate comparison.


Since I heeded Ina Garten's advice of never cooking anything you have never cooked before when you are having company for dinner, I had a fresh loaf of bread and a big slow cooker full of shredded Italian Beef ready before I even brought my kettle to a boil... and Sasa told me that in Croatia, they always had gnocchi with a beef sauce kind of like a goulash.

She easily convinced me to experiment with a portion of plain, un-butter-sauced gnocchi. We heated a pan over medium heat and added a tablespoon or so of leftover browned butter. Then, I made a roux by adding an equal amount of flour and stirring it for about a minute. I added maybe a half of a cup, all told, of warm water, and continued stirring with Sasa adding salt, aleppo pepper and finally, a good amount of sweet smoked Spanish paprika. Lastly we stirred in a heavy cupful of shredded beef and let it turn into a sauce:


I grabbed my camera, and she told me that maybe it wasn't the most photogenic thing. I agreed, but was it tasty! We all mixed everything together as we ate, grating Parmesan cheese over our whole plates, and devouring all but about 11 little gnocchi. It was suspiciously quiet during dinner, so I know that it is certainly a meal that I would make again, and hopefully soon, since I only cooked half the amount of beet gnocchi that I froze.

I may be hesitant to join more organized groups, but I have to say I really like participating on a whim to "round-ups" such as the Veg of the Month Club, and Buttermilk Party Cake's Elevenses sweets. I do think that it forces me to be creative in my kitchen, if for no one else, then for myself. My Husband detests beets, and they are one of my favorite things, so I was very happy to have fellow beet lovers to enjoy my hard work with. If you love beets and have a beet recipe you want to share with others, consider submitting it to innBrooklyn before May 9, 2010. I know I'll be eagerly searching their results on the 10th for my next beet adventure!
Friday, June 4, 2010

Homemade: Raw Almond Milk

Yesterday, I got it in my head to make almond milk. I know I have serious problems with experimentation when a mere mention in a conversation with my Mom had me thinking that I could make it at home. In fact, most of today was consumed with kitchen experiments, some of which will have to wait until another day to be told.

It all began bright an early, or kind of dark and stormy, at 6:30, since that is what time my self has decided to wake up every single day regardless of what time I go to bed. Before bed I soaked my raw almonds, in filtered water under refrigeration, so I didn't even need my first cup of coffee fully ingested before beginning this project.

Almond milk is of course raw vegan, and really is another thing so easy to make that you will wonder why you would ever buy it again. One cup of almonds and 4 cups of water will produce nearly a quart, so very little effort produces a stellar result, and not to mention a more economical (and environmental, since you have no packaging) choice, and you can use a 1:4 ratio to make as much or as little as you like. I also like that I have complete control over the sweetness. I used a base recipe from Choosing Raw, but a number of others that Google turned up were similar if not exactly the same. You can also use just about any nut you feel like, if almonds are really your thing.


My very scientific looking soaking almonds.

Vanilla Almond Milk (from Choosing Raw)

1 cup raw almonds, soaked in cool water overnight (8 hours) under refrigeration
4 cups spring or filtered water
6 dates
1 t. vanilla (the extract I used technically renders this un-raw I think, but you can use vanilla pod seeds, scraped out as flavoring if you like)

Drain the almonds, and then in a blender (or a VitaMix for you lucky owners), blend all ingredients until finely blended. I saved out the extract until the milk was done, but you can add it in right away if you like. I drained it through several layers of cheesecloth (see picture below), and when enough of the liquid seeped through, I twisted the cheesecloth into a bag-like shape and squeezed out as much liquid as I could. I added a sieve underneath to catch any stray particulate, but it probably would not have been necessary. I saved the almond "pulp" for another experiment, below. Milk will keep 3 days or a little more according to Choosing Raw, but I have a feeling it will be long gone by then.


I should take a moment to lament my lack of a "Real" blender. The blender I currently have, I bought when I was still in high school. Why I decided to buy a blender one day like 15 years ago, when I had no real use for a blender I'm not sure, but the thing just will not die. I wish it would, so I would have an excuse to buy a new one, but it is still hanging on. Tenacious as it may be, it is not very strong. The only thing it really has going for it is a glass pitcher. If the mixture I am trying to blend has the slightest semblance of a thick sauce, I use my food pro instead to save myself the frustration, but I know if I had tried to make this in a food processor, I would have had an even bigger frustration. Trust me, I know from experience. I really am considering a VitaMix savings fund to be placed on my counter in a Mason Jar. Maybe I'll do that today, and each time I am frustrated by lack of horsepower, I'll add some dough to the jar. Sounds like a good plan to me.


Real blender or not, my nut milk turned out perfect.

That said, I tried to take the almond pulp and process it into a raw nut butter. Besides making a crumbly mess for me to clean up, I learned that this, my friends, is a task that I don't think can be done in a food pro. It just does not have the horsepower to emulsify nuts into creaminess. That's okay, since I decided to alter a recipe from Dreena Burton's book Eat, Drink and Be Vegan.

When I was with my Mom last week, we stopped in at the Viroqua Food Co-Op, a cousin to our Outpost here in Milwaukee. I usually am not in the habit of buying sweets when I shop... but when I'm with my Mom we like to try things just for fun. I saw this cookie, which happened to be gluten-free, and we had to try it.


It was kind of the same feeling I had when I first had Outpost's Little Oatie sandwich cookie. I NEED to find a way to make this now! Our Wisconsin food co-ops are on to something not always providing a recipe (I did find the Midnight Madness cookies, another complete addiction, on the Outpost website one time, but last I checked, it was no longer there.) If I had the access to a recipe like this I'd probably never leave the home and become a complete hermit in the ways of new foodstuffs. Not having something exact to follow, I figured I could at least come close using Dreena's recipe and my new almond pulp...


And, I did pretty well. Well, maybe better than well, since I couldn't stop eating them. I think this is a work in progress, since they didn't taste exactly like the Viroqua Food Co-Op's, but maybe that's a good thing. They would probably all be gone if they did.


Since these had additional moisture from the almond pulp, I had to add quite a bit of extra grain. Next time, I will most likely try using less oil. I still have another portion of almond pulp leftover, so I will be sure to update the recipe at the end of this post when I try again.

Jam Thumbprint Cookies (adapted from Dreena Burton)
  • 1/3 c. oat flour (rolled oats blended in a spice mill works great)
  • 2/3 c. steel cut oats
  • 3/4 c. barley flour
  • 1/2 c. almond pulp, leftover from making almond milk
  • 3 T. brown sugar
  • 1 t. baking powder
  • 1/4 t. cinnamon
  • 1/4 t. salt
  • 1/4 c. maple syrup
  • 2 T. brown rice syrup
  • 1 t. vanilla extract
  • 1/2 t. almond extract
  • 1/4 c. veg oil (or olive oil)
  • jam - to fill centers
Preheat oven to 350 degrees f. In a large bowl, combine flours, oats, almond pulp, sugar, baking powder, cinnamon, and salt and stir until combined. In a separate smaller bowl, combine maple syrup, brown rice syrup, extracts, and oil and stir well to combine. Add the wet ingredients to the dry ingredients and blend until just combined. (I used a hand mixer. Remember that if you let it sit for a few minutes, the oats will naturally absorb some of the moisture. If it still seems too moist, add a little additional oat flour - and if it is too dry, add a bit of oil.)

Using a small scoop or a spoon, scoop little mounds out onto a parchment lined sheet. Using a wooden spoon handle (or like me, my rolling pin handle) dipped in flour, make an indentation in the center. (Dreena spoons the jam into the indentations here prior to baking, but I cooked them 3/4 of the way and then removed them from the oven and added the jam. Since I had to increase the baking time quite a bit due to my extra moisture, I'm glad I did it this way!) Bake for 14-20 minutes, until the edges begin to turn brown. Let them cool on the sheets for a minute or two before moving them to a rack to cool completely.


Marisa at Food in Jars is having a give-away for a Ball Blue Book and asked her participants to note what jam is their favorite. I love pretty much any type of jam, jelly, preserve, conserve or marmalade... but, hands down, my favorite is her recipe for Sour Cherry Jam. I have 3 little jars left on my shelf that I've been saving, why I do that I don't know! Cherry season will be here before I know it, so I cracked one open to fill my cookies, and I'm so glad I did. If you are a jam-maker, Marisa has great recipes for you to try, and top on your list should be this Sour Cherry one. Sour Cherry Jam may even make it's way into a vanilla almond milk smoothie of some sort...

If you are a kitchen experimenter like I am, and make this cookie recipe, please let me know how it turns out for you! I'll be playing around with it, since I am beguiled by it's toothsome earthiness, and I don't feel guilty eating a half dozen of them, either. I also know that if you are a nut milk drinker, you will be hooked on the simplicity of making it yourself. The only bad news is that it takes longer to clean up the kitchen afterward than it does to concoct. But, you can enjoy a glass of milk when you're doing it.

Monday, May 24, 2010

Raw Vegan Monday: Lasagna Roll-Ups with Raw Marinara


This may be kind of a cheat for my Raw Vegan Monday week 3 installment, since I had the Cashew Ricotta Cheese already made, but this was so delicious that it needs proper attention.

I know I am full of hypothesis when it comes to raw vegan diet... but I feel that I need to make special attention to photograph raw vegan foods since it is so effortless to prepare that I almost feel guilty. (Almost, since I'm really only "cooking" it for myself...) What I do find in photographing raw vegan food, however, is that since it has so little processing, the elements usually taste far better than they look. That is good news for eaters, as this food tastes so real and delicious that no matter it's looks you can be sure of it's health giving properties.


I know when I made the Cashew Ricotta Cheese the use by date was a week, so I was just inside of the recommendation when I made these roll-ups yesterday. But really, if it is refrigerated and doesn't have a strange smell, I can't imagine cashew cheese really going bad too quickly. I also should say that I like it even more as it sits. In fact, I ate one of my vegan cupcakes with the ricotta cheese frosting last night and thought it was even better several days later. (I stored the frosting separate and frost them just before eating, since I do not like to refrigerate cake, but did refrigerate the frosting.)

This recipe, then, was a perfect application for the remaining cashew cheese: Raw Lasagna. There are many stock raw vegan recipes for marinara and lasagna, but I altered a few to suit my on hand needs. If you don't have cashew cheese, take a look at this Gone Raw recipe for a filling made from almonds, macadamias, pecans and tahini. I think it looks like a great filling on it's own, and doesn't require expensive probiotic powder or a lengthy time to produce.


You can use this basic method to make any amount of lasagna roll-ups, or even layer the zucchini, cashew cheese and sauce to make a more traditional looking lasagna. I made 4 roll-ups for a lunch size portion (I ate a couple while I was assembling...), so I'm listing the approximate ingredients for 1 person, with leftover marinara. If you aren't vegan and thinking that this marinara is too strange, you have to make it to eat on proper egg pasta, since you will not be disappointed!

Raw Vegan Lasagna Roll-Ups with Marinara

for the Roll-Ups:
  • 1/3 c. cashew cheese (seasoned like I did here)
  • 4 zucchini strips, sliced thinly (I used a mandoline)
for the marinara:
  • 2 oz. crimini mushrooms (a large handful)
  • 1 tomato, chopped and drained if very juicy
  • 1 clove of garlic, minced
  • 6 sundried tomatoes, rehydrated in water for at least an hour until they are soft, and then chopped
  • 1 cubanelle pepper (or green pepper), chopped
  • a glug of extra virgin olive oil, about a tablespoon
  • salt and pepper to taste
  • fresh basil to taste and for garnish
Assemble the zucchini roll-ups by spreading them carefully with the cashew cheese and then rolling them up.

In a food pro with the S-blade, chop the mushrooms until finely chopped. Add the rest of the marinara ingredients and process as much or as little as you like. I let mine go until it was fairly uniform in a chunky smoothness.


You could, of course, add more veg to the sauce - red peppers or red pepper flake for a spicier version. I'm not exactly sure on spices for the raw vegan. It seems that some may not fit the bill as a "raw food" due to their processing. If you aren't following a truly strict diet, you could of course embellish the sauce with dried herbs of many sorts: oregano, basil or thyme. I can never resist pinching off the tops of my new plants nearly the second I get them home and planted, which is what I did, since I got some herbs on Saturday...

This sauce in particular took me back to raw sauces I used to make, but somehow haven't in a long while. Each summer, when I lived alone, I used to make a cherry tomato based sauce with just quartered tomatoes, garlic, olive oil and made non-vegan with bocconcini (mozzarella) and plenty of fresh basil, salt and pepper. This sauce on homemade egg pasta is akin to true summer eating perfection. I used to let the sauce sit at room temperature for several hours, and everything would marinate so nicely. I'd even used it as a pizza topping.

The Sweet Millions I planted on Saturday are the earliest cherry tomatoes I could find, 56 days I think. If my Husband's math is correct (he's good at this sort of thing) by July 18 I should be able to enjoy the first of this year's tomatoes! Isn't that a nice thought! The first thing I'll do with a pail full of those beauties is make a raw sauce. Maybe, I'll even leave out the cheese.

Tuesday, May 18, 2010

Excitement: Somehow it always includes Beets.

So in my recent obsessions with all things vegan, I got the book The Conscious Cook by Tal Ronnen from the library last week. It, of course, is now in my Amazon cart. In addition to lovely recipes, it has great photography and great layout, and is full of inspiring fresh recipes. In reading it cover to cover, I discovered that I was so curious about his "cheese" made from cashews, that I could think of nothing else. In his book, Tal makes Cashew Creams (you can find the recipe on his website) and also cheeses made from nuts that are kind of related to the Cashew Creams. His recipe for Beet Ravioli with Balsamic Pickled Figs and Green Garlic Oil was the one to really pique my interest, and a couple of days ago I decided to embark into the world of vegan "cheese".

His approach is to soak cashews overnight, then blend them together with probiotic powder and let them culture at warm room temperature for 12-14 hours. Now, dear readers, you know that I have a serious addiction to obsessions, when I was so curious about this, that I had to drop $26 at Outpost for the New Chapter Probiotic All-Flora capsules that this culturing project required. I wavered in how much I wanted to try this just a little bit, before giving in and just buying it. After all, I feel like I haven't been buying so many groceries lately, and giving $26 extra of my grocery fund to Outpost is not really a bad cause. I wasn't disappointed in my decision.


I am absolutely glad I parted with my USD's, since the result of this cashew "ricotta" as I'm calling it, was wonderful. I used my immersion blender to puree the cashews and water, and was not able to achieve absolute smoothness, but the flavor of plain, soaked and blended cashews was nice enough that the bit of grainy texture didn't bother me at all. In fact, I thought it tasted exactly like the texture of ricotta, and could see the finished product taking on all of the "cheese-ness" of cheese, sans cheese of course.

The state of the plain blended cashews prior to culturing wasn't all that different either, so if you feel that you can't part with $26, I'd say to go ahead and make it (skipping the long culturing time) anyway! Meanwhile, I used my savvy kitchen math to realize that my 6 capsules that went to inoculation purposes cost me $2.60, and that is affordable for the sake of experimentation! If nothing else, I can pop 80 cents worth of probiotics down my gullet every day for the next month and be proud of my healthfulness - but I'm sure I'll use more of my capsules to try some others of Tal's cheeses. I also didn't measure any of the added spices, I added to taste. No wonder why I love vegan cooking so much!

Tal Ronnen's Cashew Ricotta Cheese
  • 2 cups raw cashews
  • 1 t. probiotic powder (from 6 capsules of All-Flora, or another comparable quality powder) dissolved in 1 cup of warm water.
  • 2 T. nutritional yeast flakes
  • 1 1/2 t. onion powder (I used granulated onion)
  • 1 1/2 T. minced chives
  • 2 T. minced parsley
  • 1 t. sea salt
  • black pepper
Put cashews in a bowl, add cold water to cover them, and refrigerate 12-14 hours. Drain and rinse them under warm water.

Place nuts in a blender with the probiotic powder and water mixture (I used an immersion blender), and blend until very smooth. Transfer to a clean, glass bowl, and let sit at warm room temperature (I leave the oven light on in the closed oven) for 14-16 hours to culture.

Transfer to a medium bowl, and stir in remaining ingredients. Cheese will keep for a week under refrigeration.


This morning, after a night of chilling, I took to doctoring up that cultured cashew cheese into a proper "ricotta" filling. Onion granules, nutritional yeast flakes, some fresh chives and parsley from my yard, and a bit of salt and pepper, and I was completely fooled at how delicious the taste of this was, and that it did indeed taste like ricotta cheese. (Before mixing up the savory version, I saved out a cup portion to play around later with some sweet applications... I have it in my mind that I can make a cupcake frosting out of it!)

I departed from Tal's original recipe here, since I did not make the green garlic oil, and forgot to buy figs during the Probiotic Powder shopping trip. But I was glad, since my result was so good, I was nearly jumping up and down. So many times if you spend a lot of time and effort (and those USD's) on something, the result is not up to your expectation. What a happy surprise to know that I will make this again and again!


I still had my borrowed mandoline (that I have to return), so I sliced a peeled beet very thinly. I ate a slice of raw beet, and then got out my steamer. This is no Raw Vegan recipe, now... but I'm so glad I steamed them, since they got tender enough to resemble pasta, and were easy enough to cut with a fork and gobble down. Boy-O and I spent the morning at the library, and because he was so consumed with a book on Stingrays, I got to peruse my cookbook aisle. I fortuitously plucked Eat, Drink & Be Vegan by Dreena Burton from the shelves, and found a dressing that I decided would be good for the top of my creation, a vinaigrette made from balsamic and maple syrup. Dreena's book has many great recipes, and I'm looking forward to looking over it more completely later today. I also noted that she is a blogger at eat, drink & be vegan, so I'll be adding her to my feedly, no doubt!


I have no idea why I never thought of combining balsamic vinegar and maple syrup, but I'm more than excited that I did. I used equal proportions of each, and it was almost candy-like. I made a very small amount, but it is so easy to double or triple that you'll hardly need to use any of your kitchen math!

Balsamic Maple Syrup Vinaigrette (adapted from Drena Burton)
  • 2 T. balsamic vinegar
  • 2 T. maple syrup, preferably dark
  • splash of extra virgin olive oil
  • salt
  • pepper
That's it. Blend it up.

Assemble the little stacks or "raviolis" however you wish, obsessively try to get a good photo, and then eat them up! Next time, I will make this more of a meal and have a pretty green salad underneath, but for my lunch for one, a whole steamed beet, and maybe a healthy 1/4 cup of this ricotta cheese was really satisfying.


I know I shouldn't be surprised at how contented I am eating simple whole foods that have little or no cooking. I guess, it doesn't surprise me at all that I'm so excited about my new vegan obsessions, since I do know that often it only takes a little push in any given food direction to send me off and reading about something different to me.

innBrooklyn is hosting another installment of Veg of the Month Club, due on June 10th, and the veg for this go around is beets. I have more beets in the fridge, and I didn't consider using this recipe for the Club submission, but I just may, since I loved it so much! Nothing says "excitement" to me, like beets, so I'm looking forward to seeing some good inspirations there.

Wednesday, May 5, 2010

Rhubarb Kuchen or in Which I Divulge Buttery Rhubarb Secrets

I think this recipe needs no introduction, and it certainly is not worthy of "lightening" that's for sure. In any dessert, it's usually a given that I will reduce the amount of butter or eggs, but in this family recipe, it would be something I would never dream of.

I grew up in a family of rhubarb lovers, which I count as fortunate since now that I've aged, I realize that some people detest it's tangy, sour taste. As long as I can remember, my Parent's have had a patch of rhubarb. Every Spring, we would have Rhubarb Kuchen, a recipe that came from my Dad's Mom. It is still my Dad's favorite dessert, and an easy one to enjoy in seasons other than Spring, due to rhubarb's love affair with the freezer.

The rhubarb that is currently established on my Parent's 'farm' is from my Gram's patch in northern Wisconsin. I'm hoping to get a few off-shoots of their plants to establish my own little patch in what I'm hoping will soon be my new raised bed gardens in my back yard. It always amazes me that generations of plants can thrive. In our culture of bigger, better and new, I find it so comforting to know that I can glean nutrition from a plant that was first propagated maybe 50 years ago. That is amazing.


Not only does it scream out to be eaten with ice cream, it keeps well in the refrigerator for at least a week, if you don't find yourself nibbling at it each time you open the door. Make this in a 9x13 pan, and if you you find yourself in a non-rhubarb-loving household as I do, you can make yourself insanely popular and give some away. I'm not sure where my Grandmother got this recipe, but I know it was from my Dad's side. I'll have to see if I can track down the pedigree. That side of the family really doesn't have any German ancestry, but fortunately for me, this recipe landed in their hands! While I most always bake with unsalted butter, I always use salted for this Kuchen, since that it what my Mom used.

Rhubarb Kuchen

Crust:
  • 2 c. flour
  • 2/3 c. butter, cut into 1/2 inch pieces
  • 1 egg
Filling or Custard:
  • 6 cups rhubarb, not defrosted if frozen (I used closer to 7 cups)
  • 2 c. sugar
  • 4 eggs
Topping
  • 1 c. sugar
  • 1 c. flour
  • 1/2 c. butter, cut into 1/2 inch pieces
Preheat oven to 350 degrees.

Using a food pro, (you can do it by hand) pulse crust ingredients until they look like "coarse sand". Spread them into the 9x13 pan, and press into a crust. Then, spread the rhubarb over the crust, mix the custard ingredients together, and pour over the rhubarb. Finally, pulse the topping (no need to have washed the food pro first), and sprinkle over the top. Bake for 50-75 minutes until the topping is nicely browned. It will firm up a bit more as it cools.


You will no doubt find yourself with a spoon, testing out a corner of this dessert as soon as it makes it's way from the hot oven... but it is just as lovely at room temperature or cold. Just out of the fridge, it has a bright rhubarb flavor and full buttery-ness about it. I like to eat it for breakfast, so that it's calories can be burnt off through the course of the day. But, I'm not above having it just before lights out, either.


Tuesday, April 27, 2010

April 2010 Daring Baker Challenge: British Pudding

The April 2010 Daring Bakers’ challenge was hosted by Esther of The Lilac Kitchen. She challenged everyone to make a traditional British pudding using, if possible, a very traditional British ingredient: suet.

Suet. I read through the challenge this month a little more lackluster than most... wondering if I could possibly justify making something that for me was more of an experimentation and not of the "I want to devour this right now" variety of dessert. Suet is beef or mutton fat that is found around the kidneys and loins, and has a lower melting point than most fats. Since British puddings are sometimes steamed, this easily melting fat is a good choice for these baked goods... but all this talk about kidneys and fat and savory puddings did not really serve to whet my appetite. Granted, if I were dining out I could probably give it a go, but in my home I knew I was going to have to change it up to fit my dessert eating audience.

Since I did not go with any type of suet crust and found my own British-style pudding recipe to use, I actually opted out of the challenge this month. I believe than in spirit, I did fulfill the requirements of the Daring Baker credo: to learn more about processes and cultural foods that otherwise I wouldn't have probably given a second thought to making myself.

I chose to do a Sticky Toffee Pudding, based on this recipe. I actually did not really modify it at all, and chose it because I figured I could use the excuse to make English toffee! That, and it did have dates in it, and I know I can use any excuse I can get to add dried fruit to a dessert - it creates the guise of healthfulness that makes any amount of labor or butter worthwhile.


I made the English toffee recipe from Cooking For Engineers. I love this no-frills website; it is a reliable and concise resource. I had no trouble making this butter toffee, excepting that I may have needed to let the mixture get just a little higher in temperature. My candy thermometer said that I hit the 310-315 degree mark, but I suspect my candy would have had more of the traditional "crack" if I had let it go just a minute longer. A more accurate thermometer is certainly on my list. My toffee looks and tastes great, but was just a touch on the "caramel" side of toffee. Since I was going to chop up the portion for the pudding, I suspected correctly it would be just fine. Even the almonds were a good addition to the finished cake.


In January, I came across copper pudding molds in Williams-Sonoma. I love going there in January to see what resides on their clearance table that I just can not live without. This year, it was these two molds, made in France. The smaller is a 4 cup and the larger a 12 cup capacity. Since my base recipe for pudding was a bit on the obscure side as far as yield was concerned, I wasn't sure until the last second what size I was going to use. I do not have a proper pudding basin, but could have as easily used a Pyrex bowl if my amount of batter warranted.


In the end I decided to use the 12 cup mold, even though the batter was shy of the mark:


The only thing I would do differently when I make this again (WHEN I make this again!) is to run the dates through a blender, or my little manual food mill that I used for the Boy-O when he was younger and not picky. I don't think my tasters detected the date fragments, but I did, and their pulpy, fibrous bits would have done well to be more emulsified. I did use weights for this one and you can find a good conversion resource here if you need it.

Sticky Toffee Pudding (from this source, I could not find a name of the author)
  • 4 oz. stoned dates, chopped
  • 1/2 t. baking soda
  • 1 c. water
  • 2 oz. butter
  • 4 oz. castor sugar (sugar taken for a spin in the food pro or spice mill)
  • 2 eggs
  • 5 oz. self rising flour (1 c. AP flour, with 1 1/2 t. baking powder and 1/4 t. salt added)
  • 1 T. cocoa powder
  • 3 oz. plain melted chocolate (I used unsweetened chocolate)
  • 4 oz. chopped toffee
Combine dates, baking soda and 1 cup of water in a saucepan and bring to a boil (the soda will cause it to rise, so use a medium sized pan). Turn off the heat and let stand for 10 minutes to soften the dates. (This is where I would have then emulsified the dates, keeping the liquid as well.) Fill a roasting tin with water (I used a Pyrex bowl, larger than my pudding mold), place in the oven, and preheat the oven to 350 degrees.

Cream together butter and eggs. Sift flour and cocoa powder and fold into egg/butter mixture. Fold in remaining ingredients, including butter. (I added the sugar first, and the batter kind of reminded me of a pate a choux until I added the water. It is a stiff batter.)

Pour the batter into a well greased mold (I think 8 cup would probably be perfect). Bake for 45 minutes - 1 hour, depending on the depth of your mold, and your preference of done-ness. I let mine go just shy of an hour, and until the toothpick came out nearly clean.


It wouldn't be far off to compare this pudding to a luxorious brownie. It is deep, rich and nearly black, a good thing in the dessert world if you ask me. It is so tender and moist in the center, you can feel yourself already needing to start the coffee as soon as you slice into it. It seems the British protocol to douse puddings with a cream or sauce, and this original recipe called for melting Mars (Snicker's) bars together with heavy cream. I briefly considered making some homemade equivalent, but discarded that notion rather quickly. I have to draw the lines of health somewhere! Instead, Maeckel brought some vanilla frozen custard - which was a good, thick and creamy counterpart to the moist cake, and not to mention it adds a decidedly Wisconsin touch.


Of course, that is until the Schaum Torte Ice Cream was made... I froze half of the cake last week, and since my Mom is coming to visit (and she could be the reason I have the sweet tooth I do) I will pull it out after supper tonight to serve with the ice cream. I have a feeling if I let it melt over the top, it will be the best combination in The Whole World.

Saturday, April 17, 2010

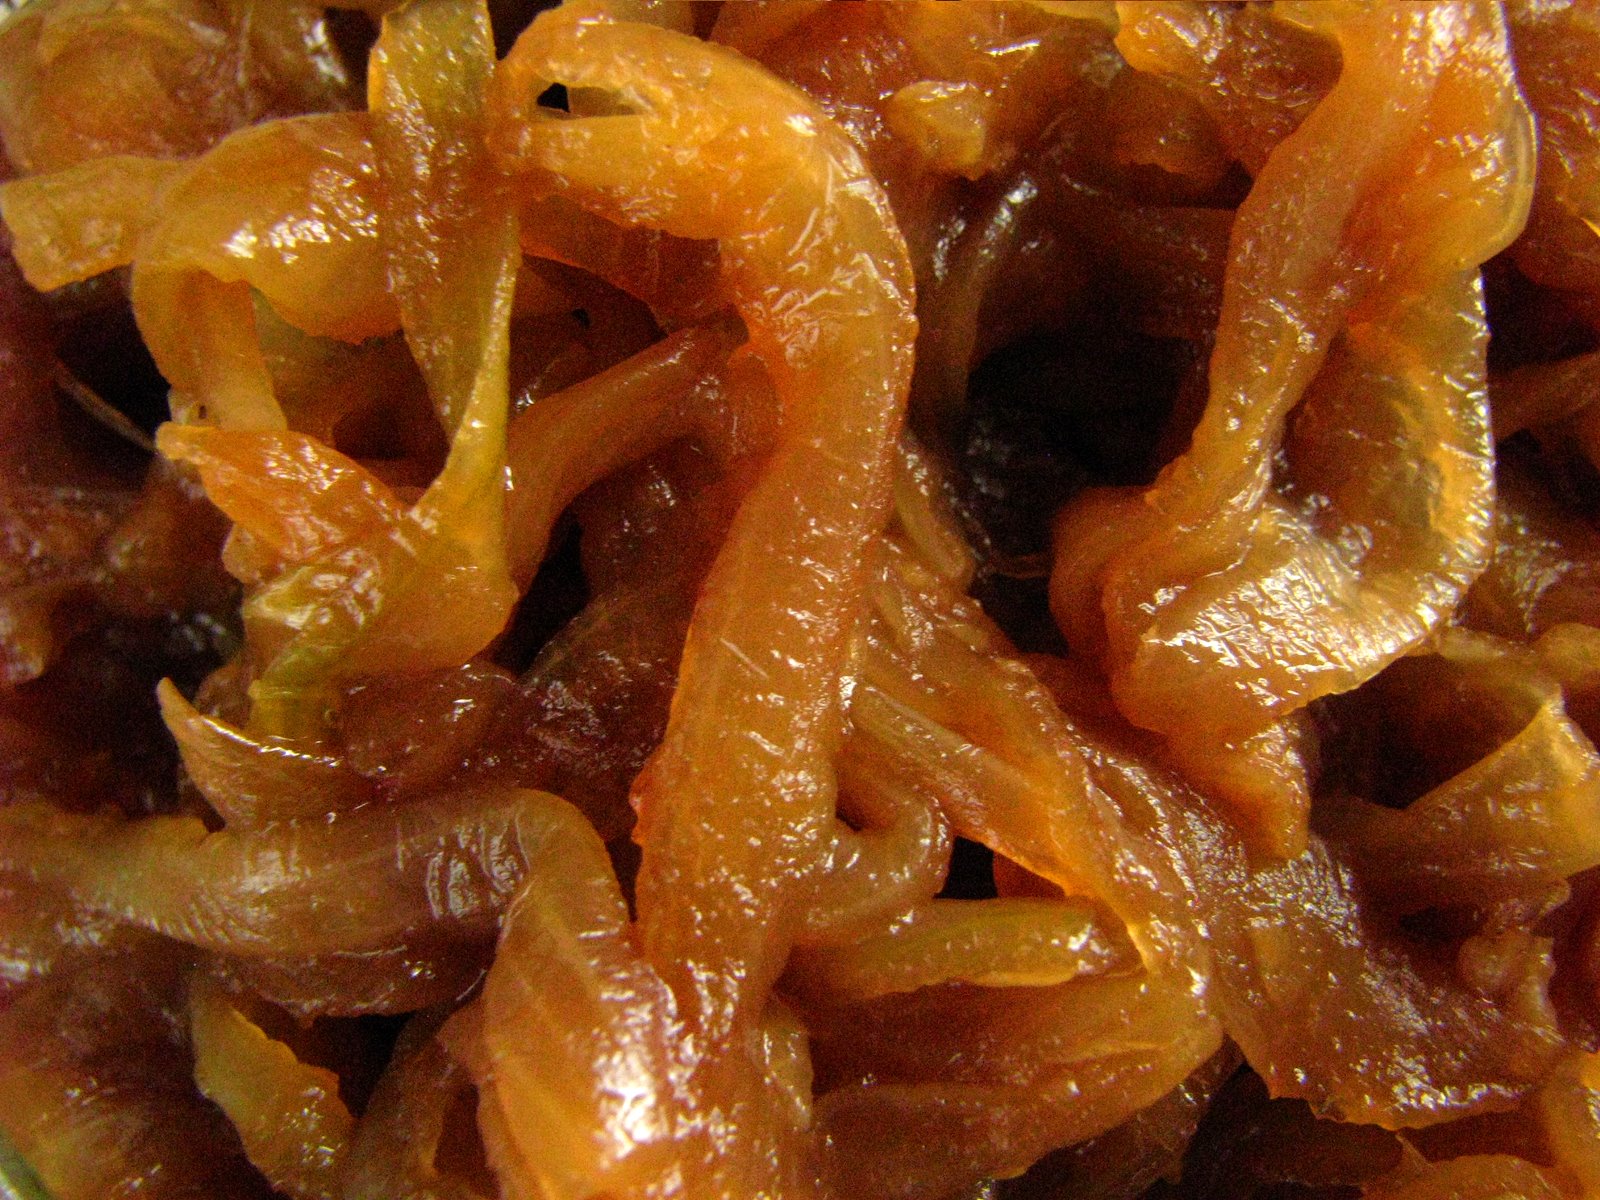
Onion Jam: The stuff obsessions are made of.

It really is no surprise that the onion is one of the oldest vegetables in the world. It is a vital base of so many different foods, and can be found in almost every culture's foodstuffs. Every time I saute them, I think of a study I read a long time ago that ranked them as the smell that most reminded men of being at home. Of course Googling such a subject topic to see where I may have read it revealed some interesting data, none of which I feel is appropriate to share here...


Sometimes, inspiration strikes in the strangest ways. I had some previously made flatbread dough and a small bowl of already sliced onions in the refrigerator last night, both from unfinished projects earlier in the week. The flatbreads were actually supposed to be made last Tuesday, and although the recipe said it would hold for 2 days in the fridge, I didn't know if it was going to make acceptable flatbread by Friday night, so I figured I would turn it into a skillet pizza - a trick I first saw Alex Guarnaschelli do a couple years ago on Food Network. The oven is preheated, 400 in my case, and you heat the skillet on the stove top with olive oil and sear both sides of a dough before topping it and finishing it in the oven. Since I had a bowl of sliced onions to use up (I don't even remember what I was going to use them for), I thought I would caramelize them for the pizza. While trying to be patient and stirring them, I was chatting away with Sasa, and we started talking about onion jam.

Pizza onions: higher heat, darker color.

I knew that the ones I was working on were going on a pizza, so I was not looking for the gently moderated heat that renders onions magically gelatinous. I got them done, finished up the pizza, and began plotting about onion jam. First thing this morning I starting my perusal for onion jam recipes. Some looked too sweet and some were more on the pickled side, but I finally found this one on Panini Happy, and knew it was more on par with what I was after. I am still looking for a recipe that would be able to be canned, if anyone can help me out - but meanwhile, I adapted the Panini Happy recipe to what I had on hand and my own personal taste.


I used 1 1/2 pounds of regular Wisconsin storage onions (about 6 medium/small ones), they were fairly strong. After cooking down, they yielded 10 1/2 oz. of jam. I also made a batch of granola in the interim, since most of the cooking time is largely unattended (and my oven was hot from roasting the garlic). It's always good to have a second project, so you don't go batty while waiting for the onions to soften. Your patience will be rewarded! I did set a timer for each of the caramelizing steps, which is much nicer than trying to rely solely on color, especially if you get interruptions. The original recipe said that it will last a week under refrigeration, but I suspect it could last longer. If you don't polish it off right away, that is.

Onion Jam
  • 1 1/2 lbs. onions, frenched (sliced)
  • 1 head of garlic, roasted
  • 1 T. granulated sugar
  • 2 T. dark brown sugar
  • pinch of salt
  • 4 T. balsamic vinegar (I used 2, and then 2 of red wine vinegar, since it appears that I need to add balsamic vinegar to my shopping list)
  • water
Heat a lidded saute pan over medium heat, and saute onions in a t. of olive oil until softened and translucent, stirring occasionally for about 15 minutes. If they start to stick at all, cover the pan, and turn your heat down a bit.

Add sugars, cover the pan, and continue cooking and stirring occasionally for another 20-30 minutes until the onions are golden brown.

Add 1/4 c. water, cover the pan, and continue cooking and stirring occasionally for another 20-30 minutes.

Meanwhile, mash up the roasted garlic cloves with a fork, and mix with the vinegar.

Then add the mashed garlic/vinegar mixture and an additional 1/4 c. of water and cook and stir until nicely thickened, another 10 minutes or so.

Lean towards the 30 minute mark if you want a darker jam, I stuck closer to the 20 minute marks, and mine was a beautiful, butterscotch color.


After having some of those great grilled cheese combinations on Thursday, I know I'll have at least one foray into the sandwich realm with this jam. The funny thing is, I ate a spoonful, and immediately wanted some with eggs. Weird! So, I will let you know if some onion-y eggs appear anywhere around my home this week. I have a sneaking suspicion that I'll be doing a lot with this humble condiment...