Showing posts with label recipe links. Show all posts

Thursday, July 5, 2012

What do I Eat When it's 100 Degrees Farenheit?

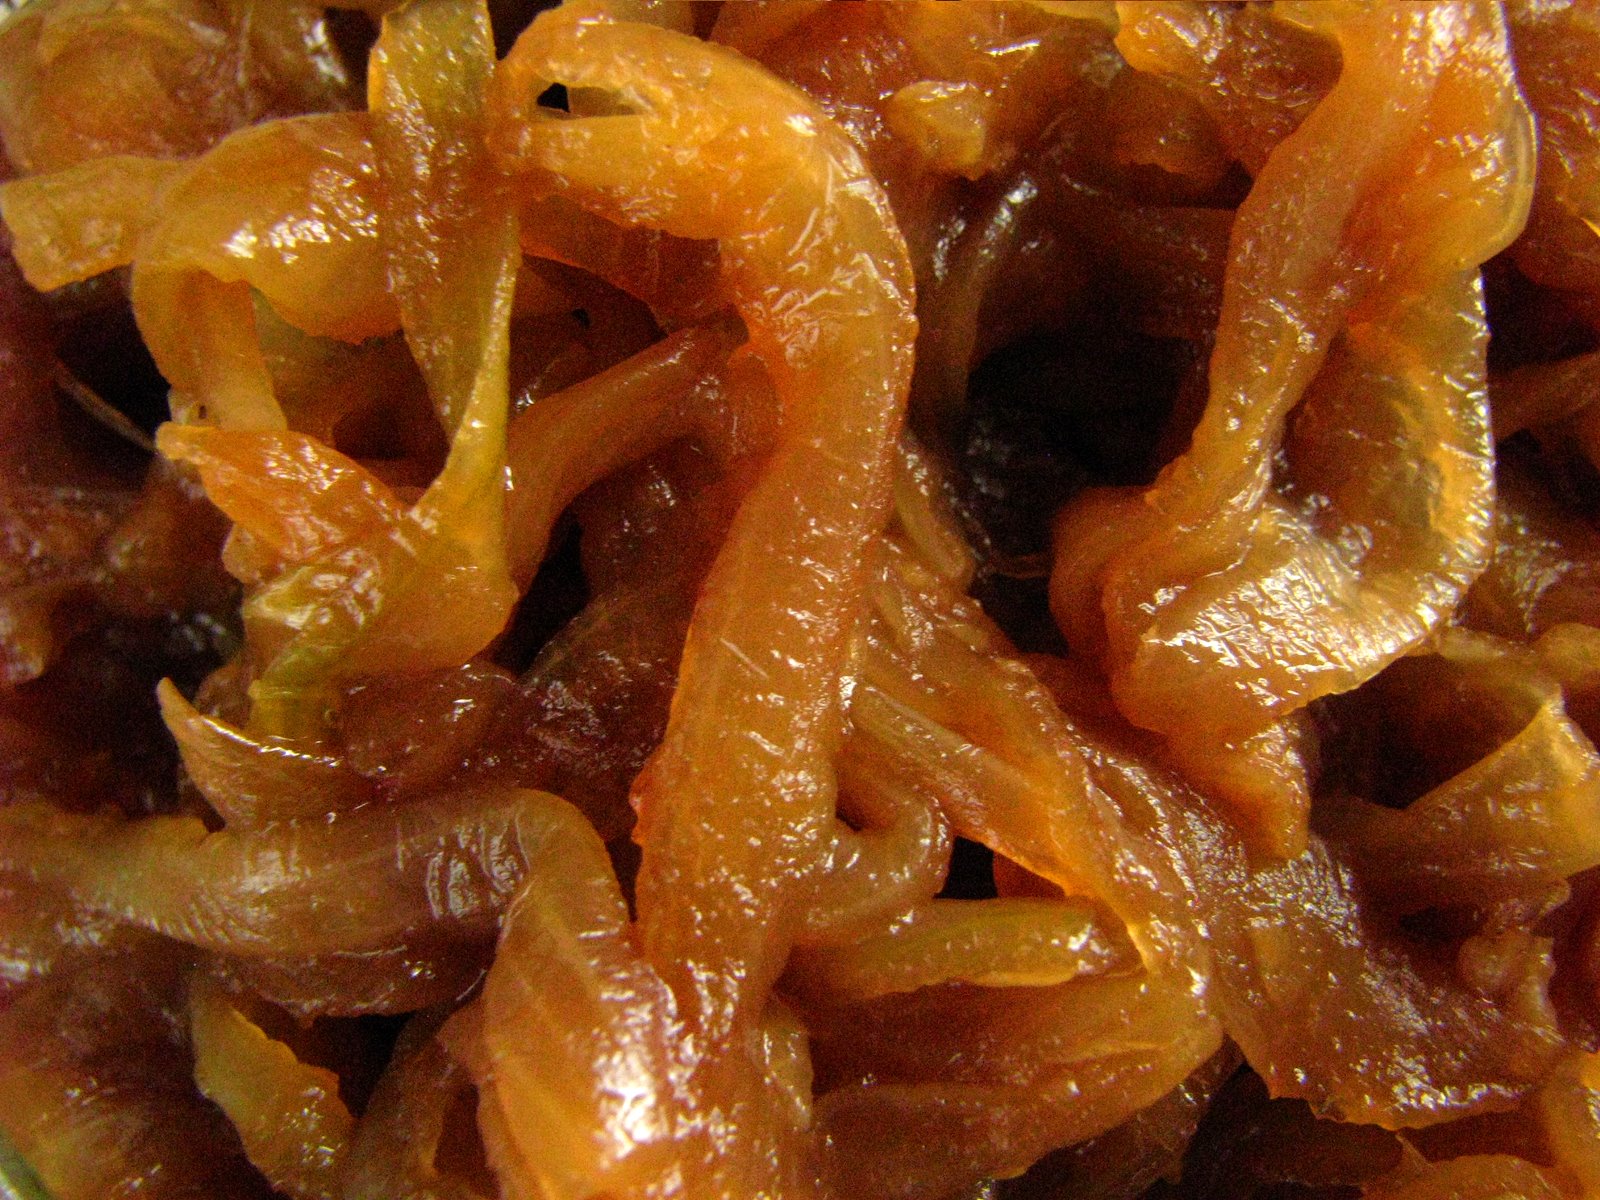
It doesn't feel like I've eaten much this past week, certainly not enough to warrant writing about. The last actual meal I made was on Tuesday: beef stew alongside a new loaf of bread - and a whole quart of it is still tucked into the fridge. The thought of it re-heating on the stove makes me sweat a little. And it was good too - worth the heating of the kitchen to reduce sinewy stew meat (nearly two years old, from the deep freeze) to soft, silky beefiness. Finally I made good use of the pontack sauce, judiciously adding a few tablespoons after the beef browned and the heat evaporated the accumulated juices. I was happy to note that beef and elderberries get along extremely well together, and secretly, I patted myself on the back at the deliciousness that occurred with next to no help from me.

Untitled

Yesterday was the 4th of July, historically one of my favorite holidays in part because there are no expectations for it other than to eat (and make cool desserts). Just 8 days at the start of July separate the birthdays of my Husband and Kiddo, and in-between these cake-events, I made a pan of lime bars. Part of my melancholy today has to be due to the sugar consumption I have made every excuse for indulging in lately. I returned to my old ways (gone since last year!) completely today when instead of greeting the morning gently with a glass of water and then a relatively nutritious fruit smoothie, I welcomed it voraciously with a fat slice of chocolate layer cake eaten like a madman over the sink. I only wish I were exaggerating.

Sugar is a demon for me, the more I eat it the more I feel like a total addict - licking the bowls of frosting clean with a spatula and depositing it directly into my mouth. To my defense, I made the frosting from powdered sugar I had made in my Vitamix. I'd challenge anyone to stop eating chocolate frosting that has a slight crunch to it; it's like frosting made with malted milk powder without the too sweet, malty aftertaste. It makes your teeth hurt, but not so much that you can stop yourself from shoveling it in. It's frosting that makes you know you have a problem.

4th of July breakfast.

Yesterday I made waffles with white flour, blueberries and ample amount of maple syrup adorning them. They weren't even sourdough, just plain, quick, all-American waffles. I guess I really am making every excuse to eat sweets these first days of July, and the least of them is that it is just too dang hot to eat much more than mouthfuls of sugar. After breakfast, I didn't eat again until we grilled out late in the afternoon.

I have also made a few batches of ice cream this week, using Jeni's Splendid method I first read about last year when she was profiled in Saveur. Recently I found her aptly splendid ice creams book at the library, and I really have never had finer vanilla ice cream. July's heat has me oogling the salted caramel, the goat cheese with sour roasted cherries, the olive oil with salted pumpkin seed... Oh, how easy it is for me to give in to sugar addiction! So many I'd love to try, and so few days left in my sugar binge. I just keep telling myself that it's only a few days until the next birthday, and then I will have no more excuse to make and eat desserts. I will go back to my austere dining habits and behave myself. But I will keep Jeni's website in my browser so I can visually indulge.

mushroom pate
what??

But there were actually meals of a non-sugar nature. They consisted of a few bites of my potato salad, augmented with red pepper and plenty of hard cooked egg. (When it's hot, not much tastes better than a little bowl of potato salad for supper. I do believe that's my Gram talking right there.) There were several meals of thick slices of bread, spread with curried mushroom "pate". I got that recipe idea from the back of one of my co-op newsletters, and I don't think there is much I could do to ruin it no matter the substitutions I make. It isn't really very pretty, but my, it sure is tasty. Especially when it's cold from the fridge after a day or two of lingering. (Click the photo above for the recipe.)

tacos

I ate taco(s) today courtesy of my best friend, but ate too many of the accompanying salsas with chips and could only manage to eat one of the two after driving around in my a/c-less car for the morning. It was a lunch I will remember always, because we are both budget minded right now, and this 10$ spent may have well as been 75$ to me especially. But I have the most gracious friends who look out for me and pick me up when I need it the most. I could seriously cry thinking about this taco, but instead I blinked it back and remembered this peanut-arbol chile salsa I've made a couple of times. Also from Saveur a while back, that salsa will be made as repayment, a garnish for my own tacos that I'll invite my friends to eat. And it makes my own tacos every bit as good as eating out tacos, but sometimes it's the eating out that you need for inspiration and encouragement.

So maybe the heat is getting to me. I am so thankful for the air conditioning in my house, that its 1970's shell is still pounding away and hasn't decided to give up the ghost. For all of my Mexican roots, I must be northern in my blood much deeper since I wilt fast in heat and grow grumpy, unhungry, and solemn. I have to work hard right now to look for the happy things, though they are most definitely there. I hear all over town that the heat should break tomorrow by 10 p.m., and then I will bake cupcakes with pirate flags, altering my favorite Dorie Greenspan chocolate cake with billowy, marshmallowy frosting to please some 6-year-olds as much as to please myself, a day or two left in my sugary early July. And then, after I recover from all the sugar, I'll venture back outside and enjoy some more hospitably warm days, hopefully back in the double digits.

Monday, June 4, 2012

Beetific!


sliced beet gratin

It's early beet season here in Wisconsin, and I ate this ridiculously good gratin made with both the beetroot and healthy green tops yesterday (and today) with particular delight. You can read more about it on the Becky-Home-Ecky blog I write on Milwaukee Magazine.

My enthusiasm for all things beety had me thinking about some beet heavy recipes from my past. Bright pink beet pasta, tender Indian spiced beet "chops", whole beet risotto... so much good stuff I've made - and new stuff that I've found to make soon - that I thought a short link list of beetific recipes would certainly in order!

Here are some past favorites:

Beet Pasta (with a shockingly simple Blue Cheese Sauce to eat it with)
Beet Chops
Beet and Beet Green Risotto
Beet Gnocchi
Vegan Beet Stacks with Cashew Ricotta Cheese
Chocolate Beet Cake


chocolate beet cake
I definitely need to make this cake again...

Whenever I see something made with beets, I mentally warehouse it. Here are just a few recent perusals that I should get around to making this year:

Whole Beet and Lemon Galette (Three Clever Sisters)
Maple Horseradish Glazed Beets (LeFort Urban Homestead)
Ginger Spiked Pickled Beets (Food in Jars - the Cookbook)
Beet Ice Cream with Orange Zest and Poppyseeds (CosmoCookie)
Jamie Oliver's Smoked Beets (via Food52)

casa rcakewalk beet escabeche taco
beet escabeche tacos: concocted with roasted beet, leftover rice, canned escabeche...

Regardless of actual recipes, I will remember a favorite technique my friend Elisa was doing a couple Summers ago: roasting beets, then marinating them in a canning jar with a little feta, balsamic vinegar, maple syrup, olive oil, salt and pepper. They were ready for salads (or just to pop in my mouth plain from the jar) for up to a week, if I could keep them around my fridge for that long. This Summer, I'm making this a fridge staple once again.

I hardly need inspiration for beets, but sometimes it's good to have a reminder of good, beety things. And sometimes, it's good to share beety ideas with people who actually love beets as much as I do. Do you have a good recipe for me to try? Leave me a link in the comments, and I'll add it to my Summer Beet List!

Tuesday, April 27, 2010

April 2010 Daring Baker Challenge: British Pudding

The April 2010 Daring Bakers’ challenge was hosted by Esther of The Lilac Kitchen. She challenged everyone to make a traditional British pudding using, if possible, a very traditional British ingredient: suet.

Suet. I read through the challenge this month a little more lackluster than most... wondering if I could possibly justify making something that for me was more of an experimentation and not of the "I want to devour this right now" variety of dessert. Suet is beef or mutton fat that is found around the kidneys and loins, and has a lower melting point than most fats. Since British puddings are sometimes steamed, this easily melting fat is a good choice for these baked goods... but all this talk about kidneys and fat and savory puddings did not really serve to whet my appetite. Granted, if I were dining out I could probably give it a go, but in my home I knew I was going to have to change it up to fit my dessert eating audience.

Since I did not go with any type of suet crust and found my own British-style pudding recipe to use, I actually opted out of the challenge this month. I believe than in spirit, I did fulfill the requirements of the Daring Baker credo: to learn more about processes and cultural foods that otherwise I wouldn't have probably given a second thought to making myself.

I chose to do a Sticky Toffee Pudding, based on this recipe. I actually did not really modify it at all, and chose it because I figured I could use the excuse to make English toffee! That, and it did have dates in it, and I know I can use any excuse I can get to add dried fruit to a dessert - it creates the guise of healthfulness that makes any amount of labor or butter worthwhile.


I made the English toffee recipe from Cooking For Engineers. I love this no-frills website; it is a reliable and concise resource. I had no trouble making this butter toffee, excepting that I may have needed to let the mixture get just a little higher in temperature. My candy thermometer said that I hit the 310-315 degree mark, but I suspect my candy would have had more of the traditional "crack" if I had let it go just a minute longer. A more accurate thermometer is certainly on my list. My toffee looks and tastes great, but was just a touch on the "caramel" side of toffee. Since I was going to chop up the portion for the pudding, I suspected correctly it would be just fine. Even the almonds were a good addition to the finished cake.


In January, I came across copper pudding molds in Williams-Sonoma. I love going there in January to see what resides on their clearance table that I just can not live without. This year, it was these two molds, made in France. The smaller is a 4 cup and the larger a 12 cup capacity. Since my base recipe for pudding was a bit on the obscure side as far as yield was concerned, I wasn't sure until the last second what size I was going to use. I do not have a proper pudding basin, but could have as easily used a Pyrex bowl if my amount of batter warranted.


In the end I decided to use the 12 cup mold, even though the batter was shy of the mark:


The only thing I would do differently when I make this again (WHEN I make this again!) is to run the dates through a blender, or my little manual food mill that I used for the Boy-O when he was younger and not picky. I don't think my tasters detected the date fragments, but I did, and their pulpy, fibrous bits would have done well to be more emulsified. I did use weights for this one and you can find a good conversion resource here if you need it.

Sticky Toffee Pudding (from this source, I could not find a name of the author)
  • 4 oz. stoned dates, chopped
  • 1/2 t. baking soda
  • 1 c. water
  • 2 oz. butter
  • 4 oz. castor sugar (sugar taken for a spin in the food pro or spice mill)
  • 2 eggs
  • 5 oz. self rising flour (1 c. AP flour, with 1 1/2 t. baking powder and 1/4 t. salt added)
  • 1 T. cocoa powder
  • 3 oz. plain melted chocolate (I used unsweetened chocolate)
  • 4 oz. chopped toffee
Combine dates, baking soda and 1 cup of water in a saucepan and bring to a boil (the soda will cause it to rise, so use a medium sized pan). Turn off the heat and let stand for 10 minutes to soften the dates. (This is where I would have then emulsified the dates, keeping the liquid as well.) Fill a roasting tin with water (I used a Pyrex bowl, larger than my pudding mold), place in the oven, and preheat the oven to 350 degrees.

Cream together butter and eggs. Sift flour and cocoa powder and fold into egg/butter mixture. Fold in remaining ingredients, including butter. (I added the sugar first, and the batter kind of reminded me of a pate a choux until I added the water. It is a stiff batter.)

Pour the batter into a well greased mold (I think 8 cup would probably be perfect). Bake for 45 minutes - 1 hour, depending on the depth of your mold, and your preference of done-ness. I let mine go just shy of an hour, and until the toothpick came out nearly clean.


It wouldn't be far off to compare this pudding to a luxorious brownie. It is deep, rich and nearly black, a good thing in the dessert world if you ask me. It is so tender and moist in the center, you can feel yourself already needing to start the coffee as soon as you slice into it. It seems the British protocol to douse puddings with a cream or sauce, and this original recipe called for melting Mars (Snicker's) bars together with heavy cream. I briefly considered making some homemade equivalent, but discarded that notion rather quickly. I have to draw the lines of health somewhere! Instead, Maeckel brought some vanilla frozen custard - which was a good, thick and creamy counterpart to the moist cake, and not to mention it adds a decidedly Wisconsin touch.


Of course, that is until the Schaum Torte Ice Cream was made... I froze half of the cake last week, and since my Mom is coming to visit (and she could be the reason I have the sweet tooth I do) I will pull it out after supper tonight to serve with the ice cream. I have a feeling if I let it melt over the top, it will be the best combination in The Whole World.

Saturday, April 17, 2010

Onion Jam: The stuff obsessions are made of.

It really is no surprise that the onion is one of the oldest vegetables in the world. It is a vital base of so many different foods, and can be found in almost every culture's foodstuffs. Every time I saute them, I think of a study I read a long time ago that ranked them as the smell that most reminded men of being at home. Of course Googling such a subject topic to see where I may have read it revealed some interesting data, none of which I feel is appropriate to share here...


Sometimes, inspiration strikes in the strangest ways. I had some previously made flatbread dough and a small bowl of already sliced onions in the refrigerator last night, both from unfinished projects earlier in the week. The flatbreads were actually supposed to be made last Tuesday, and although the recipe said it would hold for 2 days in the fridge, I didn't know if it was going to make acceptable flatbread by Friday night, so I figured I would turn it into a skillet pizza - a trick I first saw Alex Guarnaschelli do a couple years ago on Food Network. The oven is preheated, 400 in my case, and you heat the skillet on the stove top with olive oil and sear both sides of a dough before topping it and finishing it in the oven. Since I had a bowl of sliced onions to use up (I don't even remember what I was going to use them for), I thought I would caramelize them for the pizza. While trying to be patient and stirring them, I was chatting away with Sasa, and we started talking about onion jam.

Pizza onions: higher heat, darker color.

I knew that the ones I was working on were going on a pizza, so I was not looking for the gently moderated heat that renders onions magically gelatinous. I got them done, finished up the pizza, and began plotting about onion jam. First thing this morning I starting my perusal for onion jam recipes. Some looked too sweet and some were more on the pickled side, but I finally found this one on Panini Happy, and knew it was more on par with what I was after. I am still looking for a recipe that would be able to be canned, if anyone can help me out - but meanwhile, I adapted the Panini Happy recipe to what I had on hand and my own personal taste.


I used 1 1/2 pounds of regular Wisconsin storage onions (about 6 medium/small ones), they were fairly strong. After cooking down, they yielded 10 1/2 oz. of jam. I also made a batch of granola in the interim, since most of the cooking time is largely unattended (and my oven was hot from roasting the garlic). It's always good to have a second project, so you don't go batty while waiting for the onions to soften. Your patience will be rewarded! I did set a timer for each of the caramelizing steps, which is much nicer than trying to rely solely on color, especially if you get interruptions. The original recipe said that it will last a week under refrigeration, but I suspect it could last longer. If you don't polish it off right away, that is.

Onion Jam
  • 1 1/2 lbs. onions, frenched (sliced)
  • 1 head of garlic, roasted
  • 1 T. granulated sugar
  • 2 T. dark brown sugar
  • pinch of salt
  • 4 T. balsamic vinegar (I used 2, and then 2 of red wine vinegar, since it appears that I need to add balsamic vinegar to my shopping list)
  • water
Heat a lidded saute pan over medium heat, and saute onions in a t. of olive oil until softened and translucent, stirring occasionally for about 15 minutes. If they start to stick at all, cover the pan, and turn your heat down a bit.

Add sugars, cover the pan, and continue cooking and stirring occasionally for another 20-30 minutes until the onions are golden brown.

Add 1/4 c. water, cover the pan, and continue cooking and stirring occasionally for another 20-30 minutes.

Meanwhile, mash up the roasted garlic cloves with a fork, and mix with the vinegar.

Then add the mashed garlic/vinegar mixture and an additional 1/4 c. of water and cook and stir until nicely thickened, another 10 minutes or so.

Lean towards the 30 minute mark if you want a darker jam, I stuck closer to the 20 minute marks, and mine was a beautiful, butterscotch color.


After having some of those great grilled cheese combinations on Thursday, I know I'll have at least one foray into the sandwich realm with this jam. The funny thing is, I ate a spoonful, and immediately wanted some with eggs. Weird! So, I will let you know if some onion-y eggs appear anywhere around my home this week. I have a sneaking suspicion that I'll be doing a lot with this humble condiment...

Saturday, April 3, 2010

Of Wonder and Eggs.

On this Easter Eve, I find myself looking back over nearly a year of posts. My blog will be a year old on April 8th, and I can hardly believe that a year has gone so quickly. I was recently asked what made me start blogging. I've been doing what you faithful readers have been seeing here for the past 12 months, for a much longer time than I've been writing about it. I may not have been quite as prolific when I was working a job or multiple jobs, but I was still making my own noodles and chicken stock, and stockpiling quick homemade meals in my freezer, and reading as much (usually in the way of cookbooks or magazines back then) as I was able.

But what made me decide to start writing about the food I make was the sudden passing of my uncle a year ago. It really affected me. It made me stop and realize just how precious our day to day lives are, and on a grander scheme how the things I love are important to others. While food blogging could seem frivolous and lighthearted at times, I often draw so many correlations to the bigger picture, especially during this Easter season which is very important to me.

One of my favorite food ruminations is that of milk and honey. Nearly all life on our planet must be sustained by eating foods that first must die. This goes for people of all dining preference: vegetarian, carnivore, vegan. All diets contain that element of the brevity of life, be it a lamb or cow, or a stalk of wheat or a lowly legume. When God promised the Israelites the land of Milk and Honey, it confirms to me the amazing knowledge of life everlasting. Milk and honey are two of the only foods that are nutritionally valid and contain no death to produce. (I think an argument for maple syrup could be made, but to my knowledge, there were no maple trees in the desert...)

Food blogging has been a series of personal kitchen adventures for sure, but it has also changed the way I see this basic necessity for life. I've heard it said that there are two types of people, those that live to eat (*raising hand*) and those who eat to live. No matter your category, you can't escape the fact that everyone, everywhere, needs to eat to live. In this incredible era of computing, I can immediately have access to hundreds of thousands of ethnic recipes from cultures around the world. If it is edible, I'd wager it has been written about somewhere. And it's all because we have the amazing privilege, I believe by design, to eat.

Not only does eating sustain us physically, but it does mentally as well. Conversation that can be had over mealtime is often among the most memorable. And what you ate on a first date, or an anniversary, what kind of cake you dreamed of for your birthday, what foods are served after a funeral of a loved family member, these are all very powerful things that we carry around with us, intrinsic parts of especially our childhood memories. They are the things that unite food bloggers of all types, regardless of all the external things that hang up all of us humans in endless debate and argument.


I think the egg is an important part of Easter for me personally. Though I wrote a very inarticulate essay by comparison, in his book The Elements of Cooking, Michael Ruhlman's discussion of the egg is alone worth the cover price. I read this book for the first time a couple of months ago, and I really find myself thinking about it often. A sample of his passage on the egg:
My reverence for the egg borders on religious devotion. It is the perfect food - an inexpensive package, dense with nutrients and exquisitely flavored, that's both easily and simply prepared but that's also capable of unmatched capability in the kitchen. Yes, an egg is just an egg, but it is also ingredient, tool, and object, a natural construction of near mystical proportions..... Eggs are appropriate to serve at any time of day for any meal. They can be the main item or the garnish, they can be served simply in rustic preparations, but they are equally suited to four star cuisine. No other ingredient has so many uses and effects. The egg is a wonder.
Easter in particular holds a special place for eggs. We dye and hunt for them. We make them out of chocolate. We fill plastic ones full of jelly beans. As I type, I'm waiting patiently for my Chocolate Schaum Torte (courtesy of Burp! Where Food Happens) to bake; it is full of the wonderful levity that egg whites produce. I'm glad I decided to make it, since this is my first ever Easter dinner at my house - with just my little family. A dessert appropriate for Easter in my 33rd year...

One night this past week, we had eggs for supper. My Husband: two fried, with runny yolks. I decided at the last minute that I had to have a soft boiled egg. I have never had one! I've eaten eggs all sorts of ways, including raw, but never have I soft boiled one. I remember Sasa telling me how she loved them as a child, and called her to ask how many minutes to boil them. She said 5 minutes without hesitation, and then Googled to be sure. Bring water to a boil, carefully lower eggs into water, and boil 5 minutes. That's it. Without a doubt, the best way I have ever eaten an egg - even if I had to improvise an egg cup by using my 1/8 cup measure and the 2 ounce side of a bar jigger. I am not sure I could eat two of these every day as Nigella Lawson does, but I can tell you I will be eating many more of them in the future.

As CakeWalk bravely enters year two, I have no idea what will be in store. I am frequently surprised even at the direction my thoughts take me as I type away, let alone what will be on the docket of food adventures. I do know that I am thankful for this opportunity to share what is important to me, and that I live in a place where I can sit here and type whatever comes to mind without fear. (I just recently read of a blogger who was visiting China, and had to post her food adventures when she returned because they do not allow blogging!) I enjoy being a small part in other people's lives, and in some cases discovering what that little part is. It's also quite contenting to know that I may never know some people who read about my little life, just as some others don't know that I read about theirs. A great mystery in this wonderful life.

Thursday, April 1, 2010

Soda Crackers and the Mystery of Links

I have a serious link problem. I collect recipe links in three places: my iPod (recently updated to full-fledged iPhone), the little Netbook, which is my new kitchen friend, and the "big computer" which is up in the attic. I read so many different blogs, and find ideas in so many places, that the link list is seriously out of control. This is the same digital clutter that is taking over my hard drive in the form of food photos, and it's almost something I don't know how to tackle.

The digital age has presented a whole host of problems for people who love to cook. A decade ago, I had real clutter. Towers of paper clutter in the guise of magazine recipes that were too great to discard. Sometimes I cut the pages into smaller sizes, just the recipe, so that more of them were floating around until making their way into semi-organized manila envelopes, and some that were whole issues of magazines - too chock full of ideas to toss away. One good thing about moving occasionally is that I can take stock of real clutter and ditch it without thinking twice because suddenly a few crates full of "must make" recipes seems too heavy to be carrying up and down rental apartment stairs, into moving vehicles, and off to new, clean and uncluttered spaces.

The digital age enables me to mysteriously, and secretively, collect and earmark things that I have to make. Sure I don't have the physical clutter, but since there is just so much information around and so many people making amazing things, sadly many recipes go forgotten under the weight of the bookmarking itself.


Recently, I've actually been pretty successful in my attempts to stop bookmarking. Things look good to me as I'm perusing around, but I mentally note it (unless it is something too good to pass up, and that does happen) instead of adding another folder to the favorites. I do have a preternatural ability to remember such facts about which Merguez sausage recipe I wanted to try (this one from Sassy Radish) and which baked donuts I need an excuse to try (these applesauce ones from Twin Tables), just two of many examples.

Lately, I've tried to stick to making things as I find them, which is what happened when I read this post from King Arthur Flour's Baking Banter blog the other day. I got done reading, and promptly mixed up some dough. I love finding recipes for things that are kind of ordinary, but that most of us don't think of making for ourselves. Crackers are certainly on the top of that list, and it's a shame since homemade are always better, even if they aren't perfect.


I find King Arthur Flour recipes to be pretty fail-safe. They run an extremely well thought out test kitchen, in my opinion, and even have help lines for you to call. People this passionate about home baking are always going to be tops in my book.

This original recipe called for Italian-Style flour, which of course is not normally stocked in my well-stocked flours. I may have ample amounts of semolina, AP, white whole wheat, whole wheat, coarse corn meal, buckwheat, bread flour and all manners of coarse brans, but Italian-Style escapes me. I have a cart going on the King Arthur website (I need this to make innBrooklyn's pancake mix, and this to mix quickbreads with since I've wanted it for a really long time), so I think I'll order a bit of Italian flour and make these according to their published recipe. My version was good, and passable as a cracker, though perhaps not as a soda cracker which is their intended purpose.


Sometimes I think it's a sickness I have that I just can not follow instructions! Usually I have pretty good luck, and these were no exception. The dough is mixed and rested in the refrigerator for 18 hours (or more than 24 in my case, since I was gone for part of the day today), and then rolled thin. Echoing the methods used in puff pastry making, the dough is folded in thirds, and re-rolled thinly which creates layers in the finished cracker. Letting the cracker cool on the sheet pans in the oven adds crispness:


I like to keep things fairly uniform, but detest waste, so I baked up the little ends separately to have little "avant garde" crackers:


In fact, I may use my same (altered) recipe again and make the pieces smaller. They got very crunchy due to their diminutive size, and they were very addicting.

If you too are lacking in Italian flour, you can give the Rcakewalk version a try while you are waiting for your King Arthur Flour order!

Part Wheat Soda Crackers (adapted from King Arthur Flour)
  • 1/2 c. whole wheat flour (KAF)
  • 1 c. AP flour (KAF)
  • 1/4 t. salt
  • 1/4 t. baking soda
  • 1/4 t. cream of tartar
  • 1 t. sugar
  • 6 T. water
  • 2 T. butter
  • 2 T. olive oil
Mix the dry ingredients in the bowl of a stand mixer. Heat the water with butter and oil until the butter melts, then let it cool until the mixture is about 120 degrees (they mention that it should feel a little cooler than your hottest tap water). Add the liquid to the dry ingredients while mixer is on low. Once the liquid is added, increase speed to medium and beat about 90 seconds until a soft, smooth dough is formed. Put into a lidded container, and refrigerate "overnight and up to 18 hours". The dough will not rise too much, so you can use a smaller container.

Remove dough from fridge, and let sit for 15 minutes. Heat oven to 425 degrees, and line 2 sheet pans with parchment.

On a well floured surface, roll dough to about a 13x15 inch rectangle. Starting with the shorter side fold in thirds (like a letter) and roll again to about an 11x19 rectangle. Sprinkle with salt of your choice (after yesterday's post in which I ranted about salt usage, I used just a light sprinkle of kosher salt), and lightly roll over it with the rolling pin to press it into the dough. Using a knife or pizza cutter, cut into 2 inch squares and transfer to the waiting sheet pans. Poke each one a few times with the tines of a fork.

Bake for 10 minutes, maybe a shade longer, until the crackers are golden brown. Turn off the oven, and open the door wide, and let them cool on the racks until they come to room temperature. I'm thinking this would be a good project for when the weather is a bit chilly, but you don't have the heat on, since it will make your kitchen nice and warm (but perhaps a bit hazardous for small children).

I did follow the instructions from the original recipe, accidentally increasing the cold rest time since I was gone. The only difference, is that since there is higher protein content in the flours I used, the dough was much more difficult to roll out. On closer evaluation, I think I could have increased the water by a Tablespoon or so, since I used the wheat flour. This is definitely a work in progress, so if you do take up the challenge, I hope you will report back to me!


Please be sure to check out the tutorial and the original recipe over at Baker's Banter. If ever you need just one more blog to follow (and you love to bake) it is a great resource! Meanwhile, I'm mentally adding up all the things I'd like to try, and adding another lifetime to the 8 I already need to accomplish what I'd like to get done. Recipes like the one above confirm to me that I really would love to have a home-based test kitchen... one properly stocked with the right ingredients (and while I'm daydreaming, one with 3 foot deep, concrete countertops, and an extra well-lit counter for photographing!). I'll try to remember to let you know how the original recipe turns out when my flour shows up...

Wednesday, March 31, 2010

Vegan Black Bean Brownies, Redux.


Lately, I have no idea what kitchen adventures are in store for me as I begin my day. Today ended up being warm enough to venture around town and do some errands in a t-shirt, certainly not the weather that conjures up the making of brownies...

But in my supermarket stupor, which does happen when I don't go shopping very often, I found myself wandering around just looking for things to spend money on. And, I did it. I spent money on something I said I would never spend money on again: canned beans.


But really, I did it for the greater good. Last December I made these Vegan Black Bean Brownies and they were alright, even tasty, but not perfection. I've been meaning to make them again ever since. Last time, I overcooked my beans in the pressure cooker, and used an amount that I had weighed and mentally noted to be an equivalent to a 15 oz. can. So when I paid hard earned cash on a can of Goya beans today, I deconstructed their weights and contents thoroughly, in relationship to the original recipe posted at No Meat Athlete, so I can slip this recipe into my uses for beanery in the future.

My Findings:

1 15.5 oz. (439 g.) can of Goya black beans contains:
  • 7 3/4 oz. or 220 g. of actual beans (a scant 2 cups)
  • a can of liquid equals 14 oz. or a scant 1 3/4 cups by liquid volume
  • 1610 mg. of sodium!
Enter the soapbox, please, since I did not realize that there is so much salt in a simple whole food like beans. I'm sure the amount varies by brand, and I know there is a canned bean market for "low sodium" audiences. When I checked out the U.S. Dry Bean Council website (yes, there is such a thing), dry beans are virtually nil in the sodium department. When I read Michael Rulman's book The Elements of Cooking a couple months back, I recall reading a passage about the usage of salt in home cooking. In essence, he advocates using salt to flavor food to your taste, and now I can see that if I add a pinch of salt (probably less than 500 mg.), it is an unbelievable low amount if compared to a processed food of the same type. If you are a home cook and rarely eat processed foods, sodium consumption truly is of no issue to you - unless of course you have a medical condition requiring you to eat extremely low amounts of sodium. Just think, if a can of supermarket black beans is that salty, think of what is in other more "processed" foods, and how as a nation, we are training our tongues to look for this substitute for flavor in everything. OK, I'm done.

I'm by no means the most virtuous of eaters, mind you, I am obsessively deconstructing a brownie recipe after all. And with the subplot of trying to sneak in some non-cereal nutrition for the Boy-O, I cut the sugar back more than I did before. I think these articles that I've been reading about sugar being more addictive than cocaine (thanks, Mike G.) are absolutely true, and the more I read about the questionable refining processes of supposedly healthy sugar alternatives like agave syrup, the more I feel like just eating plain old sugar (or honey), and just eating less of it.

So, without further delay, here is the Vegan Black Bean Brownie, served with non-vegan (but perfectly worth it) Cayenne-Cinnamon Whipped Cream!


Vegan Black Bean Brownies with Cayenne-Cinnamon Whipped Cream (adapted from Christine at No Meat Athlete)

Makes a 9x13 pan (notations in parenthesis for a half recipe: 9x9 pan)
  • 1 1/2 cups whole wheat flour (3/4 c.)
  • 1 t. salt if using unsalted beans (1/2 t.)
  • 1 t. baking powder (1/2 t.)
  • 1 1/2 c. sugar, raw or granulated (3/4 c.)
  • 1 1/4 c. cocoa powder (1/2 c. + 2 Tablespoons)
  • 4 t. espresso powder (2 t.)
  • 1 1/2 c. chopped walnuts (3/4 c.)
  • 1 can black beans, drained and rinsed well or substitution as listed above: scant 2 c. (scant 1 c. or half a can of beans)
  • 14 oz. or scant 1 3/4 c. water (7 oz. or scant 1/2 c. + 6 Tablespoons)
  • additional 1 c. water (1/2 c.)
  • 1 t. vanilla extract (1/2 t. )
Preheat oven to 350. Lightly grease a 9x13 baking dish (9x9 for the 1/2 amount). Mix dry ingredients together in a large mixing bowl. Puree beans in water using a food pro or blender. Add to the dry ingredients along with the additional water and the vanilla extract, and mix until well combined. Fold in walnuts, and spread into a pan. Bake for 25-30 minutes until edges pull away slightly, and middle is set. Tester should come out mostly clean, but this is a judgment call on how well done you like your brownies.

When they are cooling, make the whipped cream: Beat an amount of heavy cream, an amount suitable to your needs, for 1 minute. Add a Tablespoon or two of confectioner's sugar, and as much cayenne as you like. I like mine pretty spicy, so to about a 1/2 c. of cream, I added a 1/2 t. cayenne. Cinnamon to taste, as well, I used about 3/4 t. for my amount of cream. Continue beating on high until cream is whipped and fluffy.


Now, I'm betting you could add a whole host of chocolate complements to the whipping cream if spicy with chocolate isn't really your thing. And if it is, and you aren't trying to inundate your child with hidden beans, you could add the spice right into the batter. I'm going to get some chipotle powder during my next Spice House trip, and maybe try that in my next batch. If you find that you need even more chocolate, you can also add in a cup or so of bittersweet chips - I used mint chocolate chips in the one I made last year, and that wasn't a bad choice either.

This is exactly the kind of dessert I get excited about (even if I may be the only one around here...), since it is dessert, but it is healthy enough that I don't feel too guilty about eating it every day until it's gone. Fortunately, I'm going to see R1 tomorrow, and half of my 9x13 pan will make its way over to her hungry and non-picky brood. I wish I could give it to them straight out of the oven, which is how I would serve it at a party. The middle was like a fudgy, thick English Pudding, and the spicy whipped cream melted into the top. In fact, I thought I'd just take some pictures and save it for later, but that wasn't going to happen after I took a bite... I ate my dessert at 4 p.m. today.

If you prefer sweeter desserts, or more traditional tasting brownies, I'd urge you to use the full amount of sugar from the original recipe: 2 1/4 cups. With or without any of the variations, I hope that if you do try these, you will be as enamored as I am.


Wednesday, March 24, 2010

Drinking Horchata.

The first time I ever had horchata was about 10 years ago with my friend Frankee. We were at a little Mexican place in Kankakee, Illinois, and her husband ordered a pitcher for us to share. She actually didn't drink it, since she doesn't like it, but I was hooked. Ever since, I usually ask for it whenever I try out new Mexican places. Until recently, I'd only score once or twice a year, but happily it now seems easier to find. Some are thick, some light, and others gritty. Some are so sweet, and others barely sweetened at all. I like them all, poured over huge amounts of crushed ice or ice cubes. Basically, I don't care what kind it is, since it all appeals to me equally.

Really, there are three reasons for my horchata making yesterday. Last night, I went to see Vampire Weekend and the title track on their sophomore album is Horchata. I'd be hard pressed to get the opening lines out of my brain, since it has been running through my head for the past 2 days now. I also checked out this post from Glutster yesterday, and decided that his photos were so great I had to have some horchata immediately. I have a car today, and am half thinking I'll run over to El Rey and find some pureed red cactus fruit (tuna or jiotilla), so my next glass can be as delightfully rosy as Javier's. Reason three is that my Spanish teacher, Rosa, was telling me that she is eating gluten free and sugar free right now. Rice is gluten free, and I figured you could probably sweeten horchata with stevia if you felt the need, so this could be an easily adaptable drink for allergen conscious people.


Making horchata is really as easy as drinking it, you just have to have a bit of patience. One of my Rick Bayless cookbooks had a recipe using almonds, but since I was nearly out of them, I adapted his method to this recipe, by Chelsey Kenyon. Really, I ended up using both recipes, since I added milk. The beauty of horchata is that you can do whatever you like best, to concoct a result that suits you. I did use plain old refined sugar, but knocked it way back to about a 1/4 c. Rick's recipe called for 1 cup, and Chelsey's recipe for 1/2 cup. Like I said, it is purely a matter of taste.


Rcakewalk Horchata (inspired by Rick Bayless and Chelsey Kenyon)
  • 1 c. white rice
  • 2 1/2 c. drinking water
  • 1/2 cinnamon stick (canela)
  • scant 1/4 c. granulated sugar
  • 1 c. milk (2% is what I used)
Grind the rice in a blender, or a coffee grinder like I did, until it is finely ground. You can leave the cinnamon stick whole, or break it apart if you like more cinnamon flavor. Heat 2 1/2 cups of water until hot but not boiling, and pour it over the rice and cinnamon. Let it come to room temperature, then cover and refrigerate overnight.

After refrigeration, pour the mixture into a blender. I left the cinnamon in, since I'm crazy for cinnamon, but you can fish most of it out if you prefer less. Add sugar, and mix on high for about 3 minutes until the rice is finely ground. Pour through a fine sieve (or through layers of cheesecloth and a regular sieve) to remove most of the rice pulp. (I actually like a bit of grittiness, but you could make this absolutely grit-less by using a finer sieve and perhaps running the liquid through a muslin bag.) Transfer to a pitcher.

Stir in milk. You could add more milk, or more water, or some of each, but I liked the result with just a cup of milk. You could also add additional sugar at this point if you like. Serve on ice and dream of warm weather.


"In December drinking horchata
I'd look psychotic in my balaclava
Winter's cold is too much to handle
Pincher crabs that pinch at your sandals

Whoa."


Addicting lyrics indeed, almost as addicting as the horchata itself. My milky glass below doesn't pack the same visual punch as the rosy, pecan garnished one that Glutster enjoyed the other day, but it sure hit the spot for me.


Monday, March 22, 2010

Quinoa Bread: Lahey-ified.

I must admit, that since Lahey obsession has set in, I really haven't felt like making any other bread variations. I was quite happy in making my new standby which is the Pane Integrale with a bit of extra flax meal added. Not only is it delicious and healthy, it lasts a freakishly long time. A long time if it isn't gobbled up, that is.

Well, because I was out of town for the weekend, Monday morning came with no 24 hour Lahey dough to work with. I decided to give another bread a try - since I bought this book at the same time as the Lahey book and confess to never having cracked it open until this morning. I was almost out of AP flour, which was alright since most of the bread recipes in Healthy Bread in Five Minutes a Day are predominately whole grain. When I came across one for Quinoa Bread, I knew this was the perfect opportunity to have a loaf of bread ready for my dinner deadline. And, I'm kind of a sucker for anything with quinoa in it.

The main differences in the two approaches to "no-knead" bread as I see them are these: 5 Minute a Day bread uses much more liquid and yeast, rises faster and can be stored in most cases for up to 2 weeks, and Lahey bread uses a fair amount of liquid, but only produces one loaf at a time that takes around 24 hours to complete. I

think the Lahey bread is my new favorite method as well, since it is baked in an "oven within an oven". (My new Lodge pre-seasoned 5 quart dutch oven is working out splendidly, by the way.) No messing about with pouring in water for steam, and considerably less mess, which is something of note for someone who by nature tends not to be the neatest when working with doughs. I also find that the flavor is a bit more to my liking.


Quinoa bread dough.

Rather than lament the omission of my bread baking in a pot, I decided to mix up the Artisan Bread in 5 Quinoa bread, and then treat it like I would a Lahey bread, sans waiting for 24 hours. My resulting loaf was still ABin5ish, but had enough Lahey characteristics to satisfy my obsessions. And it tasted great too, with the slight nuttiness of quinoa adding a millet-like texture to the bread. I know on the ABin5 website, they give tips for baking in pots, and I remember perusing it some time back, but I just used Lahey's methods and temperatures outlined in his book. I'll recount my recipe and procedure below, but the ingredient list isn't changed much from the original except that I did use half the recipe. You can easily double the dough and store it under refrigeration for up to 10 days.


1st raising.


2nd Raising.

Quinoa Bread (Layhey-ified, but still Artisan Bread in Five Minutes a Day's recipe.)

  • 1 1/2 c. white whole wheat flour
  • 1 1/2 c. ap flour
  • 1/4 c. bread flour (you can use all ap flour, but I was out after 1 1/2 c...)
  • 1/2 c. quinoa
  • 1 t. active dry yeast
  • 3/4 t. kosher salt (could actually use a bit more, to my taste)
  • 2 T. vital wheat gluten
  • 1 1/2 c. plus 6 T. lukewarm water
Mix dry ingredients together, then add water and mix well with wooden spoon, spatula, or stand mixer with paddle attachment. Cover the dough, and let it raise at room temperature until it rises and collapses slightly, at least 2 hours. (Actual time will depend on how much yeast, how warm or cool your room temperature is, and how lukewarm your water was.)

Dust a clean linen (or non-pilling) kitchen towel with ample amounts of wheat bran and/or oat bran.

(I could have used the whole half batch of dough here for a single loaf, but I used about 2/3 of it.) Using a bit of extra flour, shape it into a round as quickly as possible, aiming for forming a tight "skin" on the outside of the dough by pulling the top around to the bottom. It's a sticky dough, so use some extra flour if you need it. When you have a nice neat boule shape, rest it on the wheat bran dusted towel, and cover loosely with the sides of the towel. Sprinkle the top of the loaf with a bit of extra bran if it seems too sticky. Let it raise for another 2 hours or so, until the loaf looks pleasantly plump, and an indentation made by your index finger lingers in the loaf after you press it in gently.

Preheat oven to 475 degrees about a half an hour before baking, and put lidded dutch oven in the oven before doing so. When the oven is to temperature and the pot is heated, carefully remove the pot from the oven, and take off the lid. Quickly and carefully, invert the loaf into the pot, trying not to "plop" it too much if possible. Put the lid back on and bake for 30 minutes. After 30 minutes have elapsed, remove the lid, and bake another 15 minutes until loaf is golden brown and sounds hollow when tapped.

Be patient, and try not to cut into the loaf until it has cooled completely.

I was happy with the final product, when it cooled and I finally cut into it and ate the heel plain for my initial discriminations. It made good sandwiches for dinner tonight, and I'm looking forward to having it toasted for breakfast tomorrow. I am also happy at the additional complete protein it contains, and that my Husband thought it "wasn't bad"! I'll call it a win, and keep it around in my bread-making repertoire. Next time, I may try starting it a day earlier and reducing the yeast down to the 1/2 teaspoon that is the hallmark of Lahey bread. Now I'm kind of curious...

Wednesday, March 17, 2010

Better to be a Live, Cold Potato...

There are two things I always think of on St. Patrick's Day: first, that everyone can be Irish for that single day of the year, and second that "It's better to be a live, cold potato than a dead hot tomato". I don't know why this quote sticks out, but it does... and the funny thing is that I don't even really know who said that (until in this miraculous age of Googling I found that it was probably Studs Terkel...). I assume that it stuck with me all of these years due to its absolute truth, and that it offered me some comfort since in my own eyes at least, I'm not really that hot a tomato. As I stood over my sink this evening, doing an intentionally poor job of peeling some red skinned potatoes for dinner, it was all I could think of.

Unlike this morning, when glorious bread was on my brain. This is also the one day of the year when anyone can turn out a halfway decent loaf of soda bread, usually in minimal time and with minimal effort. Since it is a quick bread, those phobic of yeast bakery in the home can easily produce the soda bread of their dreams. The soda bread of my dreams is the recipe that we used at Gina's Pies Are Square, for serving on our busiest day of the year. I think it was from a Martha Stewart magazine, and the year I first made it for myself I had to call GOP and get the ingredients list, since when I just now quick searched the Martha Stewart website, 2022 results popped up for soda bread. This in itself is saying something. Soda bread has been done and redone, sweetened to the point of cake-dom or reduced to full whole wheat hockey pucks. But this one is the one for me.

My preferred recipe is probably not one for the record books. It's dry and crumbly and a pain to work with. The liquid is always too little, and I always end up adding more and hoping that I'm not overworking the dough. It is butter-less and dense, yet tender and tangy from buttermilk, and though boasting a fair amount of plain white flour, has a trace of whole wheat and oat bran. It was particularly difficult to mix up today, and I wet my hands down and forced it into domelike submission - a trick I learned from making biscotti.


This recipe is one of thousands you can find, but is my favorite. I feel some strange loyalty to it, and even though this one from Ina Garten was calling my name, I just could not bring myself to make it. Mine is dry and earthy, and needs something to sop up desperately. Perfect, in my book.

Irish Soda Bread - originally from Martha Stewart Magazine
makes one loaf (but I usually make two smaller loaves and give one to my In-Laws)
  • 3 c. AP flour
  • 1/2 c. whole wheat flour
  • 1/2 c. coarse oat bran
  • 1 t. salt
  • 1 t. baking soda
  • 1 t. baking powder
  • 1 2/3 c. buttermilk (you will likely need more)
Preheat oven to 350 degrees and line a sheet pan with parchment paper. Combine the dry ingredients, then add the buttermilk and form into a dome-like disk. You may need to add additional liquid, and possibly wet your hands down to get it to stay somewhat together. Cut a cross into the top of the loaf, about 3/4 inch deep, and bake for 45-60 minutes (35-45 for two smaller loaves), until the loaf is lightly browned and a toothpick comes out clean.


Ordinarily, I angelically wait for bread to cool before diving in for the first taste. Soda bread is different to me, and I let it cool just enough so that I won't burn myself slicing away at it. I love this bread, and only make it one time a year. I don't know why! It could be that it isn't really a good keeper. Two days at best, and you'll dump any remaining leftovers I'd wager. But for the one day of the year when I get to be Irish by association, I usually clobber it to the point of very little waste.


Non-Irish Swiss cheese and Spicy Guinness Mustard lunch.


I started another batch of Spicy Guinness Mustard this afternoon, and poured the rest of the bottle into a beef stew I was slow cooking. It was intentional, since I saw this recipe recently from innBrooklyn, and thought that it would be a perfect thing for today. I was going to follow her recipe, but then didn't so much, but luckily it was fantastic anyway. I used a beef rump roast from my frozen bevy, and the aforementioned Guinness, and part of another one I saved from Monday's Oatmeal Guinness Stout Pie. I didn't add any stock, since I didn't have any, and because when I tasted the liquid after it braised in the crock pot for 5 or 6 hours, I was amazed at the complexity of the flavor. That beef is so "beefy" that it hardly needs anything to help it along. I ended up salting and peppering it well, but to my base of beef and onion, only added a few tablespoons of tomato paste, a jigger of Worcestershire sauce, and a polite splash of red wine vinegar to liven it up (and towards the end thickened it a bit with tapioca flour). I am very grateful for the leftovers, and to innBrooklyn for planting the idea in my head...


Roasted cabbage and red potatoes, to go with the stew.


When we sat down to eat, I realized that I cooked that meat for close to 12 hours in the crock pot. It fell apart and was perfect. I was actually very full after this meal. I don't often cook such heavy food, and the funny thing is that it is usually such simple food that fills you up. Irish food really is simple comfort food, and the joy of it comes from the ease of preparation and the lack of odd ingredients.

I doubt the poor farmers that popularized these dishes would have any idea the impact they would have on a girl without an ounce of Irish heritage. I'm surprised myself of how inexplicably drawn to soda bread I am, even if this live, cold potato only makes it once a year. I may have to break that habit and give a few more recipes a try.

Monday, March 15, 2010

Guinness Oatmeal Stout Pie, and In Which I Become Even More Addicted to Fudge Babies

Late yesterday, I checked the Facebook to find out that my friend Gina, the Goddess of Pie, has sold her cafe, Gina's Pies are Square. I knew it was for sale, and I knew she wanted to venture in other directions, but this floored me. Like I somehow thought all was right in the world if the pie shop was just the way I remember it, and my one-time apartment above was there just in case I ever needed it. Not that I'm thinking I'd need to escape my current life, but the time I spent in that 500 person town was a good time. I knew everyone, everyone knew me. I only had to drive to visit my Parents or to get to church, and could walk everywhere else that needed getting to.

My apartment smelled of pie, and the outside brick wall was emblazoned with a Gold Medal Flour sign. Idyllic? Kinda. I learned how to make jewelry by taking on a second job, I learned how to co-exist on a basic level when people know your business all of the time. I remembered what it was like not to have curtains on the windows. And if I saw you coming in the front door, I'd probably already have the coffee cup (or beer bottle) at the ready for you.

Of course, this news right before retiring for the day led me to dreaming of pie... and what better pie for Pi Day (3.14) and St. Patrick's Day than Gina's Guinness Oatmeal Stout. I'd considered making it for awhile, but knew that I'd be eating a whole pie, so didn't really know if I would be making it for sure. After reading Deena's similarly mathematical post on Coupled Pair (Pear) Pie and hearing of the changes going on at the Square Pie, I knew that in my own way, I'd make a pie as tribute today.


The good news is that if you have the Guinness, you can probably do it without leaving to pick up ingredients if your baking pantry is the slightest bit stocked.

The pie recipe is one we made at the Square Pie, courtesy of the GOP.  I hope I can still call her the Goddess of Pie, since the thought of her relinquishing that crown is truly a sorry one. The crust recipe however, is from Dorie Greenspan's Baking Book. I can not believe I never made it before, because I think it is the nicest crust I've ever made. I mix it up mess free in a plastic bag as Alton Brown suggests.

Guinness Oatmeal Stout Pie
  • 3 eggs
  • 2 T. flour
  • 1 t. vanilla
  • 2/3 c. molasses
  • 3/4 c. rolled oats
  • 3/4 c. brown sugar
  • 1/4 c. butter, melted
  • 1/2 c. chocolate chips
  • 1/2 c. Guinness
Whisk all ingredients except beer until well combined, then add beer. Mixture will foam up nicely. Pour into pie shell and bake at 350 degrees for 40-45 minutes. Pie should be set and not "sloshy", but will set up a bit more as it cools... kind of like pecan pie filling. Let it cool to room temperature before digging in.

Dorie Greenspan's Pie Crust (one 9 inch pie)
  • 1 1/2 c. AP flour
  • 2 T. sugar
  • 3/4 t. salt
  • 10 T. very cold (or frozen) butter
  • 2 1/2 T. very cold (or frozen) shortening (I use Spectrum Organic)
  • about 1/4 c. ice water
Put the flour, sugar and salt in the food pro and pulse to combine. Add butter and shortening and pulse several times until mixture is like "coarse meal" and has several "fat pea" sized butter pieces floating around. Add about half the water, and continue pulsing, adding enough water and increasing duration of the pulsing a little to get the water into the flour. When the dough comes together when pinched, you have succeeded. Dump the food pro contents into a plastic bag and form into a disk. Refrigerate for 1 hour (and up to 2 days) before rolling out.


guinness pie unbaked

As if this Guinness Pie isn't enough to make your knees buckle, I rolled out the extra pie dough that I clipped off the crust, and figured that if these Chocolate Covered Katie Fudge Babies that I am hopelessly addicted to are good on their own, perhaps they would be even better wrapped up in flaky dough. All I am going to say is that it's a good thing I only had enough dough to make three of these (newly dubbed) Pastry Enhanced Fudge Babies.


I used a 2 5/8 inch ring to cut them out, but next time could go a bit larger. I also had to tear off (and eat, of course) about 1/3 of the Fudge Baby as pictured above, so that I could crimp the sides of the dough up around it. I brushed the edges with beaten egg, but since I only had a few, used the same beaten eggs in the Guinness Pie recipe. Nothing was wasted in my adventures, today.


It's not raw or vegan anymore, but I've got to think that CCK would be impressed that her Fudge Babies could be even more addicting!


I made a double batch of the original recipe yesterday, and used the gram measurements. I decided to sprinkle them with a bit of coconut to keep them from sticking to each other, but found they were in better proportion than when I used cup measurements. Katie also has all kinds of links to amazing looking Baby Variations. If I can get out of the original rut, I have to try some others. They are guilt-free, and beyond simple to make, and now that I know I can use up leftover pie crust with them, I may just have to make pie more often...

Good luck to GOP and her new endeavors, and farewell to the Square Pie of my past. I hope your new owners take good care of you.