Saturday, January 29, 2011

Ahhh, Weekend Breakfast.

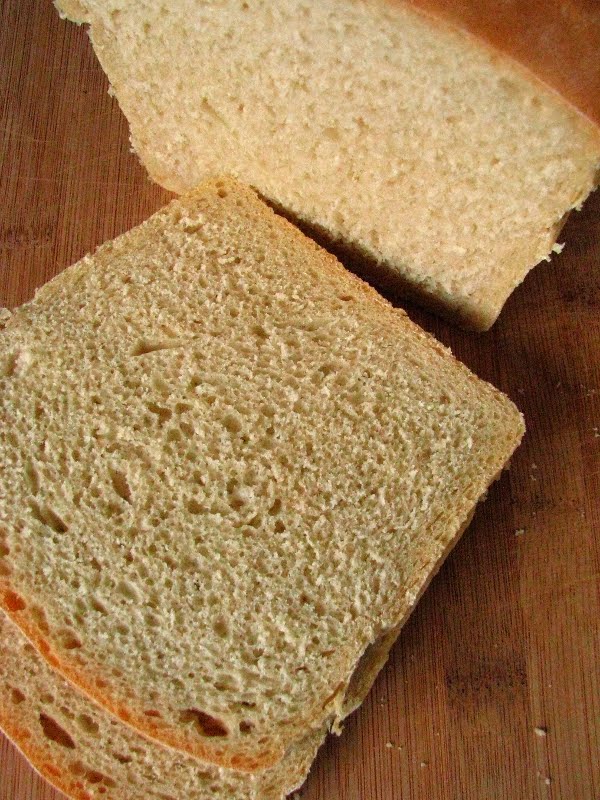
Saturday is a leisurely day for many people, although I feel privileged to lead a life mostly comprised of Saturdays so to speak. Lo mentioned something about sourdough English muffins yesterday, and here on my table for a shared Saturday breakfast are gorgeous sourdough English muffins. Let me tell you, sourdough fiends, they are amazing.


Food classified under the terms of traditional food, nutrient rich diet, or the Nourishing Traditions diet seems to be my reading and obsession focus as of late. Tiny whispers of things like brined nuts that entered my thoughts via Food 52 this week spurred me to delve into yet another section of Sally Fallon's book on soaking nuts and seeds. Sproutman's Kitchen Garden, on my shelf since summer, has received a thorough perusal. No more Maseca to make tortillas, instead I can sprout popcorn? Can my Vita-Mix even handle this after 5 days of waiting and watching and then an hour's worth of boiling pebble-like, jaw-breaking popcorn? Just to make tortillas? It is a good thing I live mostly in the extra time of Saturdays with all of the things that I have on the list of things to do. This ever-growing curiosity that so easily overtakes me without my consent, it's unrelenting.

Fortunately for me, most traditional foods are not complex or expensive, just a bit time-consuming. Usually unattended time, as I've mentioned before. Last night I decided that I had to have the English muffins, so I mixed up the batter and let it ferment until morning. The breaking of dawn, and I rushed to my kitchen to add minuscule amounts of salt, baking soda and honey, then made a complete mess of my counter by pouring olive oil over it in attempt to ward off sticking. But for a first attempt at naturally leavened English muffins, I am already in love.

I knew from making English muffins before that the dough is unruly. Sticky and stubborn, it has to be on the wet side to properly form the famous nooks and crannies. The oil-covered counter did work, but really I think that my method of making these beauties is only going to improve over time. Even by the time I griddled my last muffin, I had improved my method - finding that overlapping the edges of the risen dough to the center, then quickly transferring to the hot cast iron skillet on a well-oiled metal spatula gave me the best raise and the roundest muffin. But, as with most things homemade, I take delight in the notion that they are imperfectly beautiful.


Sourdough English Muffins (Erin, via GNOWFLINS - a really great pictorial tutorial, so click over there!)
  • 1/2 c. sourdough starter
  • 1 c. liquid (pretty much anything, but I used water... could use whey, milk, yogurt, coconut milk . . .)
  • 2 c. flour, any kind or combination (I used half AP flour and half wheat)
  • 1 T. honey
  • 3/4 t. salt
  • 1 t. baking soda
12-24 hours before you want to make the muffins, mix the starter, liquid, and flour. The batter will be very wet, but it will depend on the hydration of your starter. In my opinion, it can't really be too wet, though it makes it a tad hard to work with.

An hour before you want to make the muffins, sprinkle the honey, salt and baking soda over the top and stir in. Pour a tablespoon or so of olive oil on a clean counter top (I'm guessing that a smooth surface is going to prevent sticking more than a wooden surface), spread it around, oiling your hands in the process, and pour the batter out onto the slick counter. Knead with oiled/floured hands to make sure that the honey, salt and soda are well incorporated.

Divide into 8 pieces, and form into loose "patty" shaped mounds, using flour on your hands to help prevent sticking. Let the muffins rest on cornmeal covered silicone mat, or similar, for about an hour.

Griddle on medium to medium-low heat, preferable on cast iron. (I don't have a huge cast iron griddle, so I used 3 different cast iron pans. I found that I had to keep decreasing the temperature as I griddled, since cast iron holds the heat so well. I also have well-seasoned pans, so I didn't need to grease them at all). Griddle side one for 5 minutes, then flip and griddle 5 minutes on the other side. Moderate the temperature so that the interior will bake fully and the exterior doesn't burn in the time allotted each side. After 2 or 3 muffins, you'll have it down.

Erin, via GNOWFLINS, said that these will last a week covered at room temperature, and will freeze well. This first batch is nearly gone, so I'll likely have no reporting to do on the shelf life for awhile...


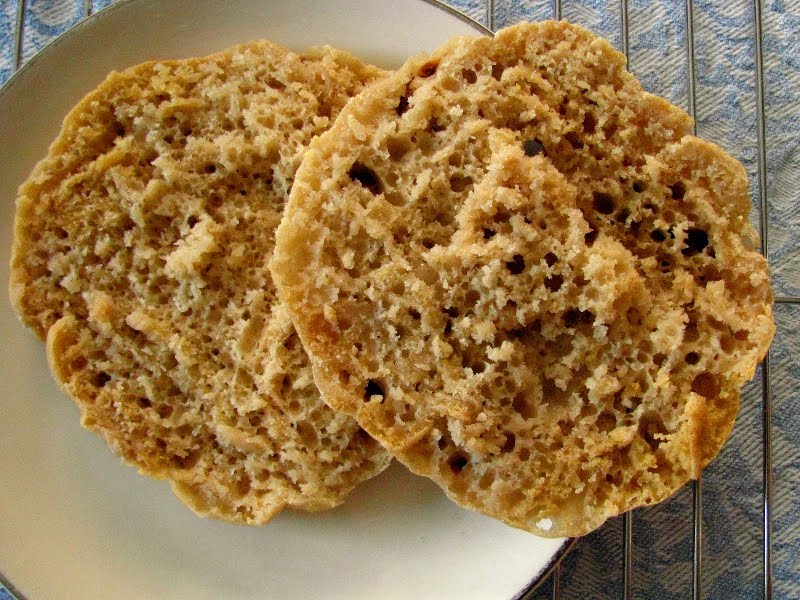
I wasn't even going to go all out and make a full breakfast, but as soon as I smelled these, I ran down to the basement freezer and grabbed a package of pork sausage from last year's pig. I still have a few packages left before I can make room for this year's... which makes me think that I should have shared weekend breakfasts more often. I never seem to fuss when it is just for me, or even just for me and my Husband - but given the opportunity to cook for someone who loves to eat as much as I do, I quickly change my disposition. Sasa ate hers mopping up her sunny-side-up yolks, and I doused mine in lemon marmalade and grape jelly. We both agreed that these English Muffins are the best.


After breakfast, I attended to my growing kitchen responsibilities, which now include rinsing grains along with feeding that thriving sourdough starter. What kitchen miracles are unlocked each day when nutrition is enhanced by doing simple tasks! I swear, I've never tasted a nut or grain in it's full glory before brining it and then slow-roasting it, hovering and tasting my progress along the way as if I have another newborn child. This stuff actually tastes different: sweeter, healthier! I'm sure it is in part in my mind, but I don't even care. It's cheap thrills over here at casa rcakewalk... the kind that aren't bad for you in any way.


I've never even had spelt, let alone sprouted it...


Sally Fallon's "Crispy Nuts": forever ruining me from roasted...

I'm now looking forward even more to "borrowing" my Mom's dehydrator, so I don't have to attend to the oven, it's door ajar for hours when I monitor the drying of various things. And next time I go up to visit, I'll likely be packing some of these delicious English muffins as a trade.


UPDATE:
I have found that I can totally skip the oiled countertops and wrestling with super sticky dough! Just sprinkle the honey, salt and baking soda over the top, and stir to combine. Then, let it sit for an hour. When it's time to griddle, just fill a pint glass with water, and dip a disher (I use 1/2 c. size) in it. (Water prevents the sticky dough from collecting on the disher.) Then, scoop up the scoop of dough and deposit it on the hot griddle. Quickly dip your fingertips in the water, and briefly flatten the muffin into a nice round shape. That's it! Continue as described above, and enjoy less kitchen clean-up!!

Thursday, January 27, 2011

Daring Bakers January 2011: Jaconde Imprime Entremets

The January 2011 Daring Bakers’ challenge was hosted by Astheroshe of the blog accro. She chose to challenge everyone to make a Biscuit Joconde Imprime to wrap around an Entremets dessert.


I had never heard of this month's challenge. Essentially, it is a French sponge cake that has a pattern baked into it, and then it is cut and used in a mold to encase something delicious. Usually, this deliciousness is a pastry cream, mousse, or other similarly creamy concoction, perhaps sandwiched between layers of cake and topped off with whipped cream. Our challenge was to make the jaconde imprime (patterned cake), make it into a mold of our choosing, and to fill it with whatever we desired.

The cake itself is made from almond meal, a touch of flour and eggs, and is not particularly sweet. The imprime batter, or the dense foodstuff that is what forms the pattern, could have been made either with the cocoa powder as I did, or left plain and colored with food coloring. Since I am not in the food coloring camp, I decided on the chocolate version first. Then, I spent part of the month thinking about what to fill it with.

The jaconde (sponge cake) has 3 egg whites, and 3 eggs in it and the imprime batter has 6 or 7 (I used weight measurements) egg whites in it. I couldn't bear the thought of making an egg-heavy cream to fill the petite desserts, especially since it may be awhile until I get back to my egg supplier. I could, however get behind the thought of the leftover orange cream cheese frosting from the cupcakes I made for New Year's Eve...

It would not be a lie to say that I figured that an ice cream made from this frosting would be the best one I've ever made. The frosting was on the sweet side, and my favorite (non-custard) ice cream base I usually leave less sweet. The marriage of the two would be one for the record books, I naturally assumed, and I assumed correctly. It took a couple of days to get truly hardened in the freezer, but still maintains the softness and creaminess that this ice cream base is usually lacking due to it's absence of egg yolks. What better to fill a cake with than icy-creamy orange and walnuts?


It bears noting that I would most certainly make a batch of this frosting just to use in this ice cream. I am famous for having all sorts of leftover frostings in my fridge, after all they nearly never go bad with all of the sugar they contain. If you would make the frosting solely for the purpose of the ice cream (and not to indulge first in Champagne Cupcakes), I would probably make a half batch. Unless you are thinking ahead and would like leftovers.

Orange Cream Cheese and Walnut Ice Cream (adapted from David Leibovitz via Burp!, Epicurious, and rcakewalk)
  • 2 c. heavy cream
  • 1 c. milk (I use 2%)
  • scant 1/2 c. sugar (I use raw)
  • pinch of kosher salt
  • 1/2 t. vanilla extract
  • about 1 - 1 1/2 c. Orange Cream Cheese Frosting
  • 1/2 c. walnuts, toasted and chopped into medium sized bits
In a small pan, heat 1 c. of the heavy cream with sugar and salt over medium heat, stirring until all the sugar has dissolved. Remove from heat and pour into a clean bowl.

Pour remaining 1 c. heavy cream, milk, and vanilla extract into heated milk mixture and stir to combine. Place in refrigerator, and chill until well chilled. (This can be up to two days, or as quickly as an hour or two.)

Churn ice cream in machine according to manufacturer's instruction. I have this model, and it takes about 20-25 minutes to get fairly firm. (The ice cream will harden in the freezer, essentially the machine is churning air into it.)

When the ice cream is nearly done, add the cream cheese frosting in dollops, and continue churning about 10 minutes for it to fully incorporate and get a bit firmer. (Even though I used leftover frosting that was cold from the refrigerator, it still brought the temperature of the ice cream down, and looked at first like it was not going to freeze into a hard ice cream.) Just before transferring to a freezer safe bowl, add in the nuts and let them disperse evenly. Don't worry if it seems very soft.

Freeze for at least a day for best results. If you are eating it as is, it can be soft set in several hours.


A day or two after making (and trying not to sneak spoonfuls of) the ice cream, I commenced with the rest of the challenge. The imprime batter that would become the pattern of the cake was very thick, and also not too sweet. I decided that I would pipe a haphazard design onto my silicone mat, including my rcakewalk signature... can you see it?


I let it sit in the freezer for 30 minutes when I prepared the sponge. The sponge was easy, and tasty enough if not highly flavorful. The batter, however, seemed very loose and I wasn't sure it would bake properly. I have made other sponges, and when making this again I would probably go with a batter that is a bit more dry. It did bake at a higher temperature, so perhaps baking at lower heat would have solved my problem?


sponge over the design.


baked about 9 minutes.

Even though I had high hopes, I already knew that the sponge was kind of uncooked in the middle. It felt soft and springy, and was properly browned, but after I let it cool about 5 minutes and tried to carefully peel off the silicone:


It was damp - even falling apart - in the middle, but the edges were baked perfectly dry and fairly flexible. I considered trying to re-bake it, but it was already sticking to my confectioner sugar covered parchment paper so I decided to salvage what I could for the challenge's sake and move along with my life.


cooked edge, nice and sponge-like.

From the entire sheet pan, I was able to use just the edges to get two small desserts. I figured this was fine with me, since I've come to realize that the challenges are more of a learning process for me and that usually it's a bonus when something is tasty and works well. I also knew that given my flavor choices, my boys wouldn't be knocking me over to get to it either. Two little desserts that can be stored in my freezer, out of temptation's way, sounded just about right to me...


I prepared my egg rings into molds.

Carefully, I was able to cut the sides of my fragile cake. I also pieced together a bottom, and pressed it firmly to form a base. I froze the cake rings overnight, and the next day "molded" the cake into submission a little more. Then, I took scoops of ice cream, softened it in my hands, and molded it into the centers. I mounded more ice cream up over the top, relying on the parchment that extended above my rings to keep it in place. When the ice cream froze hard, I smoothed the top with a hot knife and popped it back into the freezer. Meanwhile, I used some leftover tempered chocolate from my Christmas baking to make squiggly designs for the tops.


When it was finally time to taste all of the components working together, I realized the cake is a decorative, supporting member of this union. Further, I noticed that my tempered chocolate garnish was not just artistic, it actually lent a much needed chocolate note to my finished dessert. The walnuts added crunch to the middles, and the cake is so thin that it defrosts quickly when removed from the freezer. Surprisingly, this is probably one of the best desserts I've ever made! I'm actually looking forward to trying to find a better way to bake the sponge; maybe I will be able to learn more after looking at more Daring Baker results!

One last "problem" I had was that the joconde imprime batter (the chocolate decoration part) made a huge amount. I could have tried to make another sponge, but truthfully, I just wanted to clean up the kitchen and be done with it. I put it in the fridge to think about what could be done.


Then I thought of my boys, who would most definitely appreciate chocolate cupcakes a little more than sophisticated French entremets. Using one of my favorite chocolate cake recipes from the Moosewood Restaurant's Book of Desserts that I amped up with a bit of cinnamon, I dropped truffle-sized balls into the middles of the cupcakes. They baked their normal 20 minutes, and then I let them cool down before examining and tasting them. The chocolate middles sank to the bottom, turning into an almost brownie base. I'm thinking if I would add some cayenne to them prior to rolling, I may have been happier with the flavor, and maybe I can try this since I froze the remaining imprime in balls.

But actually, when I tried a cupcake later in the day with a scoop of Orange Cream Cheese and Walnut Ice Cream I was really on to something. Cinnamon, chocolate and orange: my new trinity of benevolent flavors. A pinch of cinnamon (spicy Saigon Cassia) may just find it's way into my next batch of orange ice cream...


Even though I was totally procrastinating the challenge this month, I am so happy with my results. They may not have been perfect, but I feel like I really learned a lot. If you are interested in exploring the recipes yourself, you can find them in the Daring Kitchen recipe archives. Thank you to Astheroshe for hosting a great challenge, and I can't wait to see what some of my favorite Daring Bakers have come up with!

Saturday, January 22, 2011

Sprouted Wheat Sourdough, or a Lesson In Patience.

This is the loaf of bread that took 4 days to make.

After my first taste of sprouted flour, I sprouted a couple cups of hard Winter wheat berries I had picked up from my co-op. They sprouted easily in 2 days, and I dried them in the oven with the door cracked open for about 3 hours. I let the wheat berries cool, then ground them into flour. Then, I didn't hesitate to mix up a dough with the entire amount I had just sprouted and ground.


While my end result is amazing and complex, it has little to do with me. My dough was so dense after the mixing, that I could already envision a brick emerging from the oven. And, I even broke down and added a little bit of white bread flour. Needless to say, when the dough rose for more than 24 hours and still looked like this:


I decided that I didn't have to waste this somewhat puffy wheat dough. I have a preserved magazine article from Bon Appetit, many years old in which Pamela Fitzpatrick (protegee of Nancy Silverton) uses a biga to start ciabatta bread. Walnut size chunks of dough are broken up and added to more flour after vacationing overnight in the refrigerator. Yesterday morning, about 7:30, I broke my dough into bits. I added another 1/2 cup of starter and enough water to get everything saturated. Then, I added a good amount of that dreaded white flour, along with a little extra salt. In hindsight, I probably didn't need to add more starter... and the addition of it may have contributed a bit of extra sourness.


After this doctoring, my dough came together nicely. It felt like it would no longer bake up into a nearly inedible piece of health food, but may have some character all it's own. I let it rise again, wrapped in towels and perched on my Bose Acoustimass module somewhat near a heat source in the living room until just after noon, when I transferred it to the brotform.


End of the 1st rise.


As 5:00 approached, I stuck my fingers into the dough to see how I progressed. This is the point in which I should have waited a bit longer, but was just plain tired of waiting. I started the oven, and figured an additional half hour waiting on the oven heat would be good enough. Well after 6:00, the bread emerged from the oven. Split decoratively along the fault lines I cut, I could tell it was a much heavier loaf than I normally make. It did sound hollow on the bottom, and smelled enticingly of nutty wheat. While I couldn't wait for it to raise a little longer, I could wait to cut into it. In fact I waited until after 10:00.

And so another Friday night spent at home, tinkering with bread. I know that I'll likely be the only one to eat this loaf, but I have the biggest smirk on my face while doing so. It's delicious. It's wheaty and dense, but has all of the character of a well written novel. It's complex and not just "healthy tasting". I had some for breakfast this morning with orange marmalade, which may or may not have been the correct choice. The layers of sourness were more pronounced. But, served with cheese I know it will transcend the trappings of the mortal world.


The delicate taste of the sprouted wheat may be clouded by the more assertive sourdough culture, but I'll likely make this type of bread again. This is the bread I imagine my European immigrant side of the family coming to America with. Another thing that is completely amazing to me about all of the sourdoughs I have experimented with so far is that I have not seen one trace of mold. Even after a week or more on the counter (I keep my bread on a bamboo cutting board, covered with my glass cake dome), the worst that can be said is that it is a little dry. That is something that the toaster can easily take care of.

I may have gotten a little more loft if I had been more patient, and I need to remember that next time. But impatient or not, it has been a good bread week.

Wednesday, January 19, 2011

Sprouted Grain Flour

I have wanted to sprout grains and make flour for quite awhile. I tend to read a lot of different things around the Internet and in books, and then mentally compile them into a rational reason for doing something. Certainly, it's easier to open a bag of flour and make a baked good, but the more I read about flours, chemicals, digestion, and nutrition, the more sprouting seems to make good sense to me.

Obviously, I am the type who often makes more work for herself than needed - and the truth of that is that I have the time and I enjoy it. As I read frequently by electronic means, I consider how I'd make a good Amishwoman excepting of this technology thing. Oh, and the dresses - not too sure I could swing that either. A few things withstanding, the Amish way of life is close to what I'd like if I could choose anything. The idea of making whatever I need, bartering with others, and country living all appeal to me greatly. I may lose a Husband if I ever felt I needed to act on this urge, but truly I am happy being urban-ish "amish" for now. Especially if I can make, barter, and discover on a whim, and with the aid of a computer.


soft wheat berries.

The Amish are in a time freeze somewhere around 1860, probably before the smooth mechanization and distribution of flour. From all of my readings on sprouting wheat (and other grains), I take away that sprouting wheat increases both digestibility and food enzymes and decreases phytic acid: the acid found in nuts, seeds, and grains that is undigestible to humans. When the grain is soaked and allowed to begin germination, the phytic acid breaks down, allowing the nutrition in the grain itself to enter our systems.

I think of the Amish, because every Fall, I witness the sheaves of corn and occasionally wheat dotting the countryside near my Parent's farm. I figure that even though most of that grain is likely going to livestock and is not for human consumption, it is most likely healthier for those ruminants because essentially it is sprouted. The sheaves are left standing in the elements, even the rain, and then allowed to dry - the way our ancestors likely treated their grains by necessity. When demand and modernization caught up with us, the grains and flours were able to be processed quickly, more efficiently. The once nutritional flour powerhouse we are left with is basically plain and white, devoid of life-giving, healthful properties.


soaking.

I won't lie. It takes time to sprout. Largely unattended time, but time nonetheless. Purchasing sprouted flour is costly, and really I have never considered it. My curiosity for most things culinary, and my new VitaMix that can actually grind wheat into flour, led me down the road of sprouted flour. I have to say it will be hard to turn around. After my first batch of soft wheat berries was ground up into flour, it bore no resemblance to anything I ever thought of as flour.


sprouted to tiniest tails.

The smell, and taste for that matter, of the freshly ground, sprouted and dried grain is incredible. I can't describe it, it's just wholesome and clean. I have no dehydrator so I dried the sprouted berries in the oven at my lowest temperature, 170 degrees. I left the oven door open with a wooden spoon, and frequently put my hands in to toss the grains around on the baking sheet. It took about 3 hours until the grains were dried, a much shorter time than I was expecting after reading around... but I chomped on a few and confirmed that they were fully dried.

After they cooled, I stored them in the freezer until yesterday when I decided I couldn't wait anymore to grind them. Since I sprouted the only wheat berries I had on hand, I didn't know if they were hard wheat (suitable for bread making) or soft. Yesterday when I visited the bulk bins at my co-op, I knew by sight that they were soft wheat, probably purchased for salad making. My dreams of making my first homemade, sprouted wheat flour into bread was gone, but a healthy baked good could result. I picked up some more hard wheat berries and some spelt berries to experiment with and headed home to figure out what to make.


sprouted, dehydrated wheat berries.


sprouted wheat flour.

I have to gear up to make my Daring Baker challenge, so I didn't want to make a cake. I settled quickly on making some cookies, which are wholesome enough to showcase the brilliance of this new sprouted flour. (And, the Boy-O devoured them too!) They were delicious, and I should have made a whole batch instead of a half... since these aren't going to last too long. For the half batch, I used 2 eggs, which worked out fine.

Sprouted Wheat Cookies (from GNOWFLINS)

(this is the whole batch amount, about 4 1/2 - 5 dozen)
  • 1 cup unrefined, virgin coconut oil, softened
  • 1/2 cup raw honey
  • 3 eggs (or they recommend 1/4 cup flax seed meal + 3/4 cup pure water)
  • 1 teaspoon vanilla
  • 1 teaspoon baking soda
  • 1 teaspoon sea salt
  • 2-1/4 cups sprouted wheat flour
  • 1/2 cup chocolate chips
  • 1/2 cup raisins
  • 1/2 cup chopped nuts (I used walnuts)
  • 1/2 cup unsweetened coconut
  • 1/2 cup rolled oats (soaking recommended, but I did not do that)

Cream together room temperature coconut oil and honey in large mixing bowl.

Add eggs to mixing bowl (or the flax seed/water mixture that has been mixed and allowed to stand for 5 minutes) along with vanilla and beat.

Sift flour, baking soda and salt in a medium size bowl, and add to wet ingredients in mixing bowl. Mix until just combined.

Add chocolate chips, nuts, coconut, and oats to mixing bowl. Mix gently until just incorporated.

Drop by tablespoons full onto parchment lined baking sheet. Bake at 350 degrees for 12 to 15 minutes, rotating pans halfway through.

Be sure to drop by the GNOWFGLINS website, as there is an enormous amount of information and great looking "traditional foods" recipes!


We do live in a "gluten-centric" culture here in America, and I have to wonder if that may account for the seeming increase in gluten allergy. My Husband's box of highly colored and sugared cereal even touts "whole grain" and "high in vitamin D", the buzz words that cause and reinforce consumer purchase. But what is whole grain? From now on, my whole grain is going to be an actual whole grain berry if I can swing it. The cost differential isn't that great, and if I am half as happy with the bread as I was with my cookies, it will be well worth it.

I'm sure this will not be the end of my sprouted grain tinkering. Here is a (partial) list of things I've been reading lately on sprouting:

Monday, January 17, 2011

Lemon (Daydream) Marmalade

I'd feel funny saying that I worked for 3 days on this lemon marmalade only because it didn't seem at all like work. My house has been transformed into a lemony clean paradise as the skies above are overcast and sun is scarce. In the world of preserves, marmalades are a bit famous for being fussy and time consuming. They are also a paradox of flavor, being sweet, sour, and bitter most of the time. That could be why they are some of my favorites to eat. I've read lately of some people dipping their spoons again and again into their various nut butters and homemade versions of "Nutella", but I'm certain that my future sneaky spoonfuls will contain fat dollops of this lemon marmalade instead.


I actually didn't plan on making any marmalade this year, since I have one jar left over from my canning party with Lo and a fully stocked preserves shelf in the basement. When my hold on the Blue Chair Jam Cookbook by Rachel Saunders came in at the library (and I was as impressed both with the weight and size of it as I was the photography), I set out scheming to make this lemon version shortly after reading about it. One particularly interesting thing about Rachel's method is that she uses the oven both to sterilize the jars and lids and to can the finished product. I wasn't sure about that, but decided (after a brief consultation with Julia) to give it a shot.

I'm pretty sure I had two different kinds of lemons, some were thinner skinned and smooth, and some thicker and dimply. I can't claim to know much about lemon varietals, since they don't grow in Wisconsin, unfortunately. I love reading things like this where lucky people have things that I can only imagine growing myself dropped in their laps. It's curious that I recall such instances as if they happened to me. I know I had *wished* that I could make Deena's lemon thyme marmalade last summer when I read about it. But like most things, I forgot about it when "lemon season" has hit me here, right now, in the broadest part of the Winter.

How do I know it's lemon season? I make an assumption based on when my co-op has specials on citrus; I got my 6 lbs of fruit for around $8.50, which works out to about 65 cents per jar for organic marmalade (if you don't include the sugar price).


Rachel's method is easy. The work is shared with three days, but each day's work is rather light. Day 1: soak cut half of the lemons overnight, Day 2: boil soaked lemons to make lemon juice and strain overnight and cut more lemons into thinly sliced eighths and let them soak overnight, then Day 3: add sugar and a touch of fresh lemon juice to the past 2 day's labors and boil until you reach marmalade.

I will say that I admire canners who develop recipes. It seems to be a highly specialized art. I can follow instructions (and in the event of canning, follow them without addition or subtraction which is usually hard for me), but I'm not sure I would be cut from the cloth of precision as canning writers are. This recipe delivers what she says it will, it is very pretty and hard to improve upon. I'll say that it is a miraculous balance of flavor that stems from the patience in 2 days worth of various soaking periods. There is bitter, there is sour, and there is sweetness. And, when you catch a piece of peel and bite into it, it is pure summertime even in the depths of snowy winter.


perfectly gelled.


I've actually only made marmalade one other time, with the aforementioned Lo. While the flavor was really good, the set was not. We did not, however, employ the method of spoons. Prior to making the marmalade, stick 5 spoons in the freezer to get good and cold. When the time comes to test for the gelling, you can pour a little onto the spoon and put it back into the freezer for 2-3 minutes. If properly set, it should not run off the spoon. I liked this step immensely, especially since I got to eat the spoonful after the check. It took me 3 spoonfuls to determine the set, and a full hour and (almost) a half to get to that step.


the method of the spoons.

Cooking down marmalade when the snow was falling was especially enjoyable. I made my coffee and pulled up a stool to lazily keep an eye on it, stirring every so often. I thought about the Italian tradition of serving espresso with lemon peel on the side of the cup. I took hipstamatics using my new free film in the app upgrade I downloaded this morning. I took apart and cut hearts out of an Alterra coffee bag, that I intend to string up and hang somewhere. I in general gave thanks that I am a stay-at-home mami that can do what she pleases, so long as the house is clean and so forth. And, I daydreamed of Summer and it's business of growing and walking and playing: those things I love that prevent me from sitting down at the counter for a couple of hours and tinkering with a jam that I don't even know will work.


thankful for cameras.

The recipe as written did not give an exact amount of lemon juice liquid that should have been extracted from the fruit during the process leading up to the boil. I think that the water just needs to evaporate to the proper stage, and so no exact amount is probably needed. My liquid level decreased by a good 3 inches in my stockpot. Because I kept testing with the spoon method, and because I had pulled up a chair to properly observe, I could actually tell when the boil changed from aggressive bubbling to more subdued activity.

All the while, I had my 10 clean jars with lids in a 250 degree oven. This technique of sterilization and canning I have never done. It actually seemed like something that was too good to be true. No boiling water turning my fan-less kitchen (and the rest of my smallish house) into a sauna? I love this method! I had only one that didn't seal, and I added it to the extra three I had, so I have some to devour straight away. Obviously, I have a couple unsealed to give away as well. This is the time I break out my favorite strange canning jars that I can't really use to preserve in - one triangular jam jar that Sasa gave me is my favorite:


It originally contained a Croatian fig and chocolate jam. Next time I see her, I'll give her this unsealed jar of lemon marmalade knowing I'll get it back again to fill with more surplus jams or jellies. I'm telling you, it's the simple things in life that give me the most joy.


peels seemed to rise to the top, but the gel is set so no matter.

I confess, that so far I've only read through the beginning and "Winter Through Early Spring" sections of the Blue Chair Jam Cookbook. I was smitten, my heart at first purchased with luxe paper and pictures, but now also with a sound recipe written very well. Now, I busily page through the rest of the book and drop it into my bottomless Amazon cart. I daydream of warm weather, thankful for California and it's bounty that provides me lemons in January.

I pause, and suddenly shutter at my thoughts: at the end of this summer, I will have officially hit my mid-thirties and I daydream some more that I'm still 23. But then I lighten at the hope that my first ever knit sweater should be complete by that time (I cast on yesterday!). This is what happens to me in the winter. Roller coasters of retrospect and expectation move in when I have time on my hands. I try to remember not to dream it all away and be thankful for each second.

Saturday, January 8, 2011

Here it is: Beer Sourdough!

After the recent success of the commercial yeast beer bread, I knew I had to try using beer in my sourdough. It not only works, but it works efficiently, rising and baking in a mere 6 hours start to finish. Oh, and it is delicious.


The quickest Google search ever at the end of my last post led me to this recipe from Elizabeth Yetter. Yesterday afternoon, I mixed up a half batch using half a Sam Adams I found in our basement fridge. Her original recipe calls for a whole 12 oz. beer for 2 loaves, but I decided to half it - not knowing that the outcome would be so great. It made a smallish loaf that I decided to bake in a free-formed oblong shape in my cast iron pot. Since it was smaller, I altered the temperature and baking time from my normal "bread-in-a-pot" methods. Happily, all the bread forces were working with me! When the rest of the world celebrated the end of the workweek, I was happily geeking out in my kitchen over the successes of another sourdough bread...


This particular beer is far less assertive than the IPA in my last bread, but nonetheless apparent in the rising dough. I warmed the sealed bottle in warm water like I did previously, and in 15 minutes or so, the chill was completely off. Mixing is fast, and the dough was risen and ready for it's shaping and second rise in about 3 hours. Meanwhile, I keep an eye on the dough, noting how fresh and yeasty it smelled. My Husband declared that it smelled good, like a Brewer's game, so I knew that he'd happily eat it once baked.

I let it rise on my "proofing cloth", a cotton/linen towel that is properly seasoned with flour and a bit of wheat bran. Next time, I'll probably cover it first with a damp cloth and then wrap it up with the rest of the proofing cloth - the top of the rising loaf dried out just a bit. I don't think it mattered so much, since I turned it over when it came time to bake. I also gave it three little slashes across the belly to aid in expansion.


hipstamatic beer bread.

This bread has a malty undertone once baked that doesn't read so much as "beery". It also has sweetener, something I would have liked in the beer sandwich bread. I cut back on the sugar called for, and next time, will cut back again. It was just slightly too sweet for my tastes, which tend to be on the lower side. You could easily double the recipe (using the whole beer), and make one large loaf, or two smaller ones. If making a larger loaf, you may need to adjust the baking time accordingly.

Beer Sourdough Bread (adapted from Elizabeth Yetter)
makes 1 small loaf
  • 6 oz. room temperature beer, I used Sam Adams lager
  • 1/2 c. sourdough starter (well fed)
  • 2 T. sugar (next time I'll use 1 T.)
  • 3/4 t. salt
  • 2 1/2 c. bread flour
Mix beer and sourdough starter in a large bowl. The beer will foam up. Add sugar, salt and bread flour, and mix to form a soft dough. I left mine a little on the wet side, and kneaded lazily for about 3 minutes in the bowl. I also let it rise in the same bowl. Leave in a warmish room-temperature place to rise until doubled, about 2 1/2-3 hours (depending on the activity of your starter).

After 1st rise, gently knead dough for a couple minutes, and form into a loaf shape of your choosing. Leave to rise, covered in a floured towel, for 2 - 2 1/2 hours until risen (I like to poke my finger in and make sure the indentation stays rather than bounces back.) Towards the end of the 2nd rise, preheat oven to 450 f. with covered cast iron pot on the middle rack.

Bake for 20 minutes, then remove lid of cast iron pot and continue baking 10-15 more minutes until crust is a deep golden brown. Loaf should feel light for it's size, and sound hollow when tapped on the bottom. Leave to cool completely before slicing.


The finished, baked bread smelled intoxicating (pun, possibly intended). It was just about 10:30 when it came out of the oven, and I knew I'd wait until morning to cut into it. It was a nice site to see a fresh loaf of bread on the counter when I entered the kitchen this morning. I had a guest for breakfast, and we ate half of it with smoked cheese from the Netherlands: the sweet, malty bread perfect with the smoked, herby cheese. Upon cutting into the loaf, I noticed large holes throughout. I didn't knead the dough as directed in the original recipe before forming into a loaf. I just held it in my hands, and turned it over on itself several times... and made everyone nearby smell and touch it for good luck. I'll try kneading it longer next time and see if that will distribute the holes a bit more evenly, even though I was more than happy with my results.

Please remember, that if you are in the Milwaukee area, I have sourdough starter for you if you need it! Just drop me an email, and you can start some experiments of your own!


(the post has been yeastspotted.)

Wednesday, January 5, 2011

Test Driving Yeasted Beer Bread

I was more than excited when Jeremy at Northern Brewer asked me to try making his yeasted beer bread recipe. Lately, I have been so obsessed with Christmas baking and one-pot meals that I feel that I haven't been overly creative when it comes to kitchen experiments. This experiment confirmed that not only do I love a challenge, I love to document the challenge and I love the feeling of usefulness that comes from helping out a fellow experimenter. I was also secretly glad that the dough was vegan, since I haven't posted anything vegan in a while!


Using beer to make yeast bread seems to be a natural fit. After all, the exact same type of fermentation is taking place to develop each. The recipe Jeremy provided me was pretty bare bones: flour, yeast, salt, a touch of oil, and beer. I used a spare IPA that has been in the far back of the fridge for awhile. It's certainly not my most favorite IPA, (I'd probably give that award to Three Floyds or Lagunita's) but for the purpose of carbonation and moisture in bread, it did just fine.


I have to preface this whole experiment by saying that in all of the breads I've made over the years, I have had none that had this much rise, and such a perfect interior crumb. It was soft, and golden brown. The dough felt smooth to work with and actually felt like it was carbonated. I could tell when I worked with it that it was going to be light, but wouldn't have suspected that it would be feather-light...

I used a basic method of straight-dough breadmaking, taking a few tricks from Cook's Illustrated. When I first started baking yeast breads regularly, I began with their American Sandwich Bread, which is just that: a standard, slightly sweet and fortified, white loaf bread. Applying the same technique to this dough seemed to work just fine.

The first thing I had to do with an ice-cold, refrigerated beer though, is warm it up. I didn't want to heat it on the stove or in in the microwave, hoping to preserve those carbonating bubbles. Instead, I ran some super hot tap water, and put the sealed bottle in a bowl of it for about an hour. The bottle felt warm to the touch, as did the beer when I poured it out.

I altered the recipe slightly to include a little more liquid and salt, and I mixed it in a stand mixer. You could easily mix it by hand, just increase the kneading time slightly. Basically, you want a smooth dough that isn't sticky to the touch. The finished bread has a bitter edge from using the IPA; even though I really liked it, I think I may add a tablespoon or two of honey next time to counteract. This bread makes a killer grilled cheese.

IPA Bread (a.k.a. Jeremy King's Beer Bread)
  • 4 c. bread flour (I use King Arthur bread flour)
  • 1 1/4 t. kosher salt
  • 2 1/4 t. active dry yeast (or 1 packet)
  • 1 T. vegetable oil (I used olive oil, and eyeballed it)
  • 1 1/4 c. warmish beer, as described above
  • up to 1/2 c. additional water or beer if needed
Preheat oven to 200 degrees. When the oven comes up to temperature, leave it on for 10 minutes, then turn it off.

Meanwhile, place flour and salt in the bowl of a stand mixer fitted with dough hook, and stir to combine. Open beer, and pour carefully (to avoid a "head") into a large measuring cup. Add oil to measuring cup. Have the additional water or beer ready at the side of the mixer.

With the mixer running, add yeast to the beer and oil in the measuring cup. It's going to foam up vigorously, so work quickly. Stir to combine and immediately pour into the running stand mixer. You should be able to tell within a minute or so if you need additional liquid, I used about 1/2 c. extra water. Continue kneading for about 5 minutes until a smooth, cohesive dough is formed.

Turn dough out onto a lightly floured surface, and knead by hand for a minute or so to shape into a tight ball. Place dough into an oiled bowl, turn to coat, and cover with plastic wrap. Place in preheated oven (which has been turned off), and let rise until doubled in size, 40-50 minutes.

When dough is finished with the first rise, turn it out onto a lightly floured surface and gently press air out. Aim to make a rectangle about 1 1/2 inches thick, that you can roll up into a loaf shape (so no longer than about 9 inches on one side). Tightly roll dough up into a loaf shape, and pinch the seam closed. Place dough in an oiled loaf pan with seam side down, and gently press dough into all the corners of the pan. Cover with plastic wrap (you can use the same piece that you used for the first rise), and place pan in a warm place to let rise for 20-30 minutes until dough almost doubles in size (this was about an inch over the top of my loaf pan).

Preheat oven to 350 when this is happening. (I typically put the loaf pan to rise on top of the stove, since it is pretty warm with residual heat from the oven.)

Bake for 35-45 minutes, until the bread is golden brown, and sound rather hollow when tipped out of the pan and tapped on the bottom. Temperature, if you choose to check it this way, should read at least 190 when thermometer is inserted in the bottom of the loaf.


Prior to first rise.


End of first rise.


At the end of the second rise, a finger poked into the dough should remain...


I let the dough rise in the pan to about an inch above the rim.


...and I took it's temperature to double check my done-ness. It was 192.7 f.


So there it is: a perfectly tall and domed yeasted beer bread. It was hard to wait for it to cool, but I was able to endure the time to confirm that the interior was tightly knit and perfectly uniform. I ate the heel straight away, unadorned, so I could get an unbiased taste. It was great, and it was actually beery - something that surprised me. It was great alongside the soup I made for supper last night, and toasts extremely well. I may have a new favorite loaf pan bread recipe...


I'm not sure if this technique would work with my sourdough method. I am curious if the beer would ferment happily along with the starter for 18-24 hours before becoming bread, or if it would become too alcoholic and kill off the balance of the sourdough culture. The only way for me to know would be to try (or Google, I found one already here)... I'm also wondering how the flavor would change if I used different beers, weiss beers may make a fruitier loaf, and syrupy stouts perhaps a more molasses-y one. More complex home brews are going to have more interesting results, no doubt.

Now that the newness of January is almost a week old, I can start to see where my new year is heading. While I don't envision myself becoming a full-fledged brewer this year, I can see myself tinkering around with more beer-based recipes. I like thinking that in times past it was probably the women of the households that were culturing, brewing, and fermenting things to feed and nourish their families. In our modern American world, the craft of home brewing is usually dominated by men. Where and when did this shift take place? Man, have I got a lot of reading to do... good thing it will still be Winter for a few more months.

The more I experiment with and read about, the more I realize just how connected all foodstuffs are. The people curious in general with food and drink tend to overlap, making us all better rounded in the long run. Good things to remember in the New Year!