Showing posts with label cookbooks. Show all posts

Monday, April 14, 2014

Book Review: Preserving by the Pint


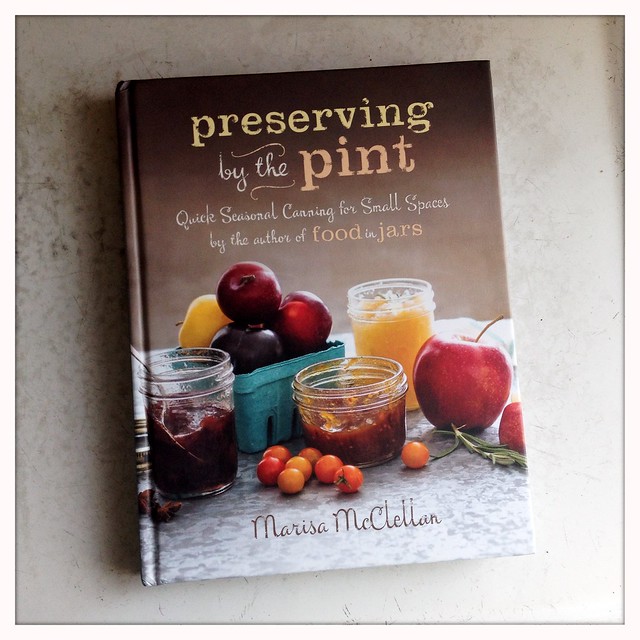
Preserving by the Pint

When I got my review copy of Marisa McClellan's latest book a few weeks back, time seemed to stand still for the moment and I almost immediately read the entire thing cover to cover.  I had been looking forward to cracking open this one since I had the pleasure of testing a few of the recipes for it last year, and it truly is a lovely addition to the growing canning book section of my kitchen library.

I couldn't help but think as I turned page after page that Marisa is going to be writing new books for years.  She has the magic trifecta in her cookery books: timeless recipes, succinct instructions, and simple inspirations.  She is passionate about her craft, and eager to share with everyone - which I think is the underlying theme of Preserving by the Pint.  Organized by season, this book encourages everyone to make small batches using local and seasonal foods.  It tempts us to branch out and try something maybe we haven't considered before, even to source special ingredients that might not be cost efficient if making a more traditionally sized amount.
small batch preserving.

Personally I like to can for my storage shelves, but with my ongoing quest for sugar reduction, having a jar or two of a really stellar preserves is an excellent idea - especially since I can tend towards the hoarding jams and jellies even when I've made 8 or 9 jars of them.  After finishing the book, I immediate found some Meyer lemons at my co-op to make Candied Meyer Lemon Slices.  Only needing a pound for the recipe made it feel doable for me when I didn't have the foresight to get on the Lemon Ladies list for bulk fruit like Marisa did.  (And, she had made a beautiful Meyer Lemon Syrup on her blog not long before, and I was feeling especially bad for missing the lemon season...) 

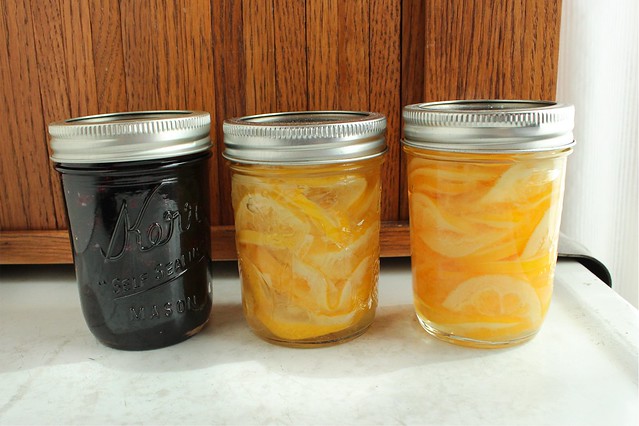
candied meyer lemon

I really loved these candied lemons, they had a nice marmalade texture and trademark Meyer lemon astrengency.  I was glad I had a little bit of the syrup leftover which set into a little lemon jelly to enjoy right away on morning toast.  I intend to make a pound cake for my birthday in September and crown it with a jar of them, and I should be able to save a jar that long since the 2 jar yield leaves me one to enjoy before then.

Spring in my neck of the woods also signals maple syruping time and for a while my family had planned to make it to an Amish neighbor's sugaring operation to reacquaint ourselves with the small miracle that is maple syrup.  Last weekend, a small group of family members went to see Daniel Hochstetler's rustic sugar shack.  We arrived just as he was getting the fire going underneath a stainless vat of sap.  Already, he had harvested over 100 gallons of finished syrup and he was hoping for another good week of syruping weather.  (Last year was a perfect year for syrup; they harvested more than 300 gallons and still had some leftover before starting this year.  If boiled to the proper temperature, maple syrup never really spoils.  The two past seasons make up for the strangely warm spring two years ago when there was no syrup to be found.)  My Mom and Dad generously sent me home with 2 gallons, which usually can last us the whole year if we watch our pancake breakfasts...
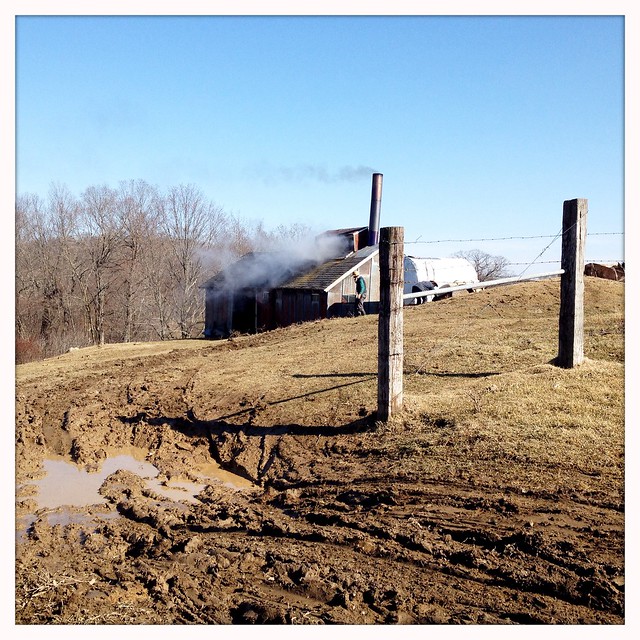
sugar shack (#2)
I respect the Amish desire not to have their faces photographed, but was able to capture a photo of Daniel and his sugar shack from a distance...

As I stood there breathing in the sauna of maple scented sap, I was dreaming of a recipe Marisa included in the book for Blueberry Maple Jam - thankful for my hoarding of a gallon bagful of blueberries in my freezer from last year, and thankful for a new harvest of syrup to replenish my waning stores. When I got back home, I started the jam right away but got busy.  Fortunately, letting the fruit macerate overnight with the syrup and brown sugar is an acceptable practice.  My yield was a little less than the 2 half-pints, but I suspect it is because I used frozen fruit.  I haven't had blueberry jam in ages - in part because of the amount of berries it requires - and this one was so good.  I was actually glad I was a little shy of a second half pint so I had some to enjoy right away.
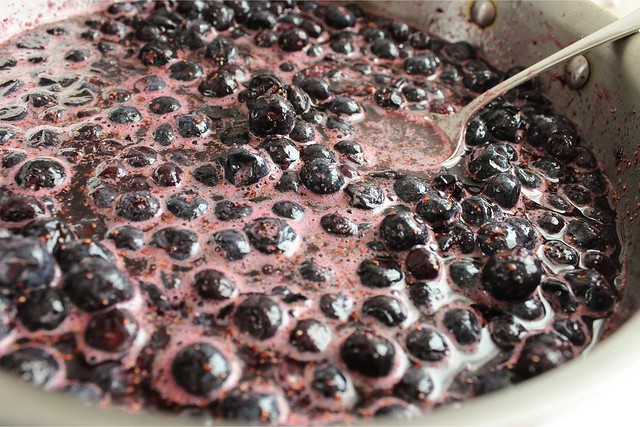
blueberry jam maceration

I made this jam with frozen berries and using the metric weights.  As I mentioned above, I think I lost a little volume due to the frozen fruit - but this is so good I probably wouldn't have needed to can it!  If canning, be sure to use the bottled lemon juice.  As Marisa explains, maple syrup is lower in acidity than sugar and the bottled lemon juice ensures a safe acid level.

Blueberry Maple Jam (Marisa McClellan, Preserving by the Pint)
Yields 2 half-pints
  • 1 dry quart fresh blueberries, rinsed, pickedd over, and mashed (about 1 1/2 lbs. / 680 g.)
  • 3/4 c. / 175 g. packed light brown sugar
  • 1/2 c. / 120 ml pure maple syrup
  • 2 T. bottled lemon juice
Prepare a boiling water bath and 2 half-pint jars.  Place 2 lids in a small sauce pan of water and bring to a gentle simmer.

Combine the blueberries, sugar, maple syrup, and lemon juice in a large skillet.  (I used this 3-quart one, which was a perfect size.) Stir to help the sugar dissolve and to integrate the maple syrup.  Once the mixture has begun to look syrupy, place the skillet over medium-high heat and bring to a boil.

Stirring regularly, bring the fruit to a boil and cook until it bubbles and looks quite thick, 10-12 minutes.  It's done when you pull a spatula through the jam and it doesn't immediately rush in to fill the space you've cleared.

When the jam is finished cooking, remove the pot from the heat and pour into the prepared jars.  Wipe the rims, apply the lids and rings, and process in a boiling water bath for 10 minutes.
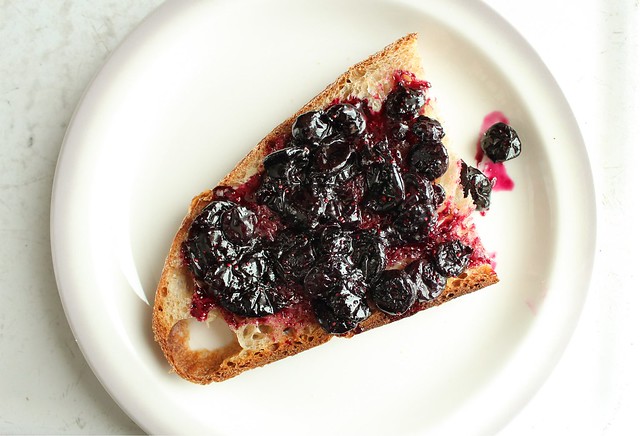
blueberry maple jam

I can't say I've ever used my 3 quart saucepan to make jam before, and that is a great tip for small batches in particular.  The surface area helps evaporate the liquid faster; I really couldn't believe the small batch was finished cooking in just 10 minutes. 

Another great thing about this book is that if you make just a few jars of something, you wouldn't necessarily have to can it if you didn't want to.  Save yourself a jar, and share another with a neighbor or two and save yourself a hot water bath and the canning time.  But I am looking forward to a little patchwork of fully preserved jars on the shelf by the first frost of fall, new preserves from this beautiful book to take me through the winter and help me wait out the time until Marisa's next book.

You can catch more glimpses of Preserving by the Pint at The Preserved Life, Well Preserved, Hip Girls Guide to Homemaking (still a couple of days left to enter their giveaway), and of course at Food in Jars where you can also find Marisa's upcoming appearances.

blueberry jam pot

DISCLOSURE: I received a copy of this book for review, but as always all of my thoughts and opinions are my own.

Friday, May 10, 2013

Crackers & Dips: Ivy Manning's Latest Book (And Giveaway!)

Ivy's Skinny Mints

When I think about Ivy Manning's new book, I can't believe that I've been looking forward to seeing the final result since October of 2011.  Time seems both to linger and fly in waves, and looking back over the amount of time that has passed since I first became acquainted with Ivy and was welcomed into cookbook testing with vigor seems oddly surreal.  

Ivy and I have never met; we were introduced online by another online friend who I have actually met in person, Deena Prichep.  Last Thanksgiving, I looked forward to an evening dinner with Ivy as she visited her homeland of Wisconsin, but an unfortunate flu plagued her (and I was iffy about eating, being newly pregnant) and the opportunity slipped by, drowned under the weight of even more passing time.  The good thing about this passing time is that I know Ivy and I will one day finally sit down to supper together, and when dark days hit, I think about this with great anticipation.

I read a lot of cookbooks.  Some year, I should actually keep track and write them all down.  I've talked about this before, how my library was my greatest resource when I was somewhat economically challeged this past year. Kind souls have somehow graced me with copies of books found in thrift shops or book sales, even the occasional author sent me a review copy of a new work I really wanted, when even those $13 meager dollars sent to Amazon were going to be a stretch.  Good things have a way of making themselves available to those who really appreciate it I think...
Amaranth Crackers with Cheddar and Pepitas served with Roasted Tomatillo and Avocado Dip
 (Photo courtesy of Chronicle books.)
 
While things on the personal finance front are finally looking up, my bookshelves could quickly grow heavy with new titles that are worth owning, and Ivy's newest book is definitely among them.  Crackers & Dips:  More than 50 Handmade Snacks is a DIY foodist's dream: and I should know, because I got to make and taste firsthand quite a lot of the contents.  The books that usually find permanent residence in my house are the ones that I grab not only for inspiration, but because I know that the recipe will work on the first go - if I'm making it for the 20th time, or just last minute for company.  The other necessary criteria for cookbook ownership is beautiful design, and this book is also beautifully photographed and illustrated, a unique combination of photography (by Jenifer Altman) and chalk drawings (by Kristina Urquhart).  There might not be a better book suited for both gift-giving and practical use!  Every recipe in this book is going to work for you, for snacking, appeasing the kiddos, gift giving, or party-going.

A School of Fish Crackers (Gluten-Free!)
(Photo courtesy of Chronicle Books)

I decided that to celebrate the release of this book, I'd make one of the crackers that I didn't get a chance to test: the Skinny Mint Chocolate Grahams.  Billed as a dessert cracker, these would remind you of a much tastier version of the classic Girl Scout classic.  And after reading this article on the suspect ingredients in them, I feel all that much better to have a really good DIY version!

I love baking by weight, since it is much faster than measuring all the ingredients traditionally, and is more consistent.  This book has metric weights for all of the ingredients listed. I know that when doing my portion of the testing, I double checked the volume to metric ratio, so even if you bake by volume, you can be assured of a good result.
"
Skinny Mint Chocolate Grahams (Ivy Manning, Crackers & Dips: More Than 50 Handmade Snacks)
  • 14 T. (200 g.) unsalted butter, at room temperature
  • 1/2 c. (100 g.) sugar
  • 2 T. honey
  • 1 1/2 t. peppermint extract
  • 1 1/2 c. (185 g.) all purpose flour
  • 1 c. (130 g.) whole wheat flour
  • 1/3 c. (30 g.) unsweetened cocoa powder
  • 1 t. baking soda
  • 1/2 t. fine sea salt
  • 1 c. (170 g.) bittersweet chocolate chips
  • 1 t. canola oil
Preheat oven to 350 f. (180 c.).

Line two baking sheets with silicone baking mats or parchment paper.  In the bowl of an electric mixer or in a large bowl using a handheld mixer, beat the butter, sugar, honey, and peppermint extract together until fluffy, stopping occasionally to scrape down the sides of the bowl.

Sift both flours, the cocoa powder, baking soda, and salt into a medium bowl.  Add the dry ingredients to the butter mixture and mix on low speed until the mixture forms moist crumbs; do not overmix.  Gather up the dough with your hands (it will come together when squeezed), and divide the dough into two equal-size pieces.  Form each piece of dough into a rectangle measuring 4x6 inches, cover in plastic wrap, and refrigerate for at least 30 minutes and up to 2 days.

Place a piece of parchment paper on a work surface and lightly dust it with all-purpose flour.  Place a portion of dough on the paper, dust it with flour and place a piece of plastic wrap over the dough.  Roll the dough out until it is 1/8" thick, picking up the plastic once or twice to make sure there are no creases in the dough.

Cut the dough into the desired shapes using cookie cutters, and use a lightly floured spatula or bench scraper to transfer the crackers to one of the prepared baking sheets; reserve and chill the scraps.  Prick each cracker a few times with a fork or comb and bake until they are crisp and smell chocolaty, 10-12 minutes, rotating the sheet once from front to back while baking.  Transfer the crackers to a cooling rack.

While the first batch of crackers is baking, repeat the rolling and cutting process with another ball of dough; the chilled scraps can be re-rolled once.

In a small microwave-safe bowl or a double boiler, melt the chocolate chips until smooth.  Remove from the heat and whisk in the canola oil.  Using an offset spatula, spread about 1/2 t. of the melted chocolate mixture over each cracker and place them on a baking sheet.  Refrigerate the graham crackers until the glaze is set, about 30 minutes.  Once the glaze has set, store the crackers in an air-tight container in the refrigerator for up to 2 weeks.
"

Ivy's Skinny Mints
Ivy's Skinny Mints

In my whole foods kitchen, I successfully substituted sucanat for the sugar, and olive oil for the canola.  I also like to roll out the crackers directly on a silicone mat with a piece of plastic wrap over the top.  I found that I didn't need to use any additional flour that way.  I also cut the crackers into squares in part because I was a bit lazy, but also because there is less waste that way.  And besides, that way I get to nibble every ragged edge of chocolate mint graham cracker myself.

Ivy's Skinny Mints

So now for the fun part:  I was given a copy of this book to giveaway!  This is the first giveaway that I've had that didn't contain something that I made myself (Pomegranate Jelly or Candied Jalapenos), or something that I bought to giveaway (WMSE Rockabilly Chili Cookbook).  Historically, I am a small blog with a dedicated readership, so your chances to win this beautiful book are very good.  I wouldn't mind if you share the post and the word about Crackers & Dips with your friends however, because I know they would appreciate a homemade batch of crackers too.  To enter, just leave a comment below before midnight next Friday, May 17th.  I'll choose a winner using a Random Number Generator on Saturday the 18th, and post it here and on the CakeWalk facebook page.

I'll leave you with the image of my favorite recipe from the book:  another dessert cracker made with rich olive oil, orange blossom water and aniseed.

Spanish Olive Oil Tortas
(Photo courtesy of Chronicle Books)

This recipe is alone is worth the cover price, especially when you consider that a gourmet, wax papered bag of pretty Ines Rosales crisps costs quite a bit in specialty food markets... and isn't it so much better to make it yourself anyway?

Congratulations to Ivy Manning on a gorgeous accomplishment!


Disclaimer:  I did receive a copy of this book for review, and another to giveaway.  My opinions of this book are my own, well deserved, and are not embellished!

Saturday, June 23, 2012

How Food in Jars Changed my Life.

Maybe some of the chatter about the new Food in Jars cookbook has died down, but I will gladly start it back up again. You might notice the lilacs on the table in the photo below, a visual clue to how long I've been mentally adding up my thoughts on Marisa McClellan's new canning tome. I'm really not even sure how to start, since Marisa was that little whisper in my ear that transformed me from the girl whose family canned, to the girl who confidently cans herself.

Food in Jars, the book.

My Mother and Grandmother will forever echo in my mind as steadfast preservers, their shelves steadily growing each Summer and then beginning to dwindle by Spring of the following year. Canning was a way of life for our family, our Northern Wisconsin gardens always struggling to produce nearly all we needed in the short growing season. The glass jars deeply lined the shelves my Dad built my Mom in our basement, simple but well constructed out of pine. I never realized what a luxury it was to be asked to go downstairs and pick out a jar of vegetables for dinner - my choice. I now know that those short journeys to the basement were life changing and a blessing of wholesome choice.

My Gram's house was a scant half mile from ours, her little red log cabin had enormous rocks as a foundation which kept her basement cool, dark and scary. I would be afraid to venture down the rock stairs (or at least they seemed like rocks; that basement seemed like a castle dungeon to me) to the tiny room just at the bottom. When the door was opened and the light flipped on, a magical and colorful land woke up: floor to ceiling shelves holding all kinds of things in jars. It was the pantry that all pantries want to be when they grow up, and the one I will judge all pantries to.

At the feet of those women, I unknowingly was instilled in good food and preservation. As most of us often do growing up, I didn't hold dear those things I was raised to love. I'd dabbled in a few canning projects - those adventures were always peppered heavily with phone calls to my Mom. She talked me through many first time experiences, consulting her aged Ball preserving book for ratios or telling me how they always did things - little tips to make things easier on the next try. My canning life never stuck for good, I seemed to rest on the laurels of my family and treated preservation as something I would do if I had a bigger garden or a bigger family.

dilly beans.
dilly beans from last year.

I never really owned the feeling of being a full-fledged preservationist until after I began this blog, and after I happened upon the Food in Jars recipe for Dilly Beans which I printed off and also shared with my Mom. That first Summer my true roots began to show as I worked my way through Marisa's jams and jellies. All of a sudden, I treated my local farmer's markets as an extension of my own backyard garden. Marisa taught me that I didn't have to grow it myself to preserve it, and that I could can just a few jars of something unusual and not can dozens of jars of pantry staples. Food in Jars became a regular stop on my Internet rounds, and Marisa became a real person that answered the questions I occasionally emailed her, a prophet of the DIY food scene that was nearly an in-the-flesh friend to me. Her blog became the source I compared against for canning inspiration and knowledge.

foodinjars

I couldn't have been more excited when I first heard about her book, and my excitement remained until May when the book was released. When my copy arrived in the mail, it came on a day when my son was still in school and I was pretty much caught up on my housework. In my own celebratory way, I marched down to my basement and plucked a jar of dilly beans off the shelf and opened them to eat with my lunch. I ate them thinking of Marisa and how happy I was for her. Then, I took my new book outside and read half of it from the beginning in the cool Spring sunshine.

I've done a bit of jam-making at the beginning of this year, but my preservation season is off to a slow start. This book is marked up with lots of post-it page markers - reminding me that I need to find apricots for the Apricot Jam and to pick up cantaloupe later this Summer for the Cantaloupe Jam with Vanilla (which Deena at Mostly Foodstuffs has already declared lives up to the claims of tasting exactly like a Creamsicle). It will be a good resource for this Summer, and beyond - giving recipes for year-round pantry staples like can-able Grainy White Wine Mustard and a number of non-canning, frequently stored in jars items like granolas.

ginger-walnut granola
Ginger-Walnut Granola, sweetened with Steen's cane syrup I happened to have stashed in the freezer...

buckwheat granola
(Gluten-Free) Crunchy Buckwheat Granola

The granolas were actually some the things I was most looking forward to reading about and sampling. I had made this recipe Marisa wrote years ago on SlashFood, a number of times - and a version appears in the cookbook. Of all the things I usually never use a recipe for, I actually followed two of the granola recipes exactly to give them a test run. Both were delicious, especially the one made with buckwheat. Marisa calls for kasha, which are buckwheat groats that have been toasted. Kasha is available for purchase, but I had buckwheat on hand and sprouted/dehydrated some myself to use. This recipe alone (in my opinion) could be worth the cover price! It's much crunchier than traditional granola, and if you have gluten-free oats, it's GF as well. I tried not to overindulge in granola eating, but both jars didn't last long. And, I learned that to get naturally forming clumps in homemade granola a couple of egg whites can often help, as can letting the granola cool when gently heaped up into a mound in the center of the baking sheet.

buckwheat granola, jar

With Spring asparagus in the supermarkets, I took advantage of the seasonality and decided to put up a small batch of Pickled Asparagus. I picked up two large bunches which only amounted to about 2 1/2 lbs. (The recipe called for 4 lbs.) I got two jars with spears, and then decided to re-blanch the tougher stems and pickle up a third jar containing them since I had extra brine. I actually haven't transferred them to the dark basement yet, because I've enjoyed looking at them so much. I haven't cracked them open to taste them yet either - but I'm certain they won't disappoint. One thing I've come to know about Marisa's recipes is that they are always spot-on.

pickled asparagus

I have a few canning books on my personal shelf now that have easily slipped into the classic category. Now right next to Linda Ziedrich and Pam Corbin sits cookbook author Marisa McClellan's first book, and that name printed on the front of a beautiful, hardcover book makes me as proud as if it were my own name. I can't really be sure why this is. It could be because the world of preservers is bonded by not only economy, thrift and seasonality, but also by unspoken vows of commonality. We are happiest when those we know give unending gifts to the canning world, the recipes in this book will do just that - and will continue to do it for many years to come.


DISCLOSURE: I received a copy of this book for review, but all of my thoughts and opinions are my own. I am extremely happy to have this book in my collection, and look forward to using it heavily!

Wednesday, November 2, 2011

Pan de Muerto.

pan <span class=

As you may already know, I've started writing a second blog for the community pages at Milwaukee Magazine. Yesterday, I wrote about cajeta - the Mexican caramel that is made from boiling down milk until it is rendered silky smooth and heartbreakingly brown. These first two days of November mark the celebrations of Dia de los Muertos, the days of the dead, and as I recounted yesterday, my family has not traditionally celebrated it.

My Mexican heritage is something somewhat buried inside me. Watered down by the generations of American citizenry, brought first to Texas then Chicago through my (maternal) Great Grandmother Carmen, a prize of my Mendez side is our love of sweets. My Mom has told me that my Great Grandmother used to love sweet sips of Pepsi, and all sweets really. "It's where we get it." she said, referring to our predisposition to sugar.

Personally I ebb and flow on the tide of desserts, all of them invade my thoughts and pulse through my culinary veins like the addiction I know it really is. In the past year, I have successfully cut back on sugary sweets, but I've given up trying to deny myself completely. Dessert is one of the great joys of my life, and if I lose a year or a tooth in the arms of this paramour, it will be worth it.

pan <span class=

Having never celebrated Dia de los Muertos traditionally, I am a foreigner to the specialty sweets it brings with it. For my birthday, I had treated myself to a copy of Fany Gerson's My Sweet Mexico. Since, I've read it cover to cover, treasuring the photography as much as the descriptions of the recipes. She paints this holiday vividly, complete with with this enriched Pan de Muerto, flecked with orange peel and scented with orange water. I began it yesterday, unsure if it would succeed. The dough was unruly and sticky, but I stuck to Fany's insistence not to add additional flour unless absolutely necessary (after 15 minutes of stand mixer beating) and then no more than a small amount. My perseverance was worth it - and this is one of the loveliest, softest, gently sweet breads I've ever made.

inside pan <span class=

When reading through the recipe, I felt like I had tried something similar before. A quick consultation with my aged recipe box (the kind that holds the 3x5 cards that no one uses anymore) confirmed my familiarity: I had tried to make something called Portuguese Sweet Bread years ago without luck. I had gotten the recipe from my ex-boyfriend's bread-genius mother, and I remember her lemony little breads raising all over her kitchen one year around Christmastime. The amount of butter and egg involved create doubt in the most seasoned baker I think, but if you pay it no mind and continue as if you know exactly what you're doing, pillow soft egg bread is your reward.

pan <span class=

There is a reason this is a special occasion bread. It's a bread meant to evoke memory and bring with it a specialness of an occasion. There are variations on flavors included in My Sweet Mexico, but I had to try the orangy flavor that was recommended. I secretly wondered if combining the yeast with orange flower water would kill it off, but it did not. It is simply decadent with a stick of butter (and more for the top) and 2 eggs, but worth every little nibble. I halved Fany's recipe to yield a single loaf. This is going to make some stellar toast tomorrow morning.

Remember to begin the day before baking.

Pan de Muerto (Fany Gerson)
yield 1 loaf

Dough:
  • 1 1/8 t. (a heaping teaspoon) active dry yeast
  • 1 T. orange flower water
  • 1/3 c. milk (whole or 2%)
  • 2 c. bread flour
  • 1/4 c. sugar
  • 1/2 t. salt
  • 1/2 t. grated orange zest (I keep some in the freezer)
  • 2 eggs, lightly beaten
  • 1/2 c. (1 stick) butter, room temperature
Topping:
  • 2 T. butter, melted
  • 1/4 c. sugar (more or less)
Dissolve the yeast in the orange flower water. Add half of the 1/3 c. of milk (leave the other half out on the counter at room temperature), and 1/4 c. of the bread flour. Mix well with a whisk (dough should be sticky and smooth), and leave at warm room temperature for 20-30 minutes until the mixture begins to bubble and look puffy.

Put the remaining flour (1 3/4 c.) in the bowl of a stand mixer fitted with the hook attachment and add sugar, salt, and orange zest. Mix for about 30 seconds. Add the eggs, the remaining milk and the yeast dough mixture. Mix on low speed until the dough comes together, then add the butter a little at a time in small pieces with the mixer running, increasing the speed to medium. (Here is where Fany begins to suggest that you should resist the urge to add more flour!) The dough will be sticky!

Continue beating for 10-15 minutes. (I let mine go 20 actually.) The dough should start to pull away from the sides of the bowl a little bit, but if it doesn't (like mine), add a small amount of flour, but no more than half of a 1/3 c. (I added a little handful.)

Lightly oil a large bowl, and place the dough inside. Cover well with plastic wrap, and let raise at warm room temperature until doubled in size 1-1 1/2 hours (mine took considerably longer, 3 hours, but my house is on the cool side). Lightly punch down the dough, gathering the sides up and flipping it over so that the seams are on the bottom. (I tried to do this like I did for making Deena's focaccia bread, leaving some air and being gentle.) Refrigerate for at least 4 hours or overnight.

When ready to continue, bring the dough out of the fridge and leave at room temp to warm up for an hour. Cut off a lime sized piece of dough to use for the "bones", and on a lightly floured surface, quickly shape the (still sticky) dough into a ball. Transfer to a parchment or silicone mat lined sheet and press down gently. Form bones out of the excess dough, 2 (that would intersect in the center as they make an "X" over the top) or 4 (small bone "snakes", like I did), and a little gumball-sized drop for the top. Let rest, covered with a clean towel, until doubled in size about 1 1/2 hours, maybe longer.

Towards the end of the rise, preheat oven to 350. Bake for 20 minutes, check browning (mine never got too brown, but if appearing to be browning too quickly, tent with aluminum foil). Continue baking for 10-20 more minutes until the bottom is browned (and temperature taken from the bottom is 190 degrees).

Remove from the pan to a wire rack and cool for a few minutes. Brush with melted butter, and immediately sprinkle with sugar evenly all over the top.

pan <span class=

I know I shouldn't have been shocked that this bread was so soft, but I was. I was actually shocked that something so sticky could result in something so perfectly beautiful as well. After it cooled and I finally cut off the end to try, I was surprised that it reminded me of my my other (maternal) Great Grandmother Laura. She was from Poland, and made plenty of amazing sweets that I am lucky enough to remember eating as a child. Cheese crepes, blintzes really, and something I remember as a round doughnutty thing, PÄ…czki. She likely treated the tops the same way, with melted butter and granulated sugar. In fact, the texture of this bread was nearly identical to what I remember as her soft bread-like buns with sugary crusts. This bread really did cause me to stir up all kinds of memories of loved ones, maybe the intent all along.

Reading farther in My Sweet Mexico I see that this same bread base is used for Three King's bread, Rosca de Reyes, which is studded with candied fruits and figurines on the 6 of January to celebrate the day that Jesus became known to the world. This in turn reminded me of the Stollen I made at Christmas for the first time last year, and the more I thought about it, I realized that the flavors were very similar.

This Pan de Muerto, however, is far more tender and delicate than it's German counterpart, one worth daydreaming over for a day or two until you can't take it any longer, and you have to celebrate something for the first time. Dia de los Muertos, these days of remembering, have been very special for me. Now, I'll have taste memories to go along with it and fondly revisit. ¡Necesito recordar mi herencia mexicana! Through a few of the celebratory foodstuffs, I can do just that.


This post has been Yeastspotted.

Friday, October 21, 2011

A New Direction and Ivy's Swedish Rye Crackers

I think it's curious that you can make almost anything from scratch, but nothing impresses people more than to tell them you made the crackers. It may be a preconceived notion that cracker origins are inexplicable: mystical, crisp things that elves or independent hippies in Vermont are lovingly packing into cardboard boxes. Maybe people consider that such things are not able to be made by human hands, but making preservative free, healthy snacks can become a rhythm backbone of the kitchen. Nothing is better than to open the pantry door and see a few jars of homemade crackers, fully deserving of your homemade dips, spreads, jams or jellies - things you can just pop out onto a plate when unexpected company arrives.


I really do enjoy making crackers, in fact I forgot how many different types I have tried and even posted about here until I searched 'crackers' in my blog search box on the right side of the page. I have some serious favorites, like the Gluten Free Multigrain Crackers or Alton Brown's Seedy Crisps - both of which are in regular rotation. Just as the school year began and I felt a lonely hole in my first few days of new solitary independence, my friend Deena emailed me and asked if I'd be interested in testing recipes, and if so if she might give my name to a friend of hers who was writing a cookbook all about crackers. I excitedly told her yes! Shortly after, I was acquainted with Ivy Manning, a cookbook author, recipe developer, and former Wisconsinite living now in Portland, Oregon.

Our first exchanges made me even more excited to be able to help. Ivy seemed oddly like me, living with a husband who is a "picky eater", fully passionate about food, and very busy. She began emailing me her recipes a few at a time, which I double checked for weights and volumes as I baked, and I tried to give her honest feedback about them. One of the first recipes I tested was for these slightly time consuming Swedish Rye Crackers - some that at the time I thought were good, but now they have grown on me so much I think I'll likely keep a batch around for emergencies on most occasions. They are very crisp, hard in fact, and they store like a dream. I've had the same batch in a half gallon canning jar for about a month and they only seem to improve. This week I ate them with a little of this incredible Walnut Lentil Pate, which I know I have mentioned before. As I ate them, I realized this cracker was the perfect pre-dinner munch, and they cemented my already warm feelings of rye flour.

Ivy decided not to use this version of Swedish Rye Crackers in her book, and granted me permission to post about them here, since I feel they deserve to have a special place in a cracker-maker's repertoire.


These are hard, crunchy crackers. If you are a fan of Rykrisp crackers or anything super crunchy, you will love them. Even though they have a good amount of rye flour, I feel like they are also distinctly wheaty in flavor. They are great for mopping up soup or mashed potatoes if you've forgotten the bread, and are good with jelly and peanut butter too - though personally I'd probably nix the caraway seeds if you plan on serving with something sweet.

Swedish Rye Crackers (Ivy Manning)
about 3 1/2 dozen crackers
  • 2 1/2 t. active dry yeast
  • 1 1/2 c. warm water
  • 1 1/3 c. bread flour, plus additional for rolling
  • 1 t. fine sea salt
  • 2 1/3 c. rye flour
  • 2 t. caraway seeds (I only put seeds on about half the batch, they are good with or without as you prefer)
  • Kosher salt, for topping crackers
In the bowl of a stand mixer, or in a large mixing bowl, dissolve the yeast in the water. Add the bread flour, and beat with the paddle attachment on medium speed for 2 minutes, or 50 strokes with a wooden spoon if mixing by hand.

Stir in salt, and gradually add the rye flour. Beat on medium low speed for 4 minutes. If kneading by hand, transfer the dough to a large ziptop bag, squeeze out the air, seal bag, and knead for 6 minutes. Do not add additional flour. Turn the bag inside out to free the dough from the bag, it will be sticky.

Coat a large bowl with oil and add the dough. Cover with plastic wrap, and let the dough rise for 90 minutes in a warm place.

Preheat the oven to 375. Turn the dough out onto a lightly flour dusted surface and divide into three pieces. Gently pat the pieces into rectangles about 1/2 inch thick. Roll one piece of dough out until it's about 1/8 inch thick, picking up the dough and rotating it frequently to make sure it isn't sticking. using a pastry or pizza wheel, trim the irregular edges and cut the dough into 4x2 inch rectangles. Place them on a baking sheet lined with parchment paper. Repeat with remaining dough to fill a second baking sheet. Prick the crackers all over with a chopstick, then spray them lightly with water, sprinkle with caraway seeds (if using) and press them in lightly so they will adhere. Cover loosely with plastic wrap, and set aside for 30 minutes. (You can re-roll the scraps once.)

Uncover the crackers and bake, rotating the sheets from top to bottom and front to back once during baking. Baking will take 25-35 minutes depending on the thinness of your cracker. (You can always take them out, and then re-bake them if you think they need to go longer.) The crackers should be browned around the edges, smell toasty, and be dry to the touch. Transfer to a cooling rack to cool completely, about 1 hour. Store in an airtight container for 2 weeks or longer...

(I baked a couple of 1/2 inch by 4 inch pieces of re-rolled dough scrap, and they puffed up hollow. Next time I make them, I may try cutting a whole tray full this way...)


So many times I wonder what I should be doing with myself. I really am content to be a homemaker, chronicling my adventures every so often so I can share some of my excitement with others. But sometimes I do get frustrated, I think I should be "gainfully employed", and then wonder what it is that I should be really be doing so that I can continue to enjoy myself as much as I have since I became a mother 5 years ago.

I know I'm not going to be the next Martha Stewart, but maybe I've found a niche in the behind the scenes of cookbook writing. This may be my first foray into this field, but it's one I hope I can figure out how to grow into more. It feels so good to see the the other side of the cookbook writing process, the amazing work that goes into it by an author, and the trials, successes and failures, and evolution of recipes. I have been reveling in cracker testing in part because it is a subject matter that is really appealing to me, but more because I feel good to be a bit unseen, a stealth baker who may just show up at your door with a little overflow of delicious kitchen bounty.


Now that Winter is on his way I feel I'll have so much more time to read, and I'm looking forward to reading more of Ivy's cookbooks: The Farm to Table Cookbook and The Adaptable Feast. Her book on crackers is scheduled for Spring 2013, but meanwhile you can find Ivy at her website. It's going to be a great book, just judging from my sneak peak testing... One recipe in particular I've made 3 times already, just because it was so delicious.

I look forward to the emails with little attachments, and like an archeologist who patiently brushes the sand away from stone bones, I have remember to discipline myself to follow instructions and be methodical. It's all a great lesson and learning experience, and I feel so thankful to have had it drop in my lap.

Tuesday, May 3, 2011

Blistery Peter Reinhart Bread and Peanutty Cookies

Of all the cookbook reading I do, it's possible that I believe the best cookbook writing comes from bread bakers. I know that there is passion in all different genres of the culinary arts, but there is just something about the bakers that click with me. They rise early and alone, they are obsessed with perfection. And, uniting all of them are the common ingredients of flour, water, salt, yeast. When you think of the volumes written about the ratios, techniques, and the utter transcendentalism of this quartet of humble beginning ingredients, it is overwhelming.

I know that sometimes I avoid reading books just because everyone has read and applauded them. I do the same with movies. It's completely feasible that I am the only North American who has never seen (and never will see) Titanic. I think, wrongfully, that I felt this way about Peter Reinhart - the indelible image of the tightly clutched mammoth loaf of bread on the cover of The Bread Baker's Apprentice just one of the things on everybody's list and the last thing on my own list of things to read.

When out of town last week, I bought a copy of his 1998 Crust and Crumb from my Mom's co-op in LaCrosse. Peter Reinhart calls this book Master Formulas for Serious Bread Bakers, and said that his methods detail a way to achieve World Class bread. As always, I read the preface, the introduction, the bits of information in the Table of Contents - marveling over all of it masterfully printed on nearly 90 lb paper. When I finally got past the introduction, where a writer typically seems to shed their personal language and really open up into writing as an art form, I found myself re-reading whole pages but for the beauty of sentence structure and the English language as it describes the ancient sustenance that is bread. It's tricky stuff to write both artful and informational simultaneously, and Peter Reinhart does it flawlessly.


"My bread epiphany occurred a few years before the bread revolution hit full force. I was cooking for the seminary of a Christian order in San Francisco (I am still a lay brother in that order, the Christ the Saviour Brotherhood). One of my friends, a very talented cook named Brother Philip Goodrich, took on the then-practically-unheard-of challenge of following all eight pages of Julia Child's instructions, in From Julia's Kitchen, for making French bread. The results were so spectacular that I followed his example, forcing myself to carry out every little step and consulting with him when I stumbled. The bread was so much better than anything we could buy, even the fabled sourdough of San Francisco, that I began making bread every day. Sometimes the results were disastrous, especially when I strayed too far from what I now know to be common bread sense. However, when the bread came out right - even accidentally - when the crust crackled and then dissolved into sweet, roasted wheatiness and the interior felt cool and buttery even without butter, I was hooked. This was my subjective initiation.

Firm Starter.

I confess, that while I've read about such (standard) bread techniques as the "windowpane test", I never before did this myself. Perhaps I felt like it was maybe a little needless for a home cook, I also kind of felt like I would be succumbing to full-out craziness, kind of the way I used to toss pizza dough up into the air (but only when no one was looking so they didn't think I was trying to be cool or something). Gluten development that happens through proper mixing is miraculous, and the temperature increases that the dough undergoes also indicate it's readiness. As great as I consider Nancy Silverton's book (Breads from the LaBrea Bakery), I couldn't grasp that until reading it through Peter's eyes.

I have graduated to a WindowPaner. There is no turning back now. To do a window pane test, simple take a small amount of dough, and try and stretch it into a thin pane-like membrane while moving it circularly around. If it rips, the gluten isn't ready, if it stretches thin and lets light pass through, it's ready.


My first duo of loaves was made with what Peter calls a firm starter. It was a starter made with my wild yeast culture that formed the ball seen above. Essentially, starter is mixed with water and bread flour, fermented 4 hours, then left to refrigerate overnight. Being firm, it is able to be kneaded by hand and as it sat it rose and became overwhelmingly sticky. To break it apart into the 6 pieces he suggested, I had to wet my hands thoroughly.

I used my stand mixer to get the sticky dough going, knowing that higher hydration does lead to better, bigger, airier holes in the finished bread. I feel that it is difficult to avoid adding too much flour when working solely by hand, but someday I'll work up to that I hope. It would be nice to have a huge, wooden bench type counter where I could fully let the flour fly, but my reality is an 18 inch maple cutting board that is dedicated to dough. I love to dream.


To calculate when you will bake, work backwards to see about what time you should start. I wanted to bake in the afternoon, so I started the firm starter the morning of the day prior to baking. I think "overnight" usually refers to about 8 hours, but I let it go more like 16 with good result. I also baked these in a pot, Jim Lahey style. The moisture from the bread creates it's own steam, which is trapped in the pot and released as baking goes on and the lid is removed. I was happy with my results.

Peter Reinhart Bread (Crust and Crumb)
makes two loaves

for the Firm Starter:
  • 1 c. (4.5 oz.) unbleached bread flour
  • 6 T. room-temp water
  • 1 c. (4 oz.) starter
for the Dough:
  • 5 1/4 c. (24 oz.) bread flour
  • 2 c. cool water (65-70 deg.)
  • Firm Starter, from above use all (11.5 oz.)
  • 2 1/2 t. salt
To make the Firm Starter: mix the starter ingredients in a mixing bowl. When they form a ball, turn the dough out onto a floured surface and knead just until all the ingredients are incorporated, and dough forms a smooth ball. Place dough in a clean bowl, cover, and let ferment at room temperature for 4 hours. Then transfer to the fridge overnight.

Remove the Firm Starter from the fridge 1 hour before mixing up the dough. Before mixing, cut it into 6 pieces. It will be pretty sticky, I used wet hands.

To make the dough: combine the flour, water and starter pieces in a stand mixer fitted with a dough hook. Mix on low for 1 minute, then on medium for 3 minutes. (At this point, you can save 12 oz. of the starter to become the Firm Starter or 'chef' for additional loaves at a later time. I assume from reading, that it would be viable in the fridge for up to 3 days.)

Add the salt, and continue mixing for another 4 minutes, or just until gluten sets up. Dough should pass the windowpane test, and read 77-80 degrees on a thermometer. Hand kneading will take 10-12 minutes to get to this stage.

Put the dough in a clean bowl, cover (Peter uses plastic, but I used a lid for my stock pot), and let rise at room temperature about 3 hours. The dough may not double fully, it just needs to "begin swelling".

Divide the dough into 2 pieces, and round each into a ball. Let rise ("use a prepared banneton, basket or mixing bowl and place the smooth side down) about 4 hours until doubled in size. Peter has specific method for this, but I let them rise the way I normally treat breads: one in a well floured linen cloth inside a colander, and the other in a reed banneton (basket) that was heavily coated with flour and wheat germ. He also recommend misting them with cooking spray, and placing them in a plastic bag. I just make sure they are away from drafts, and cover with a dry towel topped by a water-moistened towel. I just have a thing about cooking spray... I'm sure that would work perfectly, though.

About 45 minutes from the end of the second rise, place a cast iron pot (with it's lid on) in a cold oven, and preheat to 475. I decided to bake them both, one after the other, but you could also choose to let a loaf retard in the fridge overnight. Peter notes that it will develop a more sour flavor and that you should remove it from the refrigerator an hour before baking.

Gently turn over the risen loaf, score and transfer the loaf to the hot pot. Replace the lid, and bake for 30 minutes. Remove the lid, and continue baking for 10-15 minutes more until deep golden brown. Remove the loaf to a cooling rack, and cool at least an hour until slicing.


Blistered Crust.

Because I was standing around the kitchen for 1 1/2 hours during baking, and because I had decided to clean and wash out my refrigerator on Sunday afternoon (discovering a pint jar of Sally Fallon crispy peanut butter lurking in the far back), I figured I'd take advantage of the hot oven and make some cookies. Sally Fallon's nut butter tastes a bit different than most nut butter since the nuts are soaked and dehydrated, then blended with coconut oil to replace some of the natural oils that are lost in this process. There is also a little honey in her recipe, which really makes the blonde peanut butter taste unconventional. I liked it, but the Boy-O is both picky and a peanut butter connoisseur. Cookies are sure ways to use up "suspect ingredients", and while he thought they didn't taste like peanut butter, he still gobbled them down.


I cut traditional amounts of butter and sugar in half, since there was oil added to the nut butter I made. The things I loved about these peanut butter cookies were the things that often sadden me about others: they were not too sweet, they were not too rich, and they were both a little chewy and a little crunchy. They also celebrate the homemade nut butter, and I can't tell you how many times I have read "do not use natural-style peanut butter". Use it! And, they will be great.

Natural Peanut Butter Cookies
  • 1 c. peanut butter (I used Sally Fallon's sprouted kind, but I'd imagine any nut butter would work well)
  • 1/2 c. (1 stick) butter, softened
  • 1/2 c. brown sugar
  • 1/2 c. white sugar
  • 2 eggs
  • 2 t. vanilla
  • 3 c. AP flour
  • 1 t. baking powder
  • pinch of salt if using non-salted nut butter
Preheat oven to 350.

Sift the flour and baking powder (and salt) in a small bowl.

In a large mixing bowl, cream the nut butter and butter until well mixed. Add both sugars, and mix well. Add about a cup of the sifted, dry ingredients, and blend.

Add eggs, one at a time, and vanilla - mixing well (1 minutes) after each egg addition.

Add the rest of the dry ingredients, and blend until just combined. Form batter into uniform ball.

Arrange them about 2 inches apart on parchment lined baking sheets, and flatten them criss-crossed with the tines of a fork. (They don't spread too much, so you can keep them pretty close together.) Bake for 15-18 minutes, rotating pans about half way through baking time.

Cool on the pan for a few minutes, then transfer to a wire rack to cool completely.


By the time the last of the cookies were cooling, I finally felt I could risk slicing open my first "World Class Bread" loaf. Peter Reinhart's descriptions of a buttery interior, the wheatiness, the thin cracking crust: they were all there. This bread tasted different than the countless others I've made using the exact same ingredients. It was the method and ratio that was changed, and perhaps the romantic way he describes the way that this bread should taste. Because I had formed the loaves the way I did, tiny blisters popped up on the skin of the crust, something that I don't think has happened to my bread before. They were both gorgeous. They were both World Class. They looked luminous inside, and they came from my oven.

It seems I've run into a string of exceptional writers lately, and it causes me to over-analyze my own paltry attempts at words on a page. What I lack in wordiness, I make up for in passion, at least I hope. As for Peter Reinhart... I will be reading The Bread Baker's Apprentice, and I haven't looked forward to anything more in a long time. As I continue to read on through Crust and Crumb, I continue to be infinitely inspired by the lowliest and earthiest food, and the way bakers think. I inch closer to becoming a baker myself. Maybe this is my own "bread epiphany", or maybe just another in a string of epiphanies. All the while, I just sense in the back of my being that one of these days I'll figure out what I want to do, what I want to be when I grow up. Then, certainly, the next obsession will strike.


The post has been Yeastspotted.

Monday, January 17, 2011

Lemon (Daydream) Marmalade

I'd feel funny saying that I worked for 3 days on this lemon marmalade only because it didn't seem at all like work. My house has been transformed into a lemony clean paradise as the skies above are overcast and sun is scarce. In the world of preserves, marmalades are a bit famous for being fussy and time consuming. They are also a paradox of flavor, being sweet, sour, and bitter most of the time. That could be why they are some of my favorites to eat. I've read lately of some people dipping their spoons again and again into their various nut butters and homemade versions of "Nutella", but I'm certain that my future sneaky spoonfuls will contain fat dollops of this lemon marmalade instead.


I actually didn't plan on making any marmalade this year, since I have one jar left over from my canning party with Lo and a fully stocked preserves shelf in the basement. When my hold on the Blue Chair Jam Cookbook by Rachel Saunders came in at the library (and I was as impressed both with the weight and size of it as I was the photography), I set out scheming to make this lemon version shortly after reading about it. One particularly interesting thing about Rachel's method is that she uses the oven both to sterilize the jars and lids and to can the finished product. I wasn't sure about that, but decided (after a brief consultation with Julia) to give it a shot.

I'm pretty sure I had two different kinds of lemons, some were thinner skinned and smooth, and some thicker and dimply. I can't claim to know much about lemon varietals, since they don't grow in Wisconsin, unfortunately. I love reading things like this where lucky people have things that I can only imagine growing myself dropped in their laps. It's curious that I recall such instances as if they happened to me. I know I had *wished* that I could make Deena's lemon thyme marmalade last summer when I read about it. But like most things, I forgot about it when "lemon season" has hit me here, right now, in the broadest part of the Winter.

How do I know it's lemon season? I make an assumption based on when my co-op has specials on citrus; I got my 6 lbs of fruit for around $8.50, which works out to about 65 cents per jar for organic marmalade (if you don't include the sugar price).


Rachel's method is easy. The work is shared with three days, but each day's work is rather light. Day 1: soak cut half of the lemons overnight, Day 2: boil soaked lemons to make lemon juice and strain overnight and cut more lemons into thinly sliced eighths and let them soak overnight, then Day 3: add sugar and a touch of fresh lemon juice to the past 2 day's labors and boil until you reach marmalade.

I will say that I admire canners who develop recipes. It seems to be a highly specialized art. I can follow instructions (and in the event of canning, follow them without addition or subtraction which is usually hard for me), but I'm not sure I would be cut from the cloth of precision as canning writers are. This recipe delivers what she says it will, it is very pretty and hard to improve upon. I'll say that it is a miraculous balance of flavor that stems from the patience in 2 days worth of various soaking periods. There is bitter, there is sour, and there is sweetness. And, when you catch a piece of peel and bite into it, it is pure summertime even in the depths of snowy winter.


perfectly gelled.


I've actually only made marmalade one other time, with the aforementioned Lo. While the flavor was really good, the set was not. We did not, however, employ the method of spoons. Prior to making the marmalade, stick 5 spoons in the freezer to get good and cold. When the time comes to test for the gelling, you can pour a little onto the spoon and put it back into the freezer for 2-3 minutes. If properly set, it should not run off the spoon. I liked this step immensely, especially since I got to eat the spoonful after the check. It took me 3 spoonfuls to determine the set, and a full hour and (almost) a half to get to that step.


the method of the spoons.

Cooking down marmalade when the snow was falling was especially enjoyable. I made my coffee and pulled up a stool to lazily keep an eye on it, stirring every so often. I thought about the Italian tradition of serving espresso with lemon peel on the side of the cup. I took hipstamatics using my new free film in the app upgrade I downloaded this morning. I took apart and cut hearts out of an Alterra coffee bag, that I intend to string up and hang somewhere. I in general gave thanks that I am a stay-at-home mami that can do what she pleases, so long as the house is clean and so forth. And, I daydreamed of Summer and it's business of growing and walking and playing: those things I love that prevent me from sitting down at the counter for a couple of hours and tinkering with a jam that I don't even know will work.


thankful for cameras.

The recipe as written did not give an exact amount of lemon juice liquid that should have been extracted from the fruit during the process leading up to the boil. I think that the water just needs to evaporate to the proper stage, and so no exact amount is probably needed. My liquid level decreased by a good 3 inches in my stockpot. Because I kept testing with the spoon method, and because I had pulled up a chair to properly observe, I could actually tell when the boil changed from aggressive bubbling to more subdued activity.

All the while, I had my 10 clean jars with lids in a 250 degree oven. This technique of sterilization and canning I have never done. It actually seemed like something that was too good to be true. No boiling water turning my fan-less kitchen (and the rest of my smallish house) into a sauna? I love this method! I had only one that didn't seal, and I added it to the extra three I had, so I have some to devour straight away. Obviously, I have a couple unsealed to give away as well. This is the time I break out my favorite strange canning jars that I can't really use to preserve in - one triangular jam jar that Sasa gave me is my favorite:


It originally contained a Croatian fig and chocolate jam. Next time I see her, I'll give her this unsealed jar of lemon marmalade knowing I'll get it back again to fill with more surplus jams or jellies. I'm telling you, it's the simple things in life that give me the most joy.


peels seemed to rise to the top, but the gel is set so no matter.

I confess, that so far I've only read through the beginning and "Winter Through Early Spring" sections of the Blue Chair Jam Cookbook. I was smitten, my heart at first purchased with luxe paper and pictures, but now also with a sound recipe written very well. Now, I busily page through the rest of the book and drop it into my bottomless Amazon cart. I daydream of warm weather, thankful for California and it's bounty that provides me lemons in January.

I pause, and suddenly shutter at my thoughts: at the end of this summer, I will have officially hit my mid-thirties and I daydream some more that I'm still 23. But then I lighten at the hope that my first ever knit sweater should be complete by that time (I cast on yesterday!). This is what happens to me in the winter. Roller coasters of retrospect and expectation move in when I have time on my hands. I try to remember not to dream it all away and be thankful for each second.

Tuesday, November 30, 2010

Not-So-Exciting (Yet So Exciting) Pumpkin Muffins


In the chicken yard of baked goods, muffins are probably at the bottom of my baking pecking order. Don't get me wrong, I love them - they just seem to be something more "utilitarian", something to satiate a hunger pang rather than something I'll go out of the way to bake just for the joy of baking. Because they tend to be more virtuous than cupcakes, some muffins beg to be slathered in jam or butter: a hope of becoming more than they are. Some are perfect candidates for the freezer, pucks of frozen nutrition, waiting for me to remember that I stashed them in there. They do come in handy when I remember I'm hungry as I'm running out the door, but I don't often crave them, pushing them aside for other sweet, compact grab-ables such as cookies.

Every once in a while, I make a muffin that I want to eat all 12 of, and then set out to make a second batch. When that happens, I make a note and then change my tune. "What was I thinking", I ask myself, "I love muffins"! I would all of a sudden travel the world over to be able to crawl humbly back to my kitchen and mix up a batch of hand-sized quick breads, and I wouldn't even wait for them to cool before popping them into my mouth.


I have two confessions, and one of them involves Martha Stewart. The first confession is that I'm cheap. I like to think I'm cheap with class, but not always is that the case. When standing overwhelmed at the baking aisle at the non-food-co-op-grocery prior to Thanksgiving, I evil-eyed the cans of pumpkin. I don't know why, but I could not bring myself to buy the 15 oz. cans, when the 29 oz. cans were cheaper per ounce. I solemnly cursed the manufacturers that they are always putting one ounce less in something just so that a purist baker somewhere will succumb to buying the 15 oz. cans instead of a 29 oz. can so that she won't be short. Seeing as I don't buy all that much canned food, my steaming was brief, but still. Do they think I don't notice? I do. I still buy the large cans to spite them, then store the leftovers in the fridge for a few days until I can figure out what to do with them... in the case of this post, making pumpkin muffins.

My second (and unrelated) confession is that I have no real opinion about Martha Stewart. She's smart, obviously driven, and has more well appointed houses than I'll ever have. She cooks, bakes, decorates, and reads and still has time to gild a lily. I like her books, love their layouts and photography, but often find fault in her recipes. I take her recommends with a grain of salt, and don't buy into every new adventure she concocts. When I grabbed SoNo Baking Company Cookbook from the new shelf at the library, admittedly it was for the gorgeous cover. When I opened it up and read the preface by Martha herself, I discovered that it's writer was at one time one of the minions of Martha's staff. I had the book sitting on the counter for 2 weeks before reading any further.

Just a few days ago, I finally cracked it back open and was rewarded handsomely with this recipe. Besides a tome of hugely interesting baked goods, I also found in it that I shouldn't judge Martha. She is what she is, and she does recognize great talent. John Barricelli writes this book well, and also clearly has amazing ideas about baking. When I couldn't actually decide what muffin to try first, I knew he had me. And after the first bite of soft, almost-as-good-as-a-cupcake pumpkin muffin, I knew that this indeed is a great book.


I hardly alterered John's recipe. I did reduce the sugar slightly (and I used raw instead) and omitted the raisins on request of the Boy-O. He eats them fine on their own, but doesn't like them "in things" all of a sudden. I added walnuts instead, and sprinkled some on the tops prior to baking. Because the muffin is so moist and cake-like, they stuck out like ants on a rock. No matter, they tasted great all toasted up. Next time, I'll probably leave them off though.

Pumpkin Muffins (adapted from John Barricelli, The SoNo Baking Company Cookbook)
  • 1 1/2 c. ap flour
  • 1 t. baking soda
  • 1 t. kosher salt
  • 1/2 t. cinnamon
  • 1/2 t. ground ginger (or 1/2 T. grated fresh ginger)
  • 1/4 t. ground nutmeg
  • 1/2 t. ground cloves
  • 1 c. sugar (1/2 cup is plenty!)
  • 1/2 c. coconut oil (or part coconut part olive oil)
  • 2 eggs, room temperature
  • 15 oz. pumpkin puree (I just now noticed that the recipe called for half a can of pumpkin... I used a whole can equivalent, and I was more than happy with the results!)
  • 1/4 c. unsweetened applesauce
  • 1/2 c. raisins, optional (John suggests adding 1/2 c. nuts and/or chocolate chips as well)
  • 2 T. chia seeds, optional
Preheat oven to 375, with rack in middle position. Spray a standard 12 cup muffin tin, or butter generously.

In a medium bowl, whisk flour, baking soda, salt and spices together.

In a large bowl, whisk sugar, oil, eggs, pumpkin and applesauce together. Add the dry ingredients and fold until the mixture is well combined. Fold in raisins and chia seeds if using, and any other mix-ins.

Portion into muffin tin, about 1/4 c. per muffin (I use a disher). Bake for 20-25 minutes, until tester comes out clean.

Transfer pan to a rack to cool for 10 minutes. Then, using a knife as an aid, gently upturn the muffins onto their sides to cool completely in the pans.


Well, I guess the extra pumpkin I unknowingly added explains the incredibly soft and custard-like interiors... and why I got more than a dozen. I baked the remaining batter into bite-sized mini muffins, and Boy-O ate all 6 of them straight away, I ate the remaining 2. He was impatient for the bigger ones to cool, and couldn't wait to gobble up even more of them, so we know this is a good recipe.

Just as I was thinking I was "pumpkin-ed out", these beauties prove me wrong. I almost think that I could never be tired of pumpkin. Or muffins. Now that we're best friends again, the muffin and I have to have some more serious talks. If you have any varietals that I need to meet, please be sure to let me know. Meanwhile, it's almost cookieposter time... unless I decide to give Christmas Muffins this year. I doubt I'd hear any complaints if I use more of John Barricelli's recipes.