Showing posts with label Dorie Greenspan. Show all posts

Wednesday, August 7, 2013

Mulberries. Mulberry Cake.

 mulberries.
the first of the mulberries.

I first ate a mulberry two summers ago after discovering what I thought to be a tree full of them growing in a public park.  Any prior knowledge I had of mulberries centered around the Dr. Seuss book And To Think That I Saw it on Mulberry Street, which in my mind was one of the earliest books I read myself.  I don't recall that book contained the eating or description of the mulberry, which is a less seedy, blackberryish berry that grows either on trees or bushes depending I assume on the maintenance of the plants and the locations they are found.   What I do know now is that a fat, thumb-sized, perfectly ripe mulberry has no comparison in the berry world.

The first taste of mulberry for me (after confirming with someone who knew what a mulberry was), wasn't really so sweet.  Mulberries must be falling-off-the-tree ripe, and deep black - at least the varieties that I've seen here should be deep black.  The reddish ones, or ones that need some coercion to detach from their tree, are sour or tart; they are seedy and not that pleasant.  Last year's severe drought is blamed for just about everything bad in the Wisconsin food world of 2012... and what few mulberries I saw were tiny and I suspect gobbled up by the birds.  But this year:  sweet success.   The clutch of public trees I had my sights on were prolific this year, still bearing as I check up on them every few days or so, ripening slowly as if to provide me desserts just as I need them.

mulberry cake

I made the first full pint of berries we found into a tiny batch of jam, a single jar that I've been enjoying on toast about every other day.  But when we checked the tree Monday and many more berries had ripened, I thought I should really celebrate by making a cake.  I never need prompting to make a cake... but it helps that I had recently made one of my favorite summertime cakes ever - Dorie Greenspan's Dimply Plum Cake.  Except the two pieces I gave some visiting friends, I ate that whole cake myself, and then had to refrain from making another. 

I made only a few well suited changes to Dorie's impeccable original recipe, chiefly adding coconut oil instead of another type of vegetable oil.  Coconut oil and butter work together to provide an amazing texture, almost bordering on a softer version of shortbread.  Playing around with the spices is only half the fun too.  This cake is so endlessly adaptable, you could really do any kind of fruit, nut, or berry I would think. 

mulberry cake (batter)

nutmeg

If you are a raw batter taster, as I am, I would heartily encourage you to taste this batter.  It is billowy, silky, and downright indescribably delicious.  I tried to think of just one spice that could complement the flavor of mulberry, and settled in on nutmeg.  It could be that a nutmeg heavy cake I had made for a Daring Baker challenge was lingering in my mind, and I grated in a good amount of it due to the happy memory of enjoying it.  I'd see no reason why you couldn't fold the berries into the cake batter instead of arranging them on top, but I wanted to keep the spirit of Dorie's cake, and let the berries dimple the top.  The cake is best served with just a bit of barely sweet whipped cream, and additional mulberries.

Mulberry Cake (adapted from Dorie Greenspan)
  • 1 1/2 c. AP flour
  • 2 t. baking powder
  • 1/4 t. salt
  • about 1 t. freshly grated nutmeg
  • 5 T. (2 1/2 oz.) unsalted butter, at room temperature
  • 3/4 c. (packed) light brown sugar
  • 2 large eggs
  • 1/3 c. melted coconut oil
  • zest of 1 lemon
  • 1 t. pure vanilla extract
  • 1/2 c. ripe mulberries (you can snip off their stems if you like, but I went for rustic and left them attached...)
Preheat oven to 350.  Butter and flour an 8 inch round pan, I used a springform pan.

In a small bowl, combine flour, baking powder, salt, and nutmeg.  In a large bowl, beat the butter until light and fluffy, about 3 minutes.  Add the sugar, and beat another 3 minutes until fluffy.  Add the eggs one at a time, and beat a full minute after each addition.  With the mixer on medium speed, blend in the coconut oil, lemon zest, and vanilla.  Dorie says "the batter will look smooth and creamy, almost satiny", which is so apt I need to include her description.  Taste it.  It's wonderful.  Finally, add the dry ingredients, and mix until just combined.  Before transferring the batter to the baking pan, use a spatula to be sure you've incorporated any dry spots.

Smooth the batter into the prepared pan, and decorate the top with the mulberries.  Bake for about 40 minutes until the top is nicely browned and a tester comes out clean.  Cool in the pan for 10 minutes, then run a knife around the edge before unmolding it.  Cool it right side up.  Store the cake at room temperature for 2 days (it's moist, so will mold if you try to push it further), or coax another 2 days of longevity by storage in the fridge.  The texture changes under refrigeration, which isn't bad, but you may wish to allow your slices to come back to room temperature before eating them.

mulberry cake

After the discovery of what mulberries looked like, I identified trees in nearly every park we frequented.  Some trees are so big, I'd need a ladder and a friend to help glean.  But fortunately, the best glut of berries to be found is right in my own neighborhood, and is low enough to reach - even for my kiddo.  Just this week, we noticed another similarly sized tree hiding in plain sight, not far from the first... more than plenty for fresh eating and playing around with.  Not much makes me happier than seeing my picky eater stained purple from picking and eating berries and excited to look for more.  He even liked my cake, and now that he's finished off the last of the fresh mint ice cream (which is the best recipe ever, by the way), he may even help me to eat it.  If I'll share it, that is.

mulberry cake

Friday, July 26, 2013

Babies and Brandy.


brandied tart cherries
brandied tart cherries.

More than two weeks have floated by, after the birth of my second son.  He was born swiftly and smoothly on a beautiful Summer evening, 7 years to the day after his older brother.  To say that you can fall head over heels in love with another human being so quickly is an understatement of epic proportion.  He fits into our family in a way I couldn't have anticipated, and the darling boy even let me bake bread the day after I arrived home.

Physically, I feel like I can do anything.  Recovery time has also been fast, much faster than with my first son - and I feel like I have all of the energy I need to make up for lost time in the kitchen.  Grains have been sprouted, ferments set to bubbling, farmer's markets attended, and the only area I feel lacking in is actual meal planning.  Sporadic baby interruptions just before the dinner hour have slowed me up a little, and "piece catch" meals hit the table in great thanks to my freezer, garden basil, and last minute imagination.  When I was first married and working full time, I recall I used to actually plan meals in a little notebook... and I'm thinking it might not be a bad idea to bring that method back.

But meanwhile, things are good in my world.  Babies have a way of making everything feel fresh and amazing.  Kind of like a fresh bottle of brandy.  Before the comments of nursing mothers and alcohol come flooding in, I'm not actually drinking the brandy - and to be honest, despite brandy being the most often purchased liquor in my state, it's really not even my favorite.  But used to cook with or inoculate fruits?  It might just be my favorite thing ever.


Dorie's brandied chicken.
click the photo for the recipe.

Alcohol in general is still not on my grocery list.  On the continuing path to our household economic recovery, (and fresh off the path of 9 months of abstinence anyway...) I can't see spending a red cent on something as trivial as alcohol - especially since it isn't really a necessity.  But my parents were here for a Sunday dinner when my newest babe was just 5 days old, I knew I had to have them try one of my favorite chicken-in-a-pot recipes from Dorie Greenspan's Around my French Table.  It's a recipe that calls for Armagnac, which is a spirit that I find completely wonderful, though prohibitively expensive to me.  Fortunately, if you enrich the much cheaper brandy with dried prunes and cook it with chicken, the flavor is stellar nonetheless. My Mom and Dad visited the first liquor store they have probably been in since before I was born to get me a bottle of brandy for the dish, and I've been making good use of the rest of the bottle in the days since that chicken was earnestly devoured.

brandied raspberries

My neighbor has a tart cherry tree in her back yard.  She generously offered them free for the picking, and another neighbor graciously offered to pick some for me, since we were in the midst of a heatwave.  The cherries were deliciously deep red, tart, and perfect, and I instantly knew I had to make brandied cherries.  The last time I made them was maybe 3 years ago, and I still have a handful of faded cherries submerged in liquor stashed in the back of my fridge.  I couldn't remember what ratio or recipe I used, so I went with one I found on Serious Eats.  The general ratio for that recipe was one part sugar (I used raw sugar), one part water (or cherry juice) to two parts brandy.  I didn't pit the cherries, and didn't bother to poke a needle through each one either:  I figured a bit of time on the counter and more time in the refrigerator would take care of any of that extra work for me - and I was right.  I let them sit out on the counter for a few days before transferring, and already the brandy was dark red and the cherries nicely spiked with flavor.

brandied raspberries

Some new friends recently transplanted back to the Midwest from Oregon stopped by yesterday to visit and thoughtfully brought me perfectly ripe raspberries.  I decided to try brandying the raspberries using mostly the same method, but using the ratio of 1 part each sugar (white granulated sugar in this case to preserve the true flavor of the raspberry), water, and brandy.  I packed the raspberries into clean pint jars, heated the sugar and water over medium heat until the sugar just dissolved, and then added the brandy off the heat.  Just standing overnight led to color saturated liquid that is less potent than the tart cherries, but so excellent tasting I can hardly wait to have an excuse to make a pound cake or some shortcakes, maybe even a "poke" type cake that can make use of the bright, spiked raspberry juice.  There are some words I hate using to describe food, and luscious is one of them... but these berries truly are luscious.

I might be silly to compare my new babe to a bottle of brandy.  But in a way, it fits.  When you don't have something for a long time, you can really appreciate it all the more, and that is how a second baby is for me.  I am reminded of how wonderful every new moment was with my first little son, and just what is is store for me with my second.  I marvel over impossible long eyelashes and tiny fingernails, I get to know all the expressions and nuances of a brand new personality, and savor each one for the fleeting moment in time I now know it is.  Like the bottle that empties too quickly, but lives on in what it has preserved, I document in both mental and physical photographs the new life I've been blessed with.  I will most happily decant both in the future and be able to feel as full of emotion as I am right now.

Untitled

Saturday, July 21, 2012

The story of Gâteau Basque, time alone, and friends to share it with.

gâteau

This whole week I've spent nearly alone, my kiddo having stayed behind with his Nana and Papa for his first extended Summer sleep-away. I pulled out of the driveway last Monday feeling strangely solitary, and surrounded in my car by overwhelming silence. Until I am separated from my child, I don't realize how much the boy talks. I am told that this is repayment from my own childhood, when I would talk for hours on end. One famous story told by my Gram and retold for years to come by my Mom reminds me that I had gone to stay with her and in a long car ride I was talking non-stop. When sudden silence hit, she turned around to see why I had stopped talking and found I had fallen asleep mid-sentence...

I will admit that the quietness of my house is good for me once in a while. It was only periodically interrupted by long talks with my Husband, which felt good and strangely adult. With no schedule to keep I felt like I was on vacation. Really my home is like a vacation to me; most of the time there is nowhere else I'd rather be.

Amidst the organizing and some deep cleaning, a shift worked at the cafe and gentle, simple dinners, my new boss/friend and I decided that my being childless was a good excuse to have a collaborative dinner. She was bringing some pork that she had butchered in a class and had stashed in her freezer, and I was in charge of bread, dessert, and veggies. Her sister (/co-worker/neighbor) and I all sat together on the patio last night after our delicious dinner trying to pronounce "gâteau", which I thought ended up sounding more like the Spanish "gato".

But, the pronunciation doesn't matter much with this homey, easy dessert. Filled with last years tart cherry jam, I felt relieved that I had gone with a Dorie Greenspan recipe when trying to impress a chef-friend. It bears mentioning that any recipe Dorie Greenspan has ever written will turn out for me on the first try, no questions asked, making her one of my secret weapons when I am trying to make an impression. Gâteau is exactly the thing to make for simple dinner parties. It is lovely and French, it can be filled with whatever preserve on your shelf you need to show off or use up, and it isn't so big that you find yourself with enormous amounts of leftovers to contend with. It could be my new favorite dessert.

gâteau

Truth told, I am insanely insecure about cooking and entertaining for others, even more so when one guest is a professional. I re-washed all my silverware and towel dried the spots off of them, I re-folded all of the mismatched napkins to approximate the same size, I baked the gâteau at the last moment - when it had enough time to cool to room temperature, but not enough time to be called "old". The batter, which is really more of a dough or a cross between a batter and a dough, is rolled out into circles between plastic wrap, and then chilled for at least 3 hours and up to 3 days. Baking time is just over 45 minutes, allowing one to get herself cleaned up and presentable for company. Like I said, the perfect dessert for easy entertaining.

Gâteau Basque (Dorie Greenspan, Around my French Table)
makes one 7 or 8-inch cake, 8 servings
  • 2 c. ap flour
  • 3/4 t. baking powder
  • 1/2 t. salt
  • 10 T. butter, room temperature
  • 1/4 c. light brown sugar, packed
  • 1/4 c. sugar
  • 1 egg, room temperature (I soaked a cold egg in hot water for 10 minutes)
  • 1/2 t. vanilla extract
  • 3/4 c. cherry jam or other thick preserves
  • 1 egg, for eggwash

Whisk together the flour, baking powder, and salt in a small bowl.

In the bowl of a stand mixer fitted with paddle attachment (or in a bowl with a handheld mixer), beat the butter with both sugars for 3 minutes, or until the butter is smooth and the sugar has started to dissolve. Add the egg, and beat for 2 more minutes. Scrape down the sides at least once, and the batter may look curdled, but this is normal. Reduce the speed to low, add the vanilla extract, and then add the dry ingredients in 2 or 3 additions, beating only until they are fully incorporated.

Divide the dough into 2 equal portions (yes, I weighed them), and form each into a circular disk. Working with one at a time, roll the dough out into a circle between two sheets of plastic wrap. Be sure that the circles will fit into your pan. I used my 7 inch springform pan, and used the base as a measure. Still in the plastic wrap, stack the disks on a flat plate and refrigerate at least 3 hours and up to 3 days.

When ready to bake, preheat the oven to 350 degrees and generously butter your baking pan (I used salted butter for this, just because). Remove the disks from the fridge, and let them sit for a few minutes at room temperature before peeling back the plastic wrap. Fit one disk into the prepared pan, and spoon the jam evenly on it, leaving a 1 inch border. Moisten the border with water, and place the other disk on top. Press gently, trying not to let too much jam escape the sides. Some jam will escape anyway - and this is okay.

Make an eggwash by beating an egg with a splash of water and brushing it over the top. (Reserve the beaten egg for tomorrow's breakfast.) Make an even crosshatch pattern with the tines of a fork, and the bake on the center rack of the preheated oven for 45 minutes or so until the top is golden brown.

Transfer the cake to a cooling rack and let it rest for 5 minutes. Run a thin knife between the cake and the pan to loosen it, and then unmold it. Let it cool, right side up, to room temperature, then cut into wedges and serve with vanilla ice cream. (I like this one, because it is Jeni's Splendid.)

(Update: I tried this cold out of the fridge the next day and didn't like the texture nearly as well. It still tasted good, but tasted more like dense pie crust. I left the last bit out overnight, covered well with a glass dome, and then tried it the next morning. It was much tastier, more like a tender pastry. If you want to store it for a couple of days, I'd recommend putting it in the fridge, but then allow enough time for slices to come back to room temperature before eating.)

alsa


What seems like a long time ago, I found packets of French baking powder in an Asian grocery that I bought because I loved the packaging. They were sold in cellophane, maybe 6 packets to the pouch. I couldn't wait to get home and Google to find out about it. What I remember is that it is single-action baking powder, powder that activates immediately when it hits liquid and not again when it hits the oven heat. I recall that it was recommended to be used in gâteau, though I'm not certain how it would fare with a long refrigeration time. I may try it sometime, I still have the pale pink packets in my baking pantry. They still make me happy when I see them in there.

gâteau

So my vacation week is ended, my kiddo is on his way home, and I have just a few hours more of a quiet home. I am looking forward to hearing about all of his adventures away (especially because my Mom told me that he was eating all kinds of new foods this week), and I look forward to having my little family all together once again. I have a few pieces of gâteau left for everyone to taste after dinner tonight, and I will see how long the pretty little cake remains tasty.

Sunday, July 10, 2011

Sourdough CocoNana Bread (or Just Another Reason Why I Love Dorie Greenspan)

I'm sure that it's no secret that I love Dorie Greenspan. I don't really know of anyone who loves to bake who doesn't, and I think it's because in addition to her very likable personality, she also writes impeccable recipes. I consult her Baking book often, another in the stack of cookbooks that I have whole passages memorized from. Every recipe I've ever made from it has been a success: from the "adult" chocolate ganache cupcakes (gracing my CakeWalk banner above) to the Corniest Corn Muffins, each has been an instant favorite, and I'm hardly exaggerating. If you have been reading for awhile, you'll know that I don't actually own this favorite baking book of all time, instead I trek three quarters of a mile down the road and pick it up from the library every time I need it. The date due stamps are adding up over the years, and every time I check it out I wonder when I will finally break down and buy a copy of my very own.


For my Kiddo's birthday party on Saturday, I made a slew of chocolate cupcakes, and then a variation of her Perfect White Party Cake layered with Chocolate Malt Buttercream frosting for our family party later in the day. As if I would enter panic mode from not having enough chocolate to celebrate the momentous occasion of 5 years of my pride and joy, I decided to also "sourdoughize" a quick bread of Dorie's that I'd never actually tried in it's unaltered version: Coco-Nana bread.

It could be because my Parents came down to spend a couple of days (and we do love our quick breads with the morning coffee), or maybe it's because I was growing my starter bigger to be sure to have enough for plenty of pancake batter, but making this sourdough morning bread wasn't a mistake. I used a whole cup of starter and let it rise overnight until it was billowy and sweetly sour. I decided to scoop out 4 muffin-sized lumps from the rather full loaf pan after remembering my debacle with a recent cake and I'm fairly sure that proved to be a good decision. One muffin went (warm) directly into the Birthday Boy's mouth, where he promptly declared it delicious and I had no additional mess to attend to.


sourdough, overnighted.


If you plan the night before for this bread, it can be on the breakfast table in a little more than an hour. If you are in a rush, pop all of the batter into muffin papers, and they bake in roughly half the time. Either way the bread ages gracefully, gaining chocolaty depth and brownie points with children. You can easily pretend that you are having dessert for breakfast, which Dorie says is perfectly acceptable. She also says of her "coal dark morning loaf": "At first bite (it) is chocolate-chocolate, and then the banana flavor kicks in - it's altogether winning and, while it may feel decadent to have it at breakfast, it would be just as winning, if a little less racy, as a p.m. treat."

Agreed. And, seeing as my folks brought down my order of local strawberries, I'll add that sliced berries make a pretty great topping to a poundcake-sized portion as well.

Sourdough CocoNana Bread (adapted for sourdough from Dorie Greenspan - Baking From my Home to Yours)
  • 1 c. sourdough starter (100% hydration), fed somewhat recently
  • 1 3/4 c. AP flour
  • 1/2 c. buttermilk (I use my yogurt that is quite thin)
  • 1 c. cocoa powder (I used natural process)
  • 1/2 t. salt
  • 1 t. baking powder
  • 3/4 t. baking soda
  • 4 oz. (1 stick) butter
  • 3/4 c. granulated sugar
  • 1/2 c. brown sugar
  • 2 eggs
  • 2 large bananas, slightly mashed
  • 1/2 c. chocolate chips, or 3 oz. chopped chocolate (bittersweet recommended)
Combine the starter, flour and buttermilk in a large bowl and mix well. Cover and let stand at room temperature until risen and puffy, or until you are ready to bake, but preferably at least 8 hours.

Preheat oven to 350 and set the oven rack in the center of the oven. Prepare a loaf pan by buttering it well. Have ready some muffin tins if you deem you have too much batter to contend with for a single loaf.

Sift together the cocoa, salt, baking powder, and baking soda in a medium bowl.

In a large bowl, or bowl of a standing mixer fitted with a paddle attachment, beat butter at medium speed for a minute or two until softened. Add the sugars and beat for 2 minutes. Add the eggs one at a time, and beat for 1 minute after each addition. (The batter may look curdled at this time, and that's normal.)

Reduce mixer speed to low, and mix in the mashed bananas. Mix in the cocoa mixture until just combined, then add the sourdough starter mixture. Mix well by machine, and if the starter is too sticky and unruly, wet your clean hands and knead the whole lot together by hand to evenly distribute the sourdough. I try to do this quickly, gently yet firmly and I use my hands since it they seem to have one up on the KitchenAid. Stir in chocolate chips or chopped chocolate if using and mix to distribute evenly.

Spread the mixture into the loaf pan/muffin tins, and place the pan/tins on a baking sheet for some extra insulation. Bake loaf for about 60-70 minutes, and muffins for 30-35 minutes, until a tester comes out clean. Let cool in pans for 5 minutes, then turn out to cool completely.


This is some seriously chocolaty bread. Near black, or "coal black" as Dorie aptly says, is the best description, and it tastes it as well. I may try to cut back on the sugar next time, but it's so good, I may totally decide not to bother. After all, I've already tricked myself into thinking it's better for me since I used sourdough...


No matter how I vary my method of mixing, whenever I make sourdough quick breads I always have telltale streaks of unruly batter. Honestly, I couldn't tell at all (taste or texture wise) in this bread. In some breads I've made, the streaks taste a little chewy - the first attempts were worse and were almost hard, little pebbles of sourdough nearly inedible.

I'm convinced that the more I work with sourdough in quick bread the better I become at incorporating it, and anyway this bread is so decadent that it draws attention away from what almost appears to be just nuts studded throughout. Maybe it's all the butter than softens it up, and maybe that's just another reason to love Dorie Greenspan and her marvelous recipes. My breakfasts are all the better for butter laden quick breads, my life enriched by Dorie and her attention to details.

This post has been Yeastspotted.

Thursday, March 10, 2011

So I Don't Forget: A Post About Lemon Lavender Cake.


Cake. I probably like baking cake more than cooking or baking anything else. Like no other thing, it symbolizes everything good and happy in life and it can be either be made decadent or benevolent depending on your whim. There was a time not so long ago when I though baking cake would be a career path I'd choose for myself, but now I know that I'm far too absorbed with other things to be solely obsessed with cake. However, I love when someone asks me if I can make one.

Last week, a friend asked if I'd make a cake for her birthday. She may have been shocked at my over-enthusiastic and immediately-texted-back response, but birthday cakes are my absolute favorite. I may not be the best cake decorator, but birthday cakes give me the chance to make something much more extravagant that anything made for day to day consumption. (Yes, there is more often than not an everyday cake of some kind lying around my house.) They are a challenge, and they have the bonus of being shared. I asked what flavor she preferred, and without hesitation she said lemon-lavender.

I have never had this combination before. Thanks to the Internet, which at times seems like my own personal oyster-arsenal of recipes, I quickly found a way to make an infused lavender cream using the one tiny bouquet of lavender that I stored from my garden last summer. Last year, I planted lavender for the first time, and I fully anticipated using it in baking. Procrastination set in and I never got around to it, although I snatched plenty of pretty stems that decorated my dining room summerlong, and I had the immense pleasure of running my hands through the plant whenever I strolled past the garden. Never once did I make the batch of shortbread cookies I intended to make or experiment with it in other sweets, and I had the one pale purple cluster tied with kitchen twine hanging around my kitchen to remind me.


Perfect cake.

The resinous perfume of lavender is strong, so after thinking about making it into a stabilized whipped cream for a filling, I decided on understatement instead - that I'd use it only in the frosting. For my base layers, I used Dorie Greenspan's Perfect Party Cake which is perfect and white, and slices handsomely without fear of toppling. My Perfect Party Cake never rises as high as the pictures of Dories in her Baking book, but I still like the flavor and stability of this cake. Every time I make it, I think it will rise higher - and I still hold out hope that one day, I will have a mile-high white cake. The cake lacks any yolks to color it, but I used more grated lemon peel to amp up the lemon flavor and I'm convinced it made it look faintly yellow. I love to think of Dorie in her kitchen whenever I bake from her Baking book - it really is one of my favorite cookbooks.

With the frosting and cake decided, I just had to decide on a filling. I waffled between using lemon curd or lemon marmalade, or perhaps some of each. When I tasted the finished curd, then subsequently tasted the lemon marmalade, the marmalade tasted positively bitter. I decided on three layers of lemon curd. When cloaked in lightly sweetened lavender whipped cream, I think it really worked. I want to write it down so I don't forget. It happens.


I made the lemon curd and infused the lavender simple syrup the day before I baked and assembled the cake. I had one little jar of lemon curd leftover - I kind of wanted to save a little for myself, to use as a topping on Dorie's Cream Scones that I made last week. She says it will keep up to 2 months in the refrigerator, but I know I'm never going to have to worry about that.

Dorie's Lemon Curd (Dorie's Baking: From My Home to Yours)
  • 1 1/4 c. sugar
  • 6 T. butter, cut into 6 pieces
  • 1 egg
  • 6 egg yolks (save those whites! You'll need 4 for the cake.)
  • lemon juice from 4 freshly squeezed lemons (zest them all first prior to juicing. I use organic to ensure they haven't been dyed or sprayed.)
Combine all the ingredients in a heavy saucepan. Stirring continuously with a heat proof implement, heat over medium-low heat until the butter melts and the mixture gets thicker. Depending on your heat, this should take about 6-10 minutes. (Be careful not to get it too hot, or it can separate.) When done, it should coat the back of a metal spoon without running into the track you create by running your finger down the center. It will thicken in the refrigerator, so you aren't looking for it to be as thick as finished curd when it's still hot.

Pour the still hot, finished curd into a glass bowl, and press a piece of plastic wrap over the top to prevent a skin from forming. Cool completely to room temperature before refrigerating.


Lavender Simple Syrup - for Lavender Whipped Cream Frosting (Cupcake Bakeshop)
  • 1/2 c. water
  • 1/4 c. granulated sugar
  • heaping 1 T. lavender flowers
  • 2 c. heavy cream
Combine water and sugar in a small saucepan and bring to a boil. Add lavender flowers, stir to combine, and let steep uncovered for 10 minutes. Place a fine sieve over a small glass or bowl and strain out lavender flowers, pressing to release all the syrup from them. Cool, then refrigerate until ready to make whipped cream.

Whip cream using a stand or hand mixer (or by shear brute hand force if you are up for that) until soft peaks form. With mixer still running, slowly drizzle in lavender syrup and continue beating until stiff peaks form.


You can find the recipe for Dorie's Perfect Party Cake here at Ezra Pound Cake, along with the original buttercream frosting...

I love rich cakes paired with airy light frostings, and this one was no exception. The lemon curd was lemony and tart, and the lavender read more as floral than perfume-y, so I was very happy with the combination of the two. It sliced like a dream, and was rich enough that a small piece was enough. A room full of people were served, and there were still a few pieces for the Birthday Girl to have leftover the next day.

Before the onset of Winter, I covered my first season lavender plant with a large, overturned flower pot - so I have high hopes for it's reemergence this Spring. And, with the time change coming up this weekend already, I feel more ready than ever for the change in weather. I'm glad I have a bit of sunny lemon curd to hold me over until the sunlight is good and properly warming when I wander around outside. I certainly will remember both to use my lavender more during the season and to stash more of it away come Fall. I can see this becoming a habit.


Saturday, October 23, 2010

Essence of Autumn: Pumpkin

It's Fall, finally. Although today was in the 60's, our misguided October of 2010 has determined to let the leaves linger mostly on the trees while we soak up the rapidly shortening days in relative comfort. Traditionally, our October is a cold and often mean month, saturated with rain and requiring me to lament over the lack of a coat I can never seem to buy. (Oh, I have a huge parka, comfort rated by L.L. Bean to like 50 below zero, but I have no "stylish, walking around in usually sweltering stores" coat.)

I often feel so fortunate that we have 4 seasons; I couldn't even tell you my favorite if you asked. The brink of each brings it's own unique set of loves and enjoyment - I doubt I'd be so excited to garden and mow the lawn if I never saw the barren and bleak snow covered yard for what, at the time, seems like an eternity.

Our circle of seasons reminds me of life on a more specialized scale. Lately, and more specifically, my experiments with fermentation seem to echo life and our seasons - first with spurts of growth and then the maintaining, next a slowness created by increasing chill and, finally, inevitable death if not cared for properly (and sometimes even if cared for properly). Seasonal living really is extraordinary, and worth appreciating as often as I think of it. And, while I don't crave it in the Spring and Summer, some things are just inherently Autumn and the Autumnal onset brings with it my cravings for pumpkin and the endless tweaking of the classic pie.


Pumpkin pie is probably one of my top loves. It is home. It requires a modicum of beforehand thought since it takes a long time to bake, and an even longer time to cool down before that first slice can be wedged out and properly plated with appropriate amounts of ether whipped heavy cream or ice cream. I hardly know a person who doesn't love it, and if you hate making a pie crust, filling a supermarket readymade cheat will also provide nearly as much gustatorial enjoyment as the olfactorial treat you get when the whole house smells of spiced pumpkin. (Never mind if I'm introducing new words to the English Language here, I just get excited about pumpkin!)

My first pies of this season were not actually pies, but rather miniature tarts that I stole from Heidi at 101 Cookbooks. Any time I read over a recipe and see that coconut milk has been substituted for something, I get pretty excited. I also took a nod from my Mother, and decreased the amount of said milk, since it produces a richer, more custardy version - and Heidi's addition of an extra egg or two also help with that. Heidi also includes a layer of hazelnuts - boosting that Autumnal feel of this dessert sevenfold. It's good. No, it's Love.


Of course, you can use whatever pie crust you like - I opted for Dorie Greenspan's Pate Sablee. I mixed it up in the food pro, and pressed it into the 4 inch tart tins. For each tin, I used 1/2 c. plus 2 T. of crumbly dough, and a single recipe of her pastry perfectly fills 5 shells.

Pumpkin Custard Tarts (adapted from 101 Cookbooks)
makes 5 4 inch tarts, or 1 9 inch pie
  • 2 c. hazelnuts
  • 1/2 c. dark brown sugar
  • 1 T. pumpkin pie spice (I slightly altered the 101 Cookbooks one, and listed it below)
  • 1 t. salt
  • 1 T. cornstarch (or arrowroot)
  • 1 can (1 1/2 c.) pumpkin puree
  • 1 t. vanilla extract
  • 3 eggs, lightly beaten
  • half a can of coconut milk (about 6 oz. If doubling the amounts for two pies or 10 tarts, use a whole can (13+ oz.) of coconut milk)
Preheat oven to 350.

Puree 1 1/2 cups of the toasted hazelnuts in a food processor until they turn into a hazelnut paste, past the 'crumble' stage. I added a teaspoon or so of maple syrup to help it along. Set aside. Chop the remaining 1/2 cup of hazelnuts and set aside to use as garnish.

To make the pumpkin pie filling, whisk together the brown sugar, pumpkin pie spice blend, salt, and cornstarch (or arrowroot). Stir in the pumpkin puree, and vanilla, then stir in the eggs and coconut milk until just combined. Set aside.

Before filling the pie crust, crumble the hazelnut paste on top of the pie dough into the pie plate, quickly and gently press it into a thin layer across the bottom creating a layer of hazelnuts that will sit between the dough and the filling. Fill the pie crust with the filling. Fill the tins fairly full - (it will puff up a little as it bakes, then fall slightly as it cools, ) and bake for 35-40 minutes (up to 50 minutes or so for the pie). For the 4 inch tarts, I used a heaping 1/3 cup of filling in each... and then baked off any remaining pumpkin custard in ramekins. The center of the pie should just barely jiggle when you tap the pans, the edges should be set, and a thin knife inserted at the centers should come out cleanly.

Let the tarts cool fully before digging in. I like to think that it lets everything "marry" nicely. Of course you can eat them how you wish. Serve plain, or with barely sweetened whipped cream and a sprinkling of chopped hazelnuts, or with ice cream.

Pumpkin Pie Spice (adapted from Kathy FitzHenry, via 101 cookbooks)
  • 1 T. cassia (Saigon) cinnamon
  • heaping 1/2 t. allspice
  • 1/4 t. cloves
  • 1 1/2 t. ground ginger
Dorie's Pate Sablee: (Baking: From My Home to Yours)
  • 1 1/2 cups all-purpose flour
  • 1/2 cup confectioner's sugar (powdered sugar)
  • 1/4 tsp. salt
  • 1 stick plus 1 tablespoon (9 tablespoons) very cold (or frozen) unsalted butter, cut into small pieces
  • 1 large egg yolk
Put the flour, confectioners' sugar and salt in a food processor and pulse a couple of times to combine.

Scatter the pieces of butter over the dry ingredients and pulse until the butter is coarsely cut in--you should have some pieces the size of oatmeal flakes and some the size of peas.

Stir the yolk, just to break it up, and add it a little at a time, pulsing after each addition. When the egg is in, process in long pulses--about 10 seconds each--until the dough, whisk will look granular soon after the egg is added, forms clumps and curds. You may need to add a tiny bit of ice water if the dough doesn't stay together when pinched.

(You can gather the dough up into a ball, and gently knead it out into a disk, then roll on a floured surface like a traditional pie dough. But, it also works to simply pat it out into the tart shell.)


I'm a glutton for Cassia cinnamon. I first tasted it's spicy, red hot related flavor at the Spice House, and ever since I have to stock both "True Cinnamon" and Saigon Cassia Cinnamon in my spice pantry. It is so addicting, a fully unique cinnamon experience. I made these tarts a couple of different times this week, and dusted some with extra cinnamon, as my Mom also does, for looks and for extra spicy cinnamon kick.


I'm sure these are just the first of the pies to take me through to the new year. I have a couple of pie pumpkins that need the roasting and puree treatment, something I generally leave to Libby's since I actually really like the flavor of canned pumpkin.

It's not too often that I like some prepared and out of a store-bought can, but canned pumpkin is one of those things, and as this FoodinJars post reminds us, it isn't advisable for home canning in any form anyway. So, go ahead and add a sauteed leek or onion, maybe some celery and a carrot, (chile flake of course) and in mere moments your can of store pumpkin can turn into a lovely soup. Pancakes and muffins too, all perfectly accepting of a can of pumpkin. I like the cheat once in a while, and with the brevity of Fall in full swing, I'll be sure to indulge frequently.

Monday, September 27, 2010

Daring Baker Challenge September 2010: Sugar Cookies.

The September 2010 Daring Bakers’ challenge was hosted by Mandy of “What the Fruitcake?!” Mandy challenged everyone to make Decorated Sugar Cookies based on recipes from Peggy Porschen and The Joy of Baking.

I guess to be honest, I wasn't overly excited about making sugar cookies for this month's challenge. And also, to be honest, I've never made properly thick and decorated ones. Never having made something is one of the best reasons to become a Daring Baker, but I still wasn't excited. For our challenge, we were to make cookies using Peggy Porschen's recipe and to decorate them with Royal Icing in the theme of "September".

September. I kind of consider the whole month my birthday, and my son started school, and the great Midwestern humidity usually subsides, breathing into us the idea of Fall. What theme could I choose? Pencils or apples for school? A birthday cake or candle? Pretty little Autumn leaves in shades of orange and yellow? Well, I guess it's time to confess I only truly completed half of my challenge this month.


Since my little Boy-O is completely fascinated by sea life right now, we went to the local restaurant supply last Thursday and looked hopefully for a whale cookie cutter. There were no whales, or sharks, or any other sea creature. There was a little train, so that is what he picked. I imagined that I could maybe eliminate use of food coloring by just piping white accents on them, because ever since I read this article, I can not bring myself to knowingly purchase or make anything with artificial color. It actually makes me mad that so many things have fake color, and also that I have a tiny little 4 color box in my pantry for emergency egg colorant needs.

I originally thought that if we found a whale, I could tint the icing the palest shade of blue imaginable, and use an inedible dried black bean for an eye... but since we got a train, I didn't know what I would end up with.


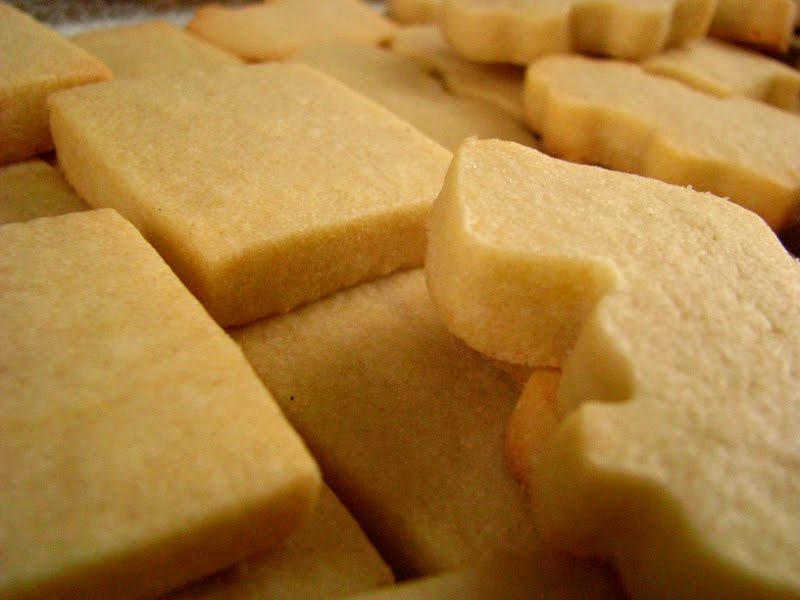
This sugar cookie dough recipe is the last one you will ever need. It is simple to work with because it is so soft. Instead of chilling the dough and then trying to roll, it is rolled out to almost a half inch (!) thickness and then chilled. No refrigerator hard butter to try and subdue into a workable sheet of dough. Since it was soft, I used the flat edge of my chef's knife to 'knock' in into a square and then eased it into the thickest sugar cookie I've ever made. My family traditionally has sugar cookies at Christmas and Valentine's Day, and my Mom always rolled them on the thin side. When I've made them myself, I've rolled them impossibly thin as well, so much so that they tend to brown unevenly, yet be delightfully crisp.

I rolled mine so thick that they bordered on shortbread. I was happy that we chose such a small cookie cutter, since they are so rich, but I'm happy I made them so formidable. I still had no idea, even as they baked, what I was going to do to decorate them. I was remembering the painstakingly painted sugar cookies I saw at Dean & Deluca the first time E and I went to New York. They were $10 a piece. I remember thinking as I stared at a mountain of cookies in every conceivable color that someone would likely come in and purchase a dozen. They were impressive, and obviously left an imprint on my mind - a vision that I still have no real desire to attack personally.

As I began pulling the cookies out of the oven, a strange thing happened. The trains turned into something else. For the life of me, I could only see Pachucos. My mind raced to see how in the world I could come up with natural black food colorant so I could ink in fedoras and faint mustaches, suit coats and white ties.


There he is: El Pachuco

Then I realized, that I do have a theme, and it is school related. In college, I was fortunate to have one really great drawing teacher. I'm not so into drawing really, but as it turns out, I have a gift for talking my way into being a good artist of sorts. I found that at our critique sessions that followed each assignment, I could wiggle my way into having a passable piece of art, and it's funny that I ended up liking whatever it was that I concocted a whole lot more after the fact. I had no idea what I was going to say going in to it, but I was able to defend myself and my work with tenacious, lawyer like prowess.

So, peering over my cooling cookies, my head filling up with drawings of zoot suits and baggy trousers, I figured that in my own way, I did accomplish my Daring Baker Challenge - even without putting icing on the cookie. These cookies last without frosting for a good 30 days, and I have a fridge with 3 kinds of leftover frostings and a good amount of Dorie Greenspan's chocolate pastry cream. Dorie's pastry cream on top of these cookies is probably the most decadent and butter/egg laden thing you could consume, but it would also be one of the most opulent cookies ever to make the journey down to your belly. Fully worthy in my book of $10 each, even if not beautiful drawn upon.

I realized this month that I wish I could have a bakeshop where I could draw pachucos on cookies for hours at a time if I felt like it. Maybe I wouldn't feel guilty about colarants and I could make them any color I wanted. I ask you, where have you ever seen a lucha libre pachuco cookie? And, one that tastes as good as this one did? I can promise you if CakeWalk ever opens it's doors, this cookie will be on the shelves:


This dough would be easily adaptable to many flavor variations. Since it was my first time with it, I stayed the normal, vanilla extract route. When I make them again I'm looking forward to playing around, lime zest comes immediately to mind. The baking time does vary depending on the thickness and shape of your cookie, and also the pan. I baked some on a perforated pizza pan, and they were done much quicker than the ones baked on a regular sheet pan. You can also decide to bake them soft or a little on the crispy side.

This recipe was also dead on in the weight measurements. I measured by standard means, and for fun checked the grams and ounces. It was on in every instance.

Basic Sugar Cookies: (The Daring Kitchen, via Mandy Mortimer and Peggy Porschen)
Makes Approximately 36x 10cm / 4" Cookies

  • 200g / 7oz / ½ cup + 6 Tbsp Unsalted Butter, at room temperature
  • 400g / 14oz / 3 cups + 3 Tbsp All Purpose / Plain Flour
  • 200g / 7oz / 1 cup Caster Sugar / Superfine Sugar (I spun my regular sugar in a coffee grinder/spice mill)
  • 1 Large Egg, lightly beaten
  • 5ml / 1 tsp Vanilla Extract / Or seeds from 1 vanilla bean

Cream together the butter, sugar and any flavorings you’re using. Beat until just becoming creamy in texture. (Tip: Don’t over mix otherwise you’ll incorporate too much air and the cookies will spread during baking, losing their shape.) (I mixed it on the lowest setting of my stand mixer using the paddle attachment.)

Beat in the egg until well combined, make sure to scrape down the sides of the bowl.

Add the sifted flour and mix on low until a non sticky dough forms.

Knead into a ball and divide into 2 or 3 pieces.

Roll out each portion between parchment paper to a thickness of about 5mm/1/5 inch (0.2 inch)

Refrigerate for a minimum of 30 minutes. (I left mine at least an hour or more.) (Tip: Recipes commonly just wrap the whole ball of dough in cling wrap and then refrigerate it for an hour or overnight, but by rolling the dough between parchment, this shortens the chilling time and then it’s also been rolled out while still soft making it easier and quicker.)

Once chilled, peel off parchment and place dough on a lightly floured surface. (I just left in on the parchment that I rolled it out on and rolled it out between two sheets of parchment. Then, I recycled the parchment by using it on the baking sheets...)

Cut out shapes with cookie cutters or a sharp knife.

Arrange shapes on parchment lined baking sheets and refrigerate for another 30mins to an hour. (Tip: It’s very important you chill them again otherwise they’ll spread while baking.)

Re-roll scraps and follow the above process until all scraps are used up.

Preheat oven to 180°C (160°C Fan Assisted) / 350°F / Gas Mark 4.

Bake until golden around the edges, about 8-15mins depending on the size of the cookies. (Tip: Bake same sized cookies together otherwise mixing smaller with larger cookies could result in
some cookies being baked before others are done.
) (Tip: Rotate baking sheets half way through baking if your oven bakes unevenly.)

Leave to cool on cooling racks.

Once completely cooled, decorate as desired.

(Tip: If wrapped in tinfoil/cling wrap or kept in airtight containers in a cool place, un-decorated cookies can last up to a month.)

Since it is such a good combination, you must have the chocolate pastry cream recipe firmly at hand as well... It makes quite a lot, but you will eat it all, trust me.

Dorie's Chocolate Pastry Cream (Dorie Greenspan, Baking From My Home to Yours)

  • 2 c. whole milk
  • 4 large egg yolks
  • 6 T. sugar
  • 3 T. cornstarch
  • 1/4 t. salt
  • 7 oz. bittersweet chocolate, melted
  • 2 1/2 T. unsalted butter, cut into 5 pieces, at room temperature
Bring the milk to a boil.

Meanwhile, whisk the egg yolks with the sugar, cornstarch and salt in a large heavy bottomed saucepan. (I used my 5 1/5 qt. dutch oven, and I wasn't sorry I did.) Whisking without stopping, drizzle in about 1/4 c. hot milk - this tempers the yolks so they don't curdle. Still whisking, add the remainder of the milk in a stady stream. Put the pan over medium heat and, whisking vigorously, constantly and thoroughly (make sure to get the edges of the pan), bring the mixture to a boil. Keep at a boil, still whisking, for 1-2 minutes. Remove from the heat.

Whisk in the melted chocolate, and let stand for 5 minutes. Then whisk in the pieces of butter, stirring until they are are fully incorporated and the cream is smooth and silky. Press a piece of chocolate wrap on the surface of the cream, and refrigerate until chilled. (I like to transfer it to a clean bowl after all that mixing, and before putting it in the fridge.)

Dorie says that it lasts 3 days, but I think you can let it go a little longer. She used this particular cream as a cake filling, and also recommends it as a dip for madeleines or sables...


And so I make my case for icing-less sugar cookies. Dip them in what you like: coffee, tea, chocolate, or dare I say melted cheese... leftover frostings cluttering up your fridge. And when you go through the process of rolling and chilling and baking, maybe your cookie cutters will morph on you and something you haven't thought about in a long time will emerge, ready for story telling time.

A very big thank you to Mandy at What the Fruitcake? - and you must go and check out her site. She is amazing!!! Also remember to check in at the Daring Kitchen website to find links to other Daring Bakers and their takes on the humble sugar cookie.

Saturday, March 27, 2010

Orange Madness: March 2010 Daring Baker Challenge Orange Tian!

The 2010 March Daring Baker’s challenge was hosted by Jennifer of Chocolate Shavings. She chose Orange Tian as the challenge for this month, a dessert based on a recipe from Alain Ducasse’s Cooking School in Paris.

I can't really say that citrus desserts are high on my list when it comes to baking in my home. I like citrus well enough, but for some reason, things made with chocolate tend to win over my family of non-dessert eaters a bit more. Not surprisingly, chocolate concoctions are also the easiest to give away, as there is most likely a chocolate lover not too far away. Citrus desserts are usually met with terms like "interesting" or "intriguing", not more ravishing language like "decadent" or in my case, "obsessive". Usually, I prefer to eat a worthy specimen as is, rather than by gilding the lily so to speak.


A mostly sunny Wisconsin March, and a really delicious citrus season despite the frigid Floridian temperatures, did excite me for this month's challenge (which in typical fashion, I left until the last moment to complete). A canning date with fellow food blogger Lo, only served to further excite. We had planned, and prior to my knowledge of this challenge, to make Three Citrus Marmalade from Food in Jars on the 18th. Not only did we get to cement our new friendship a bit more, but we made some fantastic marmalade. Twice.

There was no added pectin in our jam, and after our morning canning session we broke for lunch. On our return, we found that our sealed jam was as liquid as a heavy syrup. Fortunately, Marisa is the nicest person in the world, and emailed us that it was ok to unseal, reboil, add a bit of pectin and reprocess. We did as instructed and were pleased with our resulting marmalade.
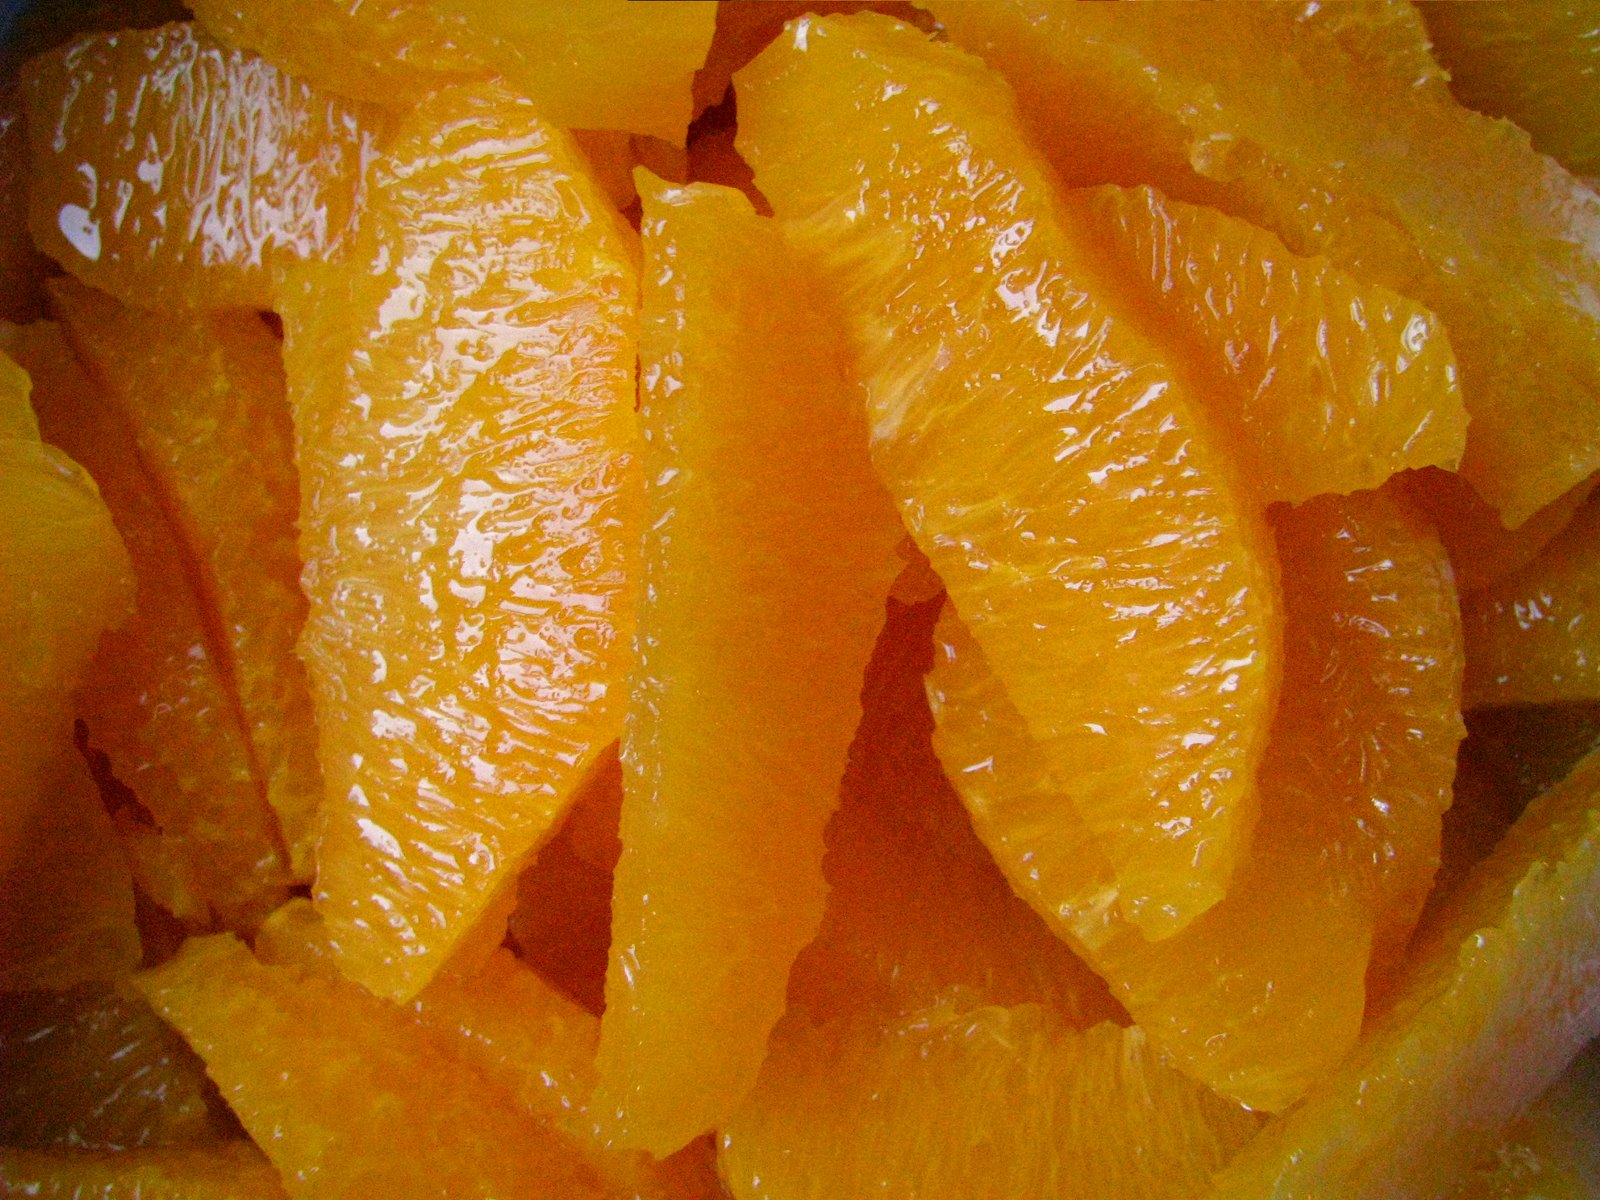
Our first tastes of the little bit of extra were perfect in flavor and texture, but I noticed after I opened the canned jars, that it was still a bit on the thin side. I do think that despite its thinness, it is just perfect on toast. It really does have a remarkable balance of sweet and tart, and just a pleasant amount of bitterness in the back of your throat as you swallow. It was also a good lesson in citrus supreming: the process by which you segment an orange. You can view a few more marmalading adventure pics here on flickr.


This dessert required 8 oranges, the amount in one bag of organic, California naval oranges I picked up from Outpost this week. Since I had so much citrus, and it was organic, I borrowed a trick from my Mom and zested the whole lot first. I am really surprised at how nicely it keeps in the freezer, and at how it even retains its vivid color. I currently have a little jar of lemon and orange zest going, and it is quite handy when you need to pack a bit of citrus punch into a baked good, or add zing to a quick muffin topping. I like to freeze it first on wax paper or parchment, and then transfer it to a small, glass jar to store.


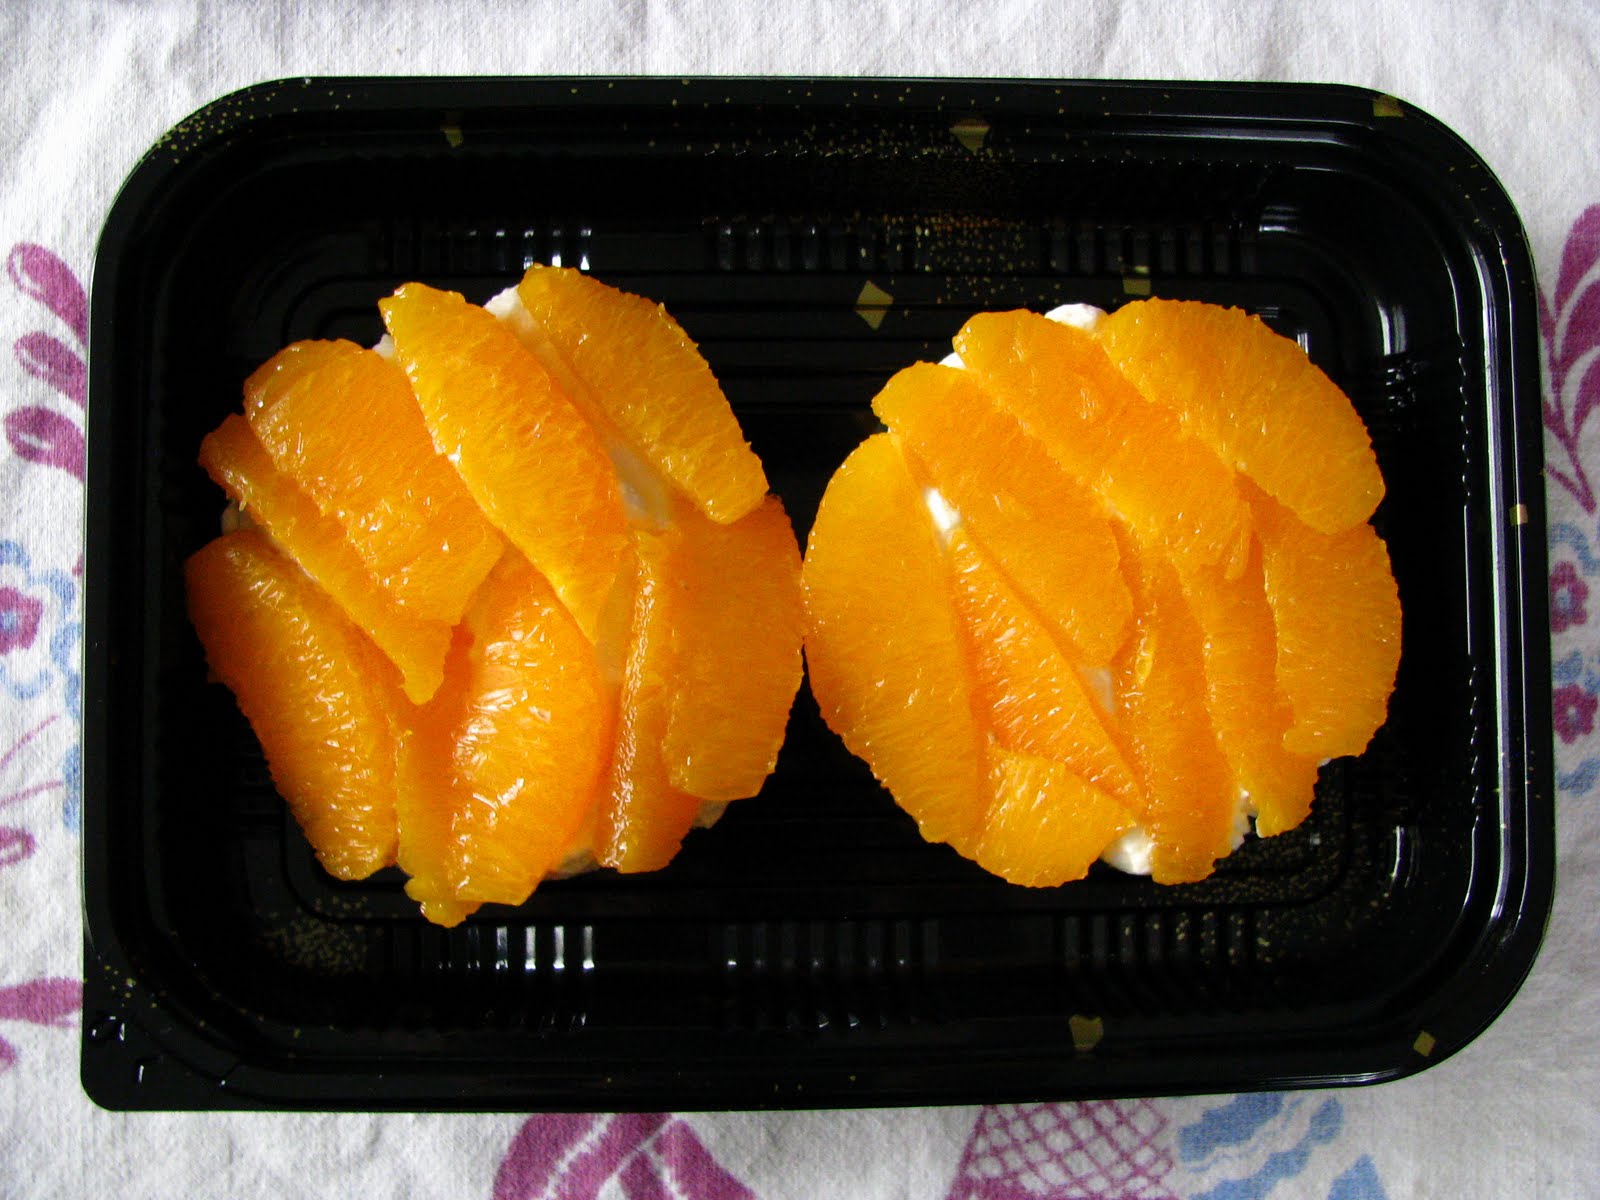
Orange Tian is a layered dessert, built upside down, so that the orange segments can be arranged artfully on the top. The middle layer is a whipped cream, stabilized with gelatine, and lightly enhanced with marmalade -and a glug of Cointreau, since I figured why not go all out orangy! The base is a pre-baked pastry dough round, brushed with additional marmalade.

I used this Pate Sablee recipe from Dorie Greenspan instead of the one recommended for the challenge. I fortunately found it on Sweet Bites, a fellow Daring Baker's site, since I do not have Dorie's Baking book. Yes, I know you may think that I do since I go on making recipes from it often, but I seriously rent it for months at a time from my library., and I just returned it after a two cycle rental run. I'm sorry Dorie, I really am going to buy it, and soon. I opted to add some of that reserved orange zest. That Dorie really knows her doughs!


I made a "family size" Tian using my springform pan as a mold, and then rerolled the excess dough to get two smaller ones. I have to say, the larger was easier to make and assemble, and was much cleaner in the end result. The crust had just enough shrinkage, and I didn't overdo the whipped cream. I assembled on parchment paper, and let it rest in the freezer for about 15 minutes before overturning it onto a platter.


I was surprised at how firm the gelatinized whipped cream got, and was thankful for it, since there was no disaster in flipping it over.


You can see how the little one on the left below had compromised orange slice placement for the size of the mold! It's packaged up and waiting for a trip to Lo's tomorrow so she and Peef can give me their expert opinions. I tend to usually be biased with my own dessert eating, since I can eat a date and be as happy as if I spent 4 days assembling and baking something. After making and trying all of the components, I can have a bit of tunnel vision when it finally comes the time to indulge. I think this is the reason that people go out for dessert! Well, one reason, since the temptation to eat it in its entirety certainly looms over the household.


If you too are curious about Orange Tian, you can find the recipes here, but I would recommend making Dorie's Pate Sablee, since it was truly worth it. Another month elapses, another Daring Challenge under my belt, both figuratively and literally. I am surprised at how much I am learning from these challenges. From how to read and interpret the directions, to simple tips from other Daring Bakers, and little tricks like this stabilized whipped cream, which I will no doubt put into employment elsewhere. It also gives me an excuse to have Maeckel over for supper.

Maeckel, who is kind of becoming my monthly DB Challenge-eating partner, and I just split the sorry looking one in half. (My Husband sat this one out...) I drizzled it with a bit of the chocolate syrup I made, instead of additional orange "caramel" sauce, and we agreed it was pretty tasty. We wern't quite sure if the chocolate was the right sauce, I think due to the bitter marmalade notes, but on its own, I think it would be well served at a Springtime brunch. But what really stands out to me the most, is Dorie's crust.

Monday, March 15, 2010

Guinness Oatmeal Stout Pie, and In Which I Become Even More Addicted to Fudge Babies

Late yesterday, I checked the Facebook to find out that my friend Gina, the Goddess of Pie, has sold her cafe, Gina's Pies are Square. I knew it was for sale, and I knew she wanted to venture in other directions, but this floored me. Like I somehow thought all was right in the world if the pie shop was just the way I remember it, and my one-time apartment above was there just in case I ever needed it. Not that I'm thinking I'd need to escape my current life, but the time I spent in that 500 person town was a good time. I knew everyone, everyone knew me. I only had to drive to visit my Parents or to get to church, and could walk everywhere else that needed getting to.

My apartment smelled of pie, and the outside brick wall was emblazoned with a Gold Medal Flour sign. Idyllic? Kinda. I learned how to make jewelry by taking on a second job, I learned how to co-exist on a basic level when people know your business all of the time. I remembered what it was like not to have curtains on the windows. And if I saw you coming in the front door, I'd probably already have the coffee cup (or beer bottle) at the ready for you.

Of course, this news right before retiring for the day led me to dreaming of pie... and what better pie for Pi Day (3.14) and St. Patrick's Day than Gina's Guinness Oatmeal Stout. I'd considered making it for awhile, but knew that I'd be eating a whole pie, so didn't really know if I would be making it for sure. After reading Deena's similarly mathematical post on Coupled Pair (Pear) Pie and hearing of the changes going on at the Square Pie, I knew that in my own way, I'd make a pie as tribute today.


The good news is that if you have the Guinness, you can probably do it without leaving to pick up ingredients if your baking pantry is the slightest bit stocked.

The pie recipe is one we made at the Square Pie, courtesy of the GOP.  I hope I can still call her the Goddess of Pie, since the thought of her relinquishing that crown is truly a sorry one. The crust recipe however, is from Dorie Greenspan's Baking Book. I can not believe I never made it before, because I think it is the nicest crust I've ever made. I mix it up mess free in a plastic bag as Alton Brown suggests.

Guinness Oatmeal Stout Pie
  • 3 eggs
  • 2 T. flour
  • 1 t. vanilla
  • 2/3 c. molasses
  • 3/4 c. rolled oats
  • 3/4 c. brown sugar
  • 1/4 c. butter, melted
  • 1/2 c. chocolate chips
  • 1/2 c. Guinness
Whisk all ingredients except beer until well combined, then add beer. Mixture will foam up nicely. Pour into pie shell and bake at 350 degrees for 40-45 minutes. Pie should be set and not "sloshy", but will set up a bit more as it cools... kind of like pecan pie filling. Let it cool to room temperature before digging in.

Dorie Greenspan's Pie Crust (one 9 inch pie)
  • 1 1/2 c. AP flour
  • 2 T. sugar
  • 3/4 t. salt
  • 10 T. very cold (or frozen) butter
  • 2 1/2 T. very cold (or frozen) shortening (I use Spectrum Organic)
  • about 1/4 c. ice water
Put the flour, sugar and salt in the food pro and pulse to combine. Add butter and shortening and pulse several times until mixture is like "coarse meal" and has several "fat pea" sized butter pieces floating around. Add about half the water, and continue pulsing, adding enough water and increasing duration of the pulsing a little to get the water into the flour. When the dough comes together when pinched, you have succeeded. Dump the food pro contents into a plastic bag and form into a disk. Refrigerate for 1 hour (and up to 2 days) before rolling out.


guinness pie unbaked

As if this Guinness Pie isn't enough to make your knees buckle, I rolled out the extra pie dough that I clipped off the crust, and figured that if these Chocolate Covered Katie Fudge Babies that I am hopelessly addicted to are good on their own, perhaps they would be even better wrapped up in flaky dough. All I am going to say is that it's a good thing I only had enough dough to make three of these (newly dubbed) Pastry Enhanced Fudge Babies.


I used a 2 5/8 inch ring to cut them out, but next time could go a bit larger. I also had to tear off (and eat, of course) about 1/3 of the Fudge Baby as pictured above, so that I could crimp the sides of the dough up around it. I brushed the edges with beaten egg, but since I only had a few, used the same beaten eggs in the Guinness Pie recipe. Nothing was wasted in my adventures, today.


It's not raw or vegan anymore, but I've got to think that CCK would be impressed that her Fudge Babies could be even more addicting!


I made a double batch of the original recipe yesterday, and used the gram measurements. I decided to sprinkle them with a bit of coconut to keep them from sticking to each other, but found they were in better proportion than when I used cup measurements. Katie also has all kinds of links to amazing looking Baby Variations. If I can get out of the original rut, I have to try some others. They are guilt-free, and beyond simple to make, and now that I know I can use up leftover pie crust with them, I may just have to make pie more often...

Good luck to GOP and her new endeavors, and farewell to the Square Pie of my past. I hope your new owners take good care of you.